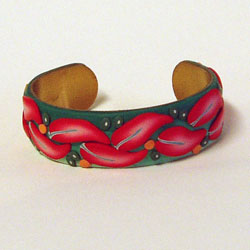
I had a favorite cane, like the coral leaf on the bracelet above. I made it a long time ago and have used it on many of my projects. It’s a simple cane using the Skinner Blend method for both the coral and the silver of turquoise in the middle. I wasn’t sure if I would remember what colors I used, but it was simple. Cadmium Red and white and turquoise and white. They make quick and easy, beautiful, tropical blends.
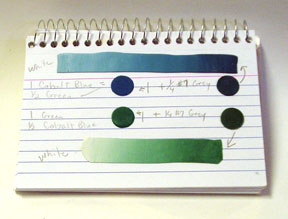
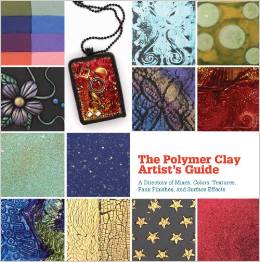
This time I’ll make a record of the color. For the last year or so, I’ve been making color records of my blends. I mix my color and then run a piece through the pasta machine at about #6 (very thin). I cut a small circle from that and heat set it with my heat gun, then glue it in my color book. Then I make Skinner blends from it and do the same thing with bits of the blend. I like being able to write on the pages and make notes if I want to.
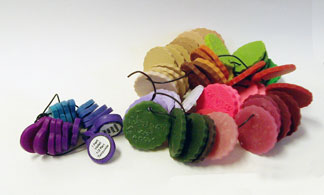
I’ve tried lots of other ways to record my color experiments like the color rings above. On the one on the right, I carved the recipe on the back. The one on the left, (I must have been out of my mind) I made these little circles with the recipe typed on the computer. I had to set them up on the computer, print them, cut them out and then glue them to the samples. After a couple of years, some of the recipes fell off!!!
Today, I like my book the best.
There’s lots of information out there about color charts, the most recent is by Maggie Maggio on her blog Smashing Color. The Article Documenting Your Color Mixes is very informative.
Oh, by the way, the bracelet is going to my Etsy shop.




I keep reading how you set things with your heat gun. You must tell us more about that. I find that very interesting and I just got one for another project. You know the one – where I worked on removing all the ugly stuff around the windows on the trailer and made it look really beautiful? The heat gun came in really handy for scraping all that stuff off. However – well – you know the story. Now – where’s my tissue?
That’s a good point Aimee. I’ll try to do a video on that, maybe this week. The thing is, I don’t think the heat gun you bought for your paint stripping is the same as the one for crafts. I think yours is way too hot for what I’m talking about. The one I have is an Embossing Heat Tool from Marvy.
I see your little sample tiles there in that pretty picture and think to myself, “now WHY didn’t I think to do that?” I’ve only been doing the clay stuff for a couple of weeks and already I’ve forgotten how I got some of the colors. I kept a very detailed journal when I developed my palette for dyeing fabrics, so now I’ll have to dig that out and keep notes on the clay formuli.
Thanks for the reminder!
I’m glad I reminded you before you got too far behind.