Polymer Clay Canes for Beginners 27 videos, step by step, beginner cane workshop

What people are saying about this tutorial.
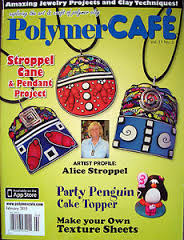
jennifer rose
Just finished this first workshop on how to make canes, and I must say I learned so much. This is exactly what I have been looking for, someone who could explain cane making in a step by step that process that I could replicate. I watched the videos, went into my studio and began to create all of the canes Alice showed. I finally have results I can be proud of, and I say thank you so much for doing this workshop. My only question now is when do we get more workshops. If you are only going to take one online class let it be this workshop. Thank you Alice for your hard work, and your dedication to helping others learn the joys of polymer clay.
Online Workshops with Alice Stroppel
[caption id="attachment_102" align="aligncenter" width="100" caption="Member IPCA"]  [/caption]
|
 Polymer Clay Mermaid Cuff Bracelet Okay I’ve figured my time and materials and have listed my mermaid bracelet in my Etsy store, I’ve listed her for a price of $60.00. She is all clay, no other materials were used. I don’t have a metal base on the bracelet like I do on most of my other ones.
However, there is much more clay used. The clay itself wouldn’t amount to very much money, maybe $4.00 or so, but the time that has been spent on the canes amounts to about 4 hours total. Plus the baking cost and spending time on the photos. Yes, I have some canes left over, but the point is, without spending that time in the first place, I wouldn’t have the canes to make my mermaid, so I’m generous in figuring the time spent.
Then I add the time spent on the mermaid bracelet, about 2 hours and I come up with about 6 hours to get this bracelet to my Etsy shop.
So, at the price of $60.00 minus $4.00 for the clay and $4.00 for the oven, that leaves me $52.00 for labor. Divide $52.oo by 6 hours and I will make 8.66 per hour. Hmmm. Oh I forgot, I still have to list it for $.20, then I have to package the bracelet nicely to send to my customer if it sells and drive to the post office. Then I have to pay a commission to Etsy, and one to PayPal.
Plus I have to spend time on my blog, Twitter, and Facebook to make sure everyone knows I’ve posted a new item. But I still don’t have the “right ” customers linking to my blog, Twitter and Facebook.
By that I mean, unfortunately, other polymerclay artists aren’t really interested in buying my polymer clay creations, they have their own.
If the item doesn’t sell right away on Etsy, people suggest that you re-list your items over and over. Just figure out the right time to re-list when the most people are on the front page of Etsy and there you go. What??? I know it probably works, but I’d rather spend time making something.
But I do like Etsy, I’ve had a few good sales and I’m happy. But I want to branch out further and continue to find galleries and shops to take my work.
Back to the money…..So now that $8.66 per hour isn’t looking very fat. (Not that it was a ton of money anyway) But that’s okay. I enjoy making my items and I really like it when other people buy them and I know they are enjoying them too.
If I sell it wholesale, because I could by the way I priced it, I would divide the 8.66 in half. Leaving me with $4.33 per hour. Not even minimum wage. But I don’t have to do anything but get it to my retailer. With my items I can send them by mail and send several at a time.
I’ve made the seconded mermaid bracelet, using the same canes. this bracelet took less time because I already had the canes, increasing my profit somewhat. Providing they both sell. I’m going to send this one to a gallery and see which one sells first. I’ll let you know.
Part 1 Selling Your Polymer Clay Artwork
Part 2 Pricing Polymer Clay Artwork to Sell Wholesale
Part 3 Mermaid Bracelet Listed on Etsy
Part 4 Inventory Lists for Your Polymer Clay
Part 5 Display Cards for Polymer Clay Pins and Necklaces
Part 6 Creating Tags for Your Polymer Clay Creations
 Polymer Clay Fish Bracelet I used the same canes to create this bracelet that I used on my mermaid in the last post. And again, I layered the cane slices instead of butting them side by side as in the video. However, I did draw a pattern and built the fish first before putting it on the bracelet.
 Laying Out The Design You can just see the pattern between the two fish. I’m fitting the fish on a piece of glass. To see my video that explains how to use a pattern and a piece of glass, just sign up for my newsletter. It’s free.
 Bracelet Covered With Black Polymer Clay I covered a bracelet with black clay, then laid my fish on top. I made sure everything was securely down and baked it.
 Side View of Fish Bracelet Notice the tail on this fish, there is another slice of this cane on the other side. In fact, these are the last two slices of the cane. In the last post I told you that this cane was made from left overs and I was only able to get 6 slices out of it. Four I used for my mermaid’s hat and these two for fish tails. I didn’t waste that little bit of Skinner Blend.
 Polymer Clay Mermaid See what happens when I start thinking about merchandise for galleries on the beach. I was mixing colors and making canes for leaves and plants for my flamingos and started thinking about my fish mosaic.
I ended up with a mermaid……………..
When I mix my colors, I try to mix them with the same amount of grey to get my base color and then add white and skinner blends. I am looking at the book Color Inspirations and am interested in play with the “mud” idea too. But for now I’m mixing grays with my color blends to get a muted result.
Then I make different canes using the mixes and Skinner blends. When I’m ready to work on a project, I have canes that blend and go together nicely.
 Polymer Clay Mermaid Close Up
I used the coral Skinner blend in each of the canes. Sometimes as the main body of the cane and sometimes as accents. Her hat was leftover bits of mixed color and Skinner blend. It didn’t make a very big cane and I only got six slices off of it, but I only needed four to make her a smashing hat. I used the other two slices on a fish bracelet I’ll show you in the next post.
Watch my video Don’t Waste That Little Bit of Skinner Blend to learn how I use even scraps of Skinner blends to make usable canes.
I used the same method to build this mermaid as I do for my fish mosaic except I’m layering the canes instead of butting them up next to each other. It’s less labor intensive, but doesn’t create the same level of sophistication as the mosaic work. It just depends on what effect you are trying to achieve and how much time you want to spend.
To see how I do my mosaics, just sign up for my newsletter and watch a video for free.
I love these blue bottles and I’m quickly running out of them. Here’s one I did for a fund raiser at Highlands Art League. It made $135 for the league. I was delighted as there was some incredible art work auctioned off that evening from some very talented artists.
 Polymer Clay Wine Bottle
 Polymer Clay Flamingo Top I started mixing some truly wonderful greens to make some items for a shop in South Florida. I thought I would try some flamingo things. A bracelet might be good and naturally salt and pepper shakers.
I don’t know why, but flamingos have always sold well for me no matter what medium I was working in. I haven’t ever figured it out. They are so wonderfully tacky, you would think people would avoid them like a bad hair day.
But I have them in my 1970 big, turquoise bathroom along with a really funky painting of mermaids my father did in the sixties, not cute but with that sixties “look”. The flamingos make me laugh, and maybe that’s the answer, they make people happy.
When I say turquoise bathroom, I really mean turquoise. all the walls but one are turquoise, the whole shower, the floor, the toilet, and the sinks are turquoise, amazing. But there just isn’t anything to be done about it, so we decided to like it.
That leads me to what I did today instead of making fabulous canes out of my fabulous new colors. I painted the one wall and the ceiling of my funky turquoise bathroom. and what color did I paint it you ask? I am ashamed to admit….white. ugh…..Can you believe it. My husband and I don’t seems to agree and so we don’t decide. I believe painting the wall white was not deciding.
But now that it’s painted, I think just maybe, with all that turquoise, maybe white will help the mermaids from trying to leave the painting and run away from home.
The good news is that it is finished and tomorrow I can work on my clay projects.
 Flamingo This is a container I covered several years ago to hold cotton balls. Not a very pretty container, but as I said, the flamingo makes me laugh and it’s functional.
 Dora's Joy of Hex Cane
Lately, I’ve been following Dora’s Explorations Blog and her polymer clay cane experiments. She seems to enjoy the complicated canes and I understand the challenge.
Her plaid canes are fabulous and there are many more just waiting for you give them a try. She is generous to share these tutorials on her website.
If you want to challenge yourself, take a look at her newest cane tutorial, “Joy of Hex“. It free and the pattern possibilities are endless. Thanks Dora for sharing your talent with us.
 Naama Zamir's Special Stripes Cane While I was searching for the author of the eye cane tutorial at the bottom of this post, I came across this tutorial from Naama Zamir. She Posted this tutorial on March 1st, 2009! I made my Ancient Mystery Bracelet on Aug.10, 2009.
I didn’t see her tutorial until 10 minutes ago. In fact I had already started this post to look for the author of the eye cane tutorial.
 Ancient Mystery I This post is to acknowledge that she thought of the technique before I did! It just must have been floating around in the air and landed on me. Take a look, she explains how to do it wonderfully.
Now to the reason I was searching the internet… this ikat cane tutorial.
 Ikat Eye Cane Do you know who wrote this tutorial for an Ikat Eye Cane? It was on a website several years ago.
I printed it out and I use it sometimes for my face canes. I copied and pasted it into another program to print it to save ink. I usually labeled things I printed out with the author’s name and the website address. But somehow I’ve lost that information.
I’ve searched for it online for quite some time with no luck. I’m afraid that it is no longer available. I would like to suggest this cane for my face canes and send people to this tutorial. If it is no longer available, then I would like to be able to share the technique.
If you know the author or the website address, or someone who might be able to help me, would you please leave a comment or email me at alice@polymerclayetc.com? Thanks in advance for any help you can give me.
Update.. Several people were kind enough to leave comments or email me about the tutorial. Click here to go to Kerstin Rupprecht’s Ikat Eye Cane Tutorial. Kerstin shared this tutorial in 2002, thank you Kertin.
 Redheads - Cuff Bracelets I was busy last night with these cuff bracelets. I really had fun! Seriously, I was smiling the whole time. When I took them out of the oven, I laughed out loud. They are are listed in my Etsy Shop. I’m working on a tutorial for the face canes to sell in my etsy shop. This is just too much fun.
I wasn’t sure if I could use the profile face cane successfully on a bracelet, but I like her, she is really 3d.
I was stuck on redheads, now to move on and do some more blonde and burnettes.
 Ancient Mystery I Here’s how this started! I was going to shoot a video to share about all the items I found while cleaning that I can use with my clay work.
But as always, I had to clean up my clay space before I could begin. There sat slices of canes that I used in my (not finished yet) Polymer Clay Collage Project…. you’ll see a line of red squares across the bottom. Some were slices that I messed up and then there was this small little piece of cane left.
If you have been following this blog at all, you know me well enough to know that I do not like to make scrap clay. So, I layered the messed up slices with a layer of black #7 on the pasta machine. Then I sliced the remaining cane and added those slices with the black layers in between. Ending up with a new cane.
Why I didn’t start filming this for you, I don’t know, except that I didn’t know that it was going to come out this cool.
I sliced this cane into thin slices and added them to a sheet of black. Then placed the whole thing on my bracelet. It looks pretty good, I liked it anyway.
Then I had just a couple of slices left of this scrap cane (and I’m laughing here)! I didn’t want to scrap the rest of the cane I didn’t use because I liked it.
So I decide to play with what I had left. this next bracelet was the result and I like it way better than the first one.
 Ancient Mystery II I laid the left over slices out on a skinny strip of black and ran it through the pasta machine. It was ragged along the edges and I kind of liked that, so I put it on a layer of ecru clay and covered the bracelet form, added dots and there it was.
It was interesting and fun to experiment and the best part is I made something out of clay that was going to become a gray blob.
But..I still haven’t made the video with the found objects to use with clay. It will have to wait now, I have a special request for more girl bracelets in my Etsy shop, so I better get moving.
I’ve listed the other two bracelets there, so cross your fingers that summer sales will happen.
 Adrienne' s Prizes As winner of the Fish Mosaic Contest, Adrienne Lindsey will be receiving the perfume pen with one of my girls on it and as a bonus, (she doesn’t know this yet) I’ve sent her a note card with her fish on the front. I’m sending her a pdf by email with a layout for two note cards that she will be able to print over and over again. She can sell them, give away sets to friends or just use them herself for thank you notes etc. All she has to add is the envelopes.
(I also did a pdf for Laura Lang’s fish too.)
I’ve added this service to my Etsy shop, for those who don’t have the software to do it themselves. If you do have the software, you should consider using your artwork in this way. It really makes sense, you can sell the original and still continue to make money from the item. That’s what other artists do with prints of their originals. Why not Polymer Clayers? Gotta think outside the box.
I just looked at Naama Zamir’s two fish that she made after viewing the video. They are so cute, they would make darling cards or prints for that matter.
The winner of the Summer Fish Mosaic Contest is
Adrienne Lindsey
 Adrienne Lindsey's Winning Fish Mosaic
I love this fish, the colors are so vibrant and full of contrast. Our judge, watercolor artist Janet King, said that it was hard to choose a winner, but she really like the red color choice in Adrienne’s fish. I want to thank my friend Janet for taking the time to be our judge. Janet is a fabulous watercolor artist and instructor. Please take the time to visit her site and spend some time with her paintings. This bird painting is one of my favorites of Janet’s and represents her humor. See why I asked her to be our judge and why she is my friend?
Adrienne will be receiving the perfume pen in the mail very soon. Thank you Adrienne for the time you spent with your fish. Adrienne was the first to enter a fish and she enjoyed it so much she made another and entered it too. As you can see it paid off, she won!! We do improve with age. (At least with polymer clay)
Thank you to the rest of you who entered this summer contest. I wish I could post all your photos. It was such fun to receive the fish photos in my in-box. But I think what I enjoyed most was talking with so many wonderful people out there that share this crazy passion for polymer clay. Or maybe it’s just the shared love of making things with our hands. The creative process is such a healing, exciting, self affirming activity that it is a necessity for our very being.
Several people told me that this project has rekindled the creativity spark in them. What a compliment for me and an affirmation for just starting something creative. Thanks again.
I did want to show another fish that came very close to winning that I felt I needed to share it. Laura Lang’s fish is beautifully done and I enjoy her color choices. Thanks, Laura for entering.
 Laura Lang's Entry If you want join in the on going adventure, simply sign up for my newsletter at the top right hand side of this page and watch the video.
|
|


Comments