27 videos, step by step, beginner cane workshop
What people are saying about this tutorial.
jennifer rose
Just finished this first workshop on how to make canes, and I must say I learned so much. This is exactly what I have been looking for, someone who could explain cane making in a step by step that process that I could replicate. I watched the videos, went into my studio and began to create all of the canes Alice showed. I finally have results I can be proud of, and I say thank you so much for doing this workshop. My only question now is when do we get more workshops. If you are only going to take one online class let it be this workshop. Thank you Alice for your hard work, and your dedication to helping others learn the joys of polymer clay.
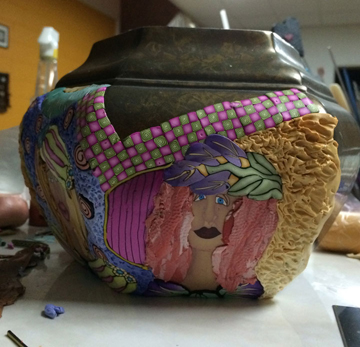
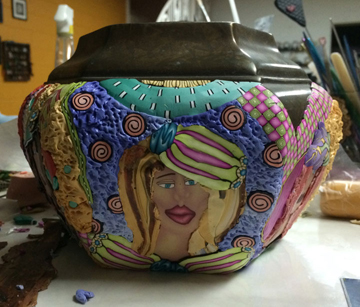
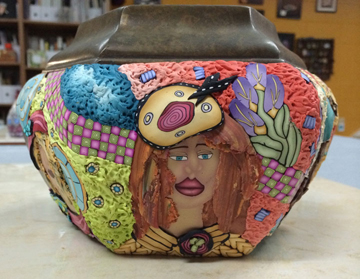
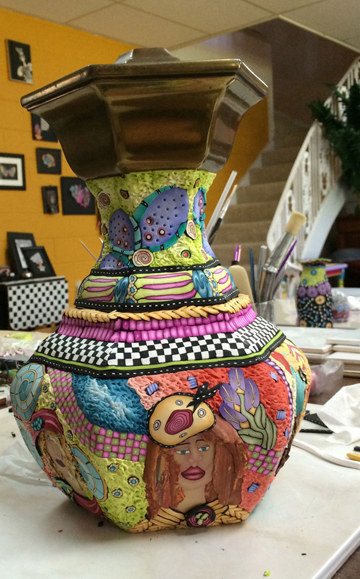
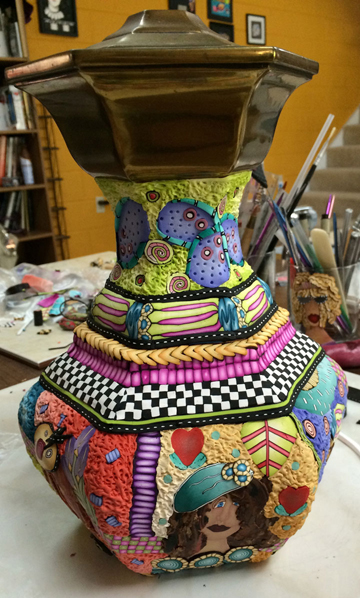
I’ve been having so much fun on Facebook with this project. I posted pictures of the first part of the project featuring six of my girls with the tag line, “Bet you can’t figure out what this is going to be”. So many of you had great guesses and wonderful compliments, I thank you so much for playing along because it made it that much easier for me to continue working on it until it was finished.
As I continued to work and post pictures you continued to guess.
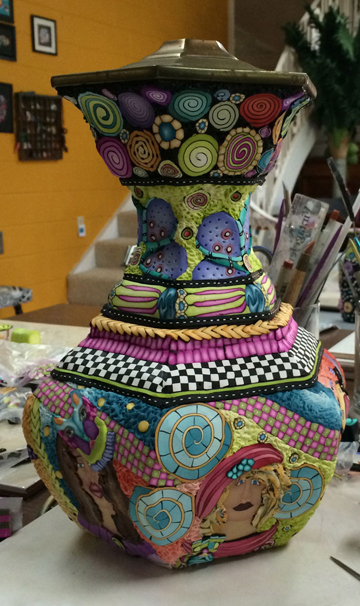
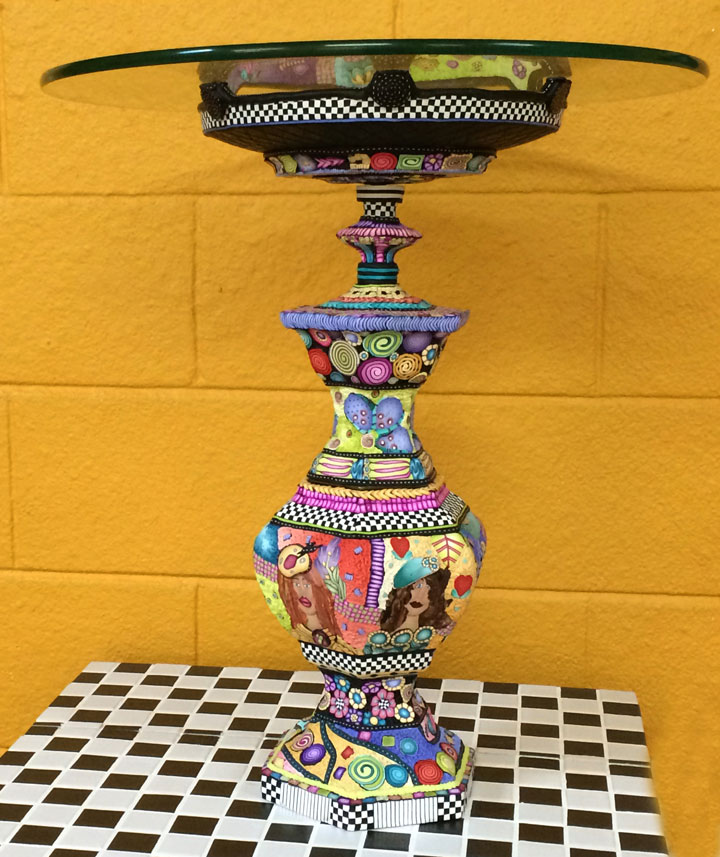
It kept getting taller and taller. ……..
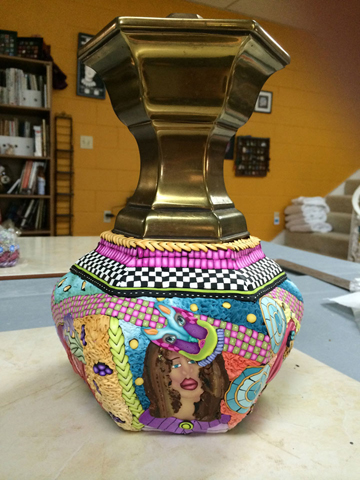
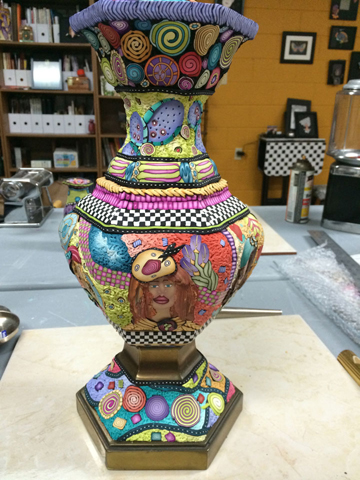
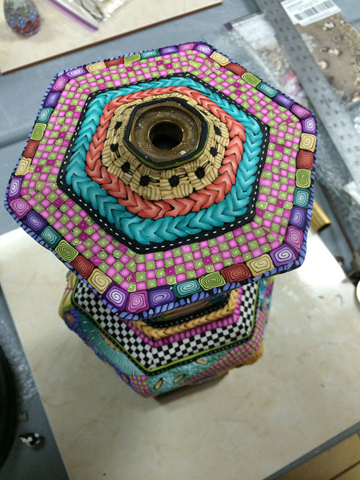
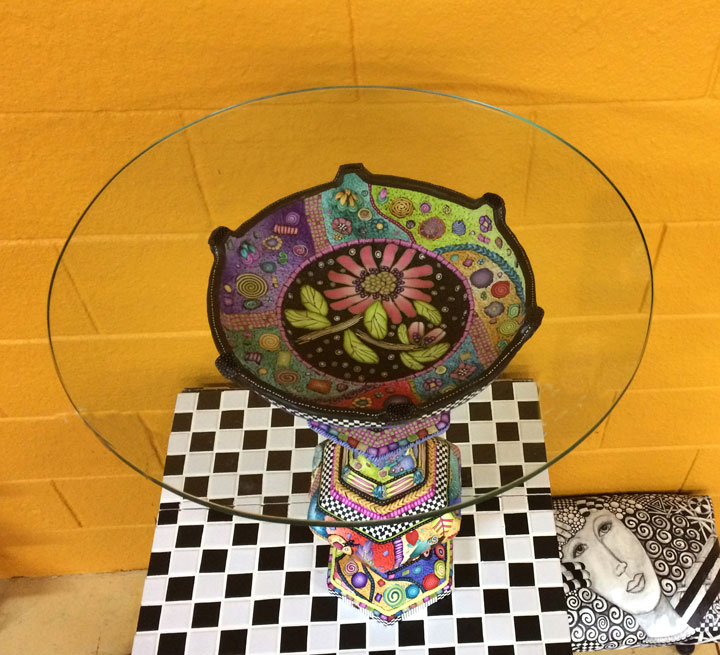
……until I finally finished it and here is the big reveal…TADA…It’s a table.
I found two base metal lamps at my local thrift store and combined pieces from each to create this crazy table. It’s very sturdy and well weighted. You might even classify this project a found object project.
I have a couple more lamps that I bought but they don’t come apart so I’ll see how they work out in the oven.
By the way, I bake in a full size oven that I have in my studio and it was easy to bake this table because is was in pieces. The next ones will be a challenge I think.
I cover a bit of each piece with clay and then bake it so I won’t mess up what I’ve just done. when it’s cool, I add more clay and bake again. I can do this as many times as I want and bake for as long as I want because I have calibrated my oven and I know that it is always on the correct temperature.
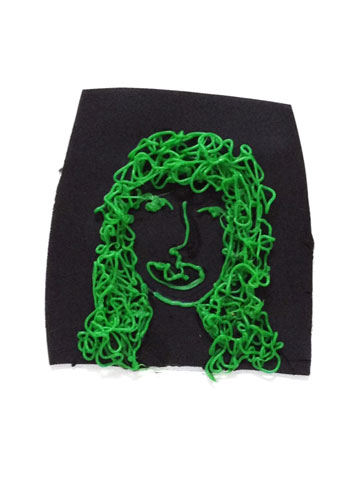
I’ve been experimenting with my newest Kickstarter find, the 3Doodler. When I first backed this project way back in the middle of 2013 I couldn’t wait to get my hands on it. I had dreams of ways to incorporate the instant plastic with my polymer clay designs. The 3Doodler is now in the MoMA store. Very cool!
BTW, see the blue hair made from the cane in the tutorial I just made in my last post using the Czextruder. I’ve used the same cane only in purple on the pin below.
I had to wait until December to get my 3Doodler. I played around with it a bit and realize that I would have to spend a little time trying to master it. I’m still trying, but I think there is some interesting applications here. I’ve found that I am able to apply it to the raw polymer and then bake it as long as I support the 3Doodler plastic with Polyfill.
This pin combines the 3Doodle squiggles and my Stroppel Cane. (see video on the right hand side of this page)
It is surprisingly durable, hard to break, you have to cut it with scissors. Until I get a better control over the pen I’ll be happy with how it adds fun to the pieces I usually make.
Interesting don’t you think? You see here my first attempt at control, hehe. I know, get to work Alice.
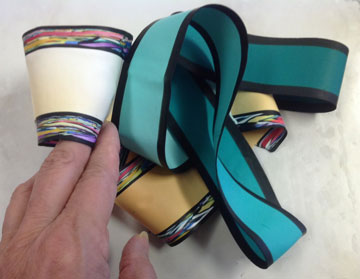
Well this was productive. I have two tall cylindrical glass vases that I wrapped the thin strips of polymer clay around and around. I layered paper between each revolution.
These strips are 29″ long, that’s as long as I could make the strips because I was using sheets of Skinner blends. I’m going to see if I can make even longer ones with solid colors.
Of course I had to add some Stroppel Cane to one of the strips. hehehe
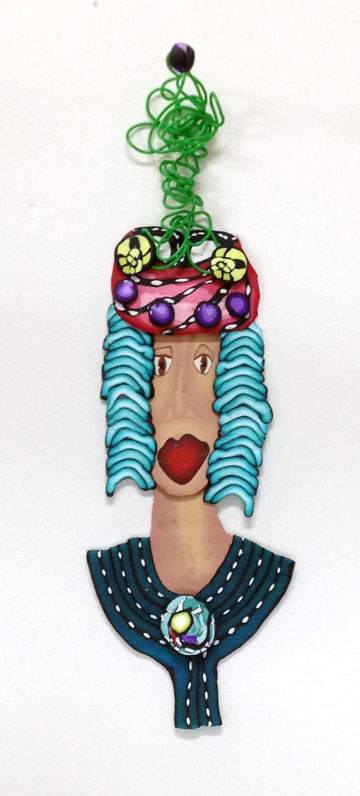
Here’s another idea I’ve had in the back of my mind. I just ordered the new Lark 500 Paper Objects and was inspired by Lydia Hirte‘s incredible work. She creates some fabulous Jewelry sculptures with paper.
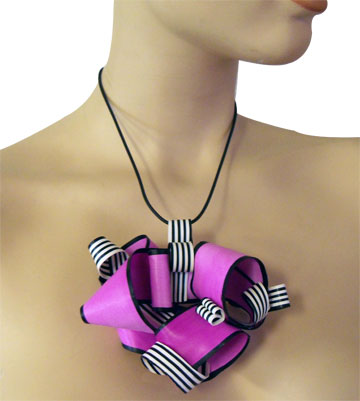
I wanted see if I could do something similar in polymer clay. I really want to do a large scale piece for the wall using these thin pieces, but first I was experimenting to see how thin I could get the clay and what I could make it do. I used Premo and it really is amazing to work with. It bends and doesn’t crack at all.
This piece is incredibly light and it’s been so much fun to play with. It’s very bright I know and I’m not really a pink girl, but this certainly says, “Here I Am!” It would stand out on black for sure.
I’ve just spent a ton of money on quite a few frames and have way too many ideas. I’m already working on a giant 27 x 39 piece that I’m very excited about and will tell you more later. Let’s see which project wins out.
I must be in a creative mood, I can’t seem to stop myself. You’re going to laugh at this one.
I ordered some Buna cord and some o-rings but when the order came in, I had o-rings that were 1 – 3/4 inches in diameter. What? Oh good grief.
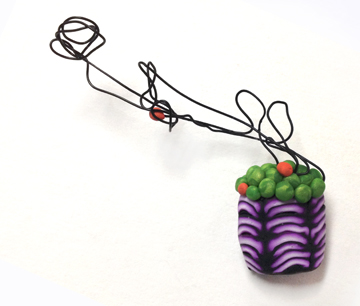
Now months later I started playing around with adding things to a pin to make things more interesting and used buna cord to support a slice of cane. Experiment! I baked it and nothing appeared to happen to it. so ……ahhhhhhh I thought .
I dug out my mis-ordered o-rings and began to play around. What about different sizes? hmmmm. My husband has a whole little box full of different sizes. (Don’t tell. *G*)
Man, this would be perfect. Fill the circles with clay, bake and tada. Well the o-rings didn’t shrink, but the clay did. I knew that!
So I glued the clay in the o-rings.
Now how to string it. I put everything together and baked it. Uh Oh, the Buna cord DID shrink, not in length, but in diameter. Darn! Okay, make the pieces separately, bake the clay, drill holes, glue and there you go.
I have been inspired from several sources, but that’s nothing new, the difference is this time I decided to act right away and now send it to my “someday” list. Besides, I’m in a experimental mood.
When I received my beautiful set of Shisha bracelets made by talented women of Samunnat Nepal ( you should order a set 🙂 I loved the way they looked. The pattern was tiny and it just laid gently around the face of the bracelet.
Then yesterday on Ornamental Elements, Laurie Prophater posted about Joseph Gatto and his topographic “Environmental” bracelets. The design featured had lots of wonderful color just around the edge. Of course I was making a Stroppel Cane from scraps from the project I was working on. It’s in the oven now, show you tomorrow. And even though it’s a bit different than what I had envisioned, I really enjoyed myself. I also have Laurie to thank for getting me started on this type of bracelet month ago.
The core is made with Ultralight, I’ve been experimenting with it a lot lately. And naturally I couldn’t leave the inside alone.
Over the last year I’ve been making bracelets with sculpted, contoured edges. I still have something like that in mind for these but for now I am happy with this one. Plus it’s the first time I used Ultralight as the core and it really worked out well.
The colors on this one remind me of a 1940 quilt or at least fabric from that time. No I wasn’t around then……but I’ve seen pictures.
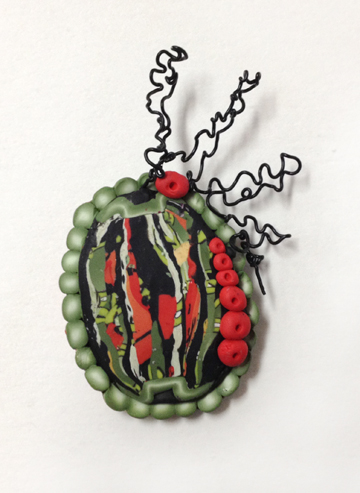
I have this whole tin full of little brass rod parts and decided to incorporated them into a pin design. Some Stroppel Canes made with scraps from the spirals…….I like the results. I think want to play with this idea some more.
This is a side view showing the dimension of the piece. In the middle of construction I decide to see if the Buna a cord would melt in the oven and if it might be something I want to use in construction in the future.
It didn’t melt and you can see it on the right. This is a mixed media piece for sure.


Comments