I always include a gift card with any purchase online. It just makes your item look more professional and it is a great place to promote your name and contact information.
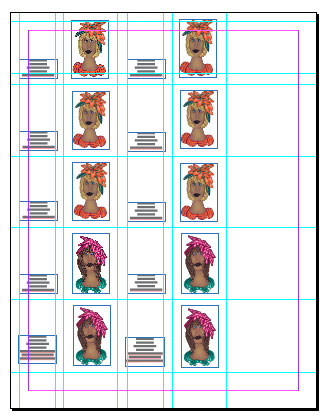
I begin by laying out several tags to be printed on one 8 1/2″ x 11″ sheet of card stock. I use 90# weight. Again, I use Adobe InDesign, but I know you can do the same thing in word.
The tags are 2″ x 3″ and will be cut and folded in half to equal 2′ X 1- 1/2″. The picture of my “girl”, my logo, is on the front and any instructions and contact information is on the back. This makes a very nice gift tag for the customer if they are giving the piece to someone else.
I also send these along to the shops, it’s a nice place for the retailer to put the price and inventory numbers. There is one difference, the retailer usually doesn’t want your contact information anywhere on the item. The customer has found your work because of the gallery or shop, the retailer wants that customer to return to them to buy again. You can’t blame them and it’s good for you if you sell more items in the retailer’s shop.
If possible, use your name or the name of your online shop or blog as your business name on the tag in some way. Or the other way around, name your blog or online shop after your business name. That way, if a person doesn’t live in the same town as the shop, perhaps a tourist passing through, and really wants to find your work online, she/he will google your name.
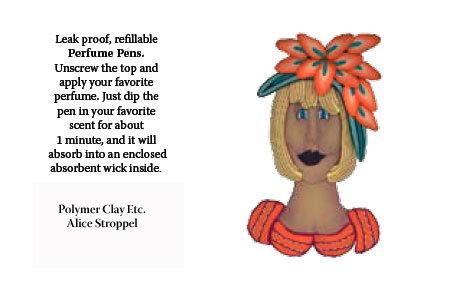
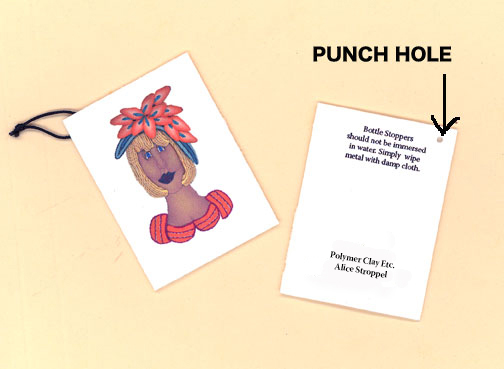
This is a tag before folding. I would have all my contact information on the back for an internet sale, ask the retailer what they prefer. On the back of this one, I’ve included instructions that came with my perfume pens. It is a perfect place to add this kind of information or a story about the item, an explanation about polymer clay or whatever might engage the customer. Retailers really appreciate this kind of service and so do your direct customers.
I was somewhere the other day, showing one of my mermaid bracelets to someone and she asked, did you paint the bracelet? I know many of you get the same question. Boy do we need an explanation on the our pieces! In fact I think that I need to do that right away for my next batch of tags. We have to educate the public and let them know the time and skill it takes to create something in polymer clay and more important, that if they purchase this item, they will have a unique piece and something to start a conversation.
I fold my tags in half, punch a hole only on the top back side and add a bit of stretchy cord. I attach it to my item and off it goes.
You could make the tags a single piece and not fold it over, you could make it smaller. There are so many things you can do with this idea. I’d love to see what you already do or what you come up with after reading this.
Oh and by the way, don’t forget to add a few pennies to the cost for paper, ink and time to produce the cards and tags. Yes you have to have them for promotion, but it is the cost of doing business and you have to recoup the cost through your sales.
So there you have it. Lots of items to get you on your way to a clean, smart look for your masterpieces in polymer clay. Good luck and remember please, to have some fun along the way.
Part 1 Selling Your Polymer Clay Artwork
Part 2 Pricing Polymer Clay Artwork to Sell Wholesale
Part 3 Mermaid Bracelet Listed on Etsy
Part 4 Inventory Lists for Your Polymer Clay
Part 5 Display Cards for Polymer Clay Pins and Necklaces
Part 6 Creating Tags for Your Polymer Clay Creations






Thank you Alice for taking this process through from beginning to end. You’ve done an amazing amount of work here to let people know what would help them and how to look their best when presenting their products. I for one am grateful and have learned quite a bit from this. There is always one little detail that can be so easily forgotten until someone else mentions it. In this series of articles you have done I have found plenty! Again – Thank you!
Aimee, you’re welcome! I just realize that I have years of experience in retail, wholesale, direct sales, publishing and promoting. It would be a shame not to share it. I’m glad it help you in any way. Thanks again for letting me know.
Great, thought provoking series of articles. Thank you.
Debbie, I’m glad to be able to add something. Glad you stopped by.
I am new at making polymer jewlery. I would like to know how I can sign my creations. I have made mostly bead bracelets and would like to sign them some how-like a painter signs his paintings. Any ideas?
Hi Lisa,
I use a Pigma Micron 01 Archival Ink pen. You can buy them at most craft stores or online. You would bake your piece or pieces first then sign it after it has cooled.Once you have signed and dated your piece or one of the beads in your piece, you must heat set it. You can do that with a heat gun or put it back in the oven for a few minutes.
Other people use a tiny stamp of their name.
Hope this helps and welcome to the wonderful world of pc.
Alice