

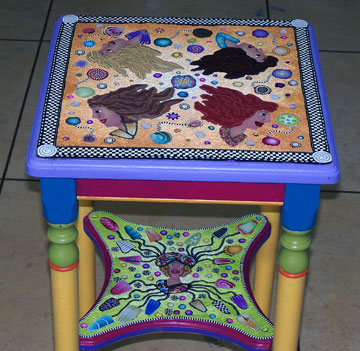
I’ve been working on the polymer clay cane mapped top of my little table off and on for days. Right now I’m not able to work days in a row, but can only get to my studio 3 or 4 days a week. So getting this piece finish it taking awhile.
I thought I might not share with you what happened, you know, admitting to a huge mistake and all, but then I decided that you might benefit from my lesson learned. Besides, (laughing) I was able to save it so I don’t look to stupid.
I’d already baked the top once with only the girls on the glass. See last post. I finished the background and cane slices and places it on the table top to see how it looked. I added some more cane circles and then baked it again.
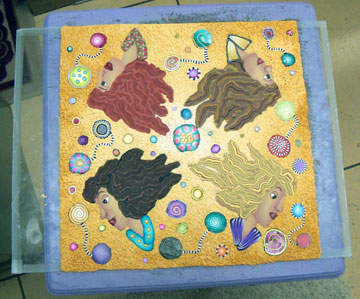
I added my dot, dot, dot cane around two edges of the baked piece and then a row of black and white check. The reason I only did two ends was because my glass wasn’t big enough to do the other two sides.
I baked it again and I was very happy with the way it was coming along. Then…..DISASTER….I can’t show you pictures, because I had to work quickly to try and save the piece and all my work.
Here’s what happened. I removed the baked top from the glass and put it on a large ceramic tile that I work on. I thought, great, this is just the right size to finish the edges. I added more dot, dot, dot cane and checkered canes to the remaining two edges. I finished off with a larger dot, dot, dot cane.
Fabulous, now to bake it and see how it fits the top. I had planned to figure out the very edges once I could really see how much room I had left.
I considered using an extruded piece that I could bake and then glue in place. I received a new CZeXtruder from Kimberly Idalski and want to try it out on the edge. I’ll be posting more about using the new extruder in another post.
Well………..I put it in the oven, baked it the normal time, the buzzer went off, I opened the oven and the piece was a total mess! YIKES!
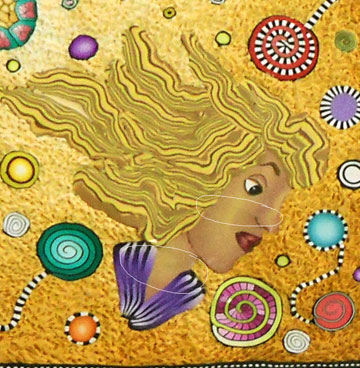
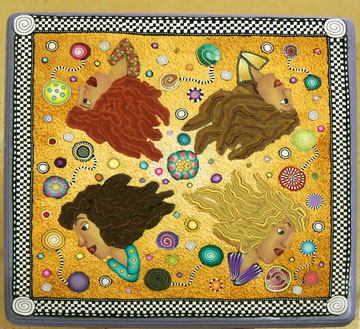
Buckling in the center and a couple of other places and so drastically the blonde girl had cracked right in two across the middle of her face and neck. Circled in white in the picture below, this is after the fix and I’m still amazed a how well it turned out.
I won’t repeat what I thought and said in the minutes that followed……. but I was able to save the entire piece and honestly I still can’t believe it. I wish I had pictures of the before.
Here’s what I did to save the piece. At first I just used a towel to press the bulging clay gently back down. It seemed to help but it wasn’t enough and the pressure wasn’t even. The tile was still extremely hot. I used another tile the same size to place on top of the piece to apply even pressure. I first placed a piece of paper on top of the design, I didn’t want the second tile to create a shine.
I remove the tiles from the oven tray and onto a cooler surface, not a cold one, just cooler. When I had completely cooled I removed the top tile and paper and it had pretty much gone back into the original shape. You can imagine how relieved I was. I’ve ruined many things in my day, but this was the biggest, most time invested piece that I “almost” lost.
I glued it down quickly to my table top. The blonde girl was actually in three pieces, but I put her back together like a puzzle and glued all the pieces in place. You can barely see hair line cracks and that my friends is the ONLY way you can tell the was a near disaster.
Now, there are two things that may have cause the buckling. At first I thought it might have been because I moved the rack up one level, I wanted to bake another piece at the same time and that put the whole thing closer to the top of the oven, you know, heat rises. And that may well have contributed, but this morning I really think the main problem is that it was on the large tile. I actually had the tile at an angle in a broiler pan and air could get underneath it. But the tile was very hot and I think the glass must not get as hot or maybe not hold the heat as well.
I bake in a regular home oven, by the way.
Whatever the reason, I will stick to baking my cane mapped pieces on glass and I won’t move away from the center of my oven.
Here’s the finished top, whew is all I can say. I’m still not sure about the very edges and I want to add more slices to the leg etc. More when I can….


Comments