

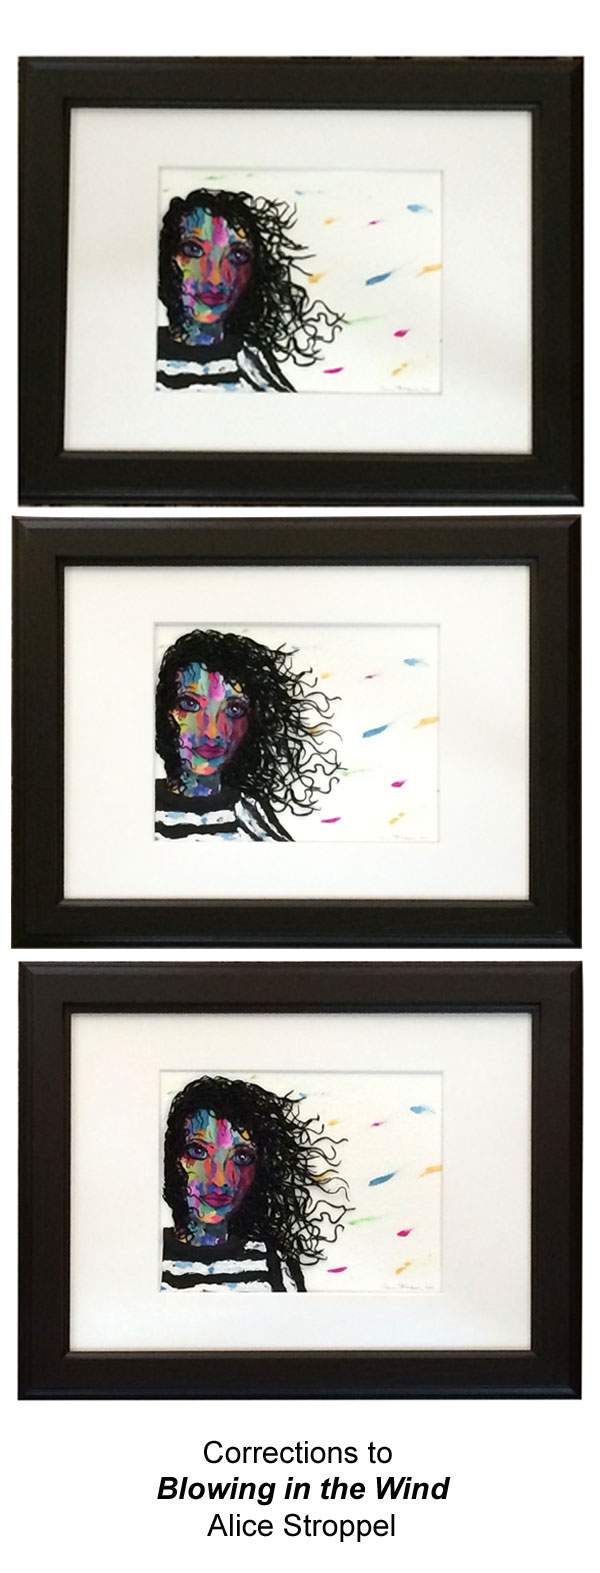
I been having fun with these polymer painted faces. This one I stopped working on late one night. I was happy with it and took a picture before stopping for the night. I had already cured it in the oven and attached it to a peace of heavy water color paper. the bits of color in the background are bits of pc not watercolor.
The first photo shows this first edition. When I saw it the next morning, I laughed because I could see right away that she was missing the top of her head. Not enough height to her hair. I was tired the night before and didn’t want to make any more hair I guess. Another reason why stepping away from a project and coming back to it or even taking a photo of it is very helpful.
I often see things in photos of a piece that I just couldn’t see when I was working on it up close. It helps to step back from the work, but sometimes taking a photo is even better.
The second photo is where I noticed that her shirt was just wrong, not enough shoulder. I guess I was too focused on the hair to notice the shirt first time around.
This is also another vote for sketching before hand, I did sketch the face, but didn’t know I wanted the shirt until I was in the middle of it all. So I work both ways, planning and as I go.
The third photo is my final try. Quite a difference I think!
I figure I’m a work in progress more than than work. As always, thanks for stopping by.


You are so right about taking pictures of your work! I tend to leave a piece for a few days and keep looking it it. What I think is perfection on the day I “finish” it is in fact a glaring reminder of how many mistakes I had made and not noticed. An eye is too small; the lips totally the wrong shape; a colour is totally wrong etc. However, taking a picture means you can see your item from a different perspective and this will really help in spotting any areas which need adjustment.
A great idea Alice! 🙂
Thanks Sue.
I love this polymer painting! Every new one I see from you becomes a new favorite! Also, great post! I agree, it often helps to take a step back to get another perspective. I find that holding something up in the mirror often gives me just enough difference in viewing to make things “pop” out that need to be changed. There are a few pieces that I thought were finished until I photographed them and realized they needed more work… nice to see I’m not alone, thanks for posting your progressions!
Oh thank you Beth. I really enjoy experimenting. I think we all do and it’s the way we learn. I’m glad you like this one, it’s a bit odd I admit. Thanks for taking the time to comment.
Thanks for sharing your process. Everyone thinks you just sit down and *POOF* another masterpiece! It is nice to know you edit yourself as well!
Thanks for always inspiring me !
Carole
I’m laughing here Carole, the thought of a good “POOF” makes me wish I could just poof things into existence. I’m not even sure I like this one and I considered not posting it for all the world to see. But I thought the correction process was something that I could share. If I could suggest anything to anyone about anything, it would be to never give up. And takes to time to do things over again, don’t just decide you can’t do it or aren’t good at something. Practice at polymer clay is something I been doing for over 20 years. There’s your “POOF” hehehe.
I found your website totally by accident, and am so thrilled to have found you! Love your polymer work, – especially like the paintings.
I was originally a sculptor in stoneware clay, but a medical condition meant that this type of clay was too heavy for me to work with. After a time I found polymer was hooked. I love how I can sculpt in ‘small’, as the polymer is far more smooth and can hold the shape of small things. I also love it that I’m not confined to artistic pieces which are used as house decorations. I can also sculpt jewellery with it.
A tip from my stoneware days … if you’re making a ‘flat’ piece of [wall]art, and want to see what it would look like if it were hung on a wall: Put the piece on the floor and, standing upright, just a little way away from the bottom of the piece, look at it from that view – – that’s the view you’d have if it was hanging on the wall!
The sculptor who taught me to sculpt taught me that trick and it’s served me really well.
So glad I’ve found you. I’ll be visiting often!
Nice to meet you too. That’s a great tip, thanks for sharing. I’m glad you found polymer clay, it really is so versatile, i never run out of new things to try. Thanks so much for stopping by and taking the time to leave a message.