

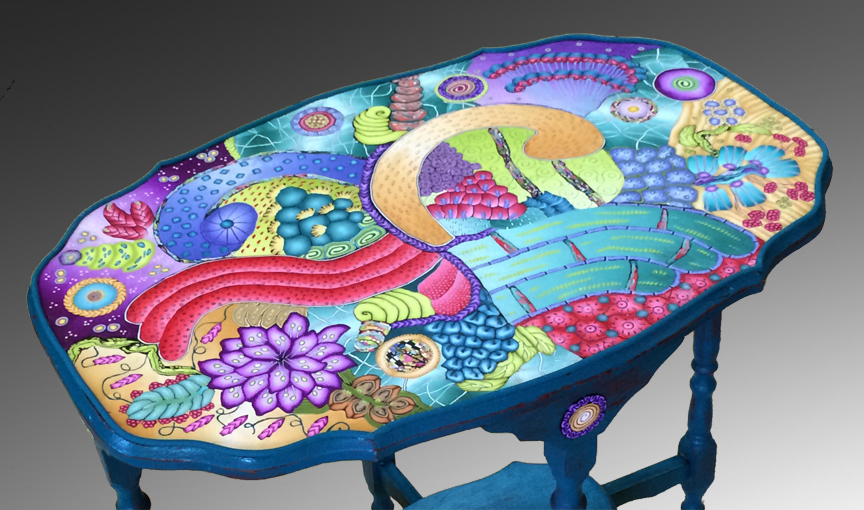
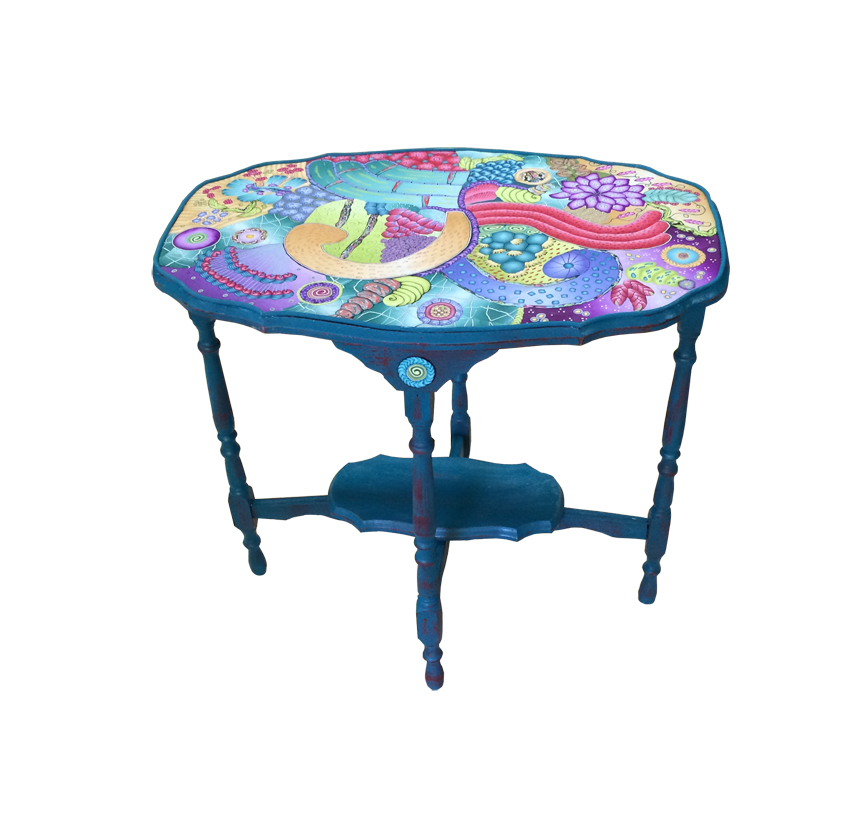
A reclaimed table finds new life in my house. It started out as a wobbly table made from solid oak but with a few years and coats of red paint under in it’s history. I brought it home and almost ave up on fixing the wobble, but fortunately my husband, who is not a wood guy, saved the day and came to the rescue for both me and the table.
I spray painted teal over the red and then sanded a bit here and there. Let her dry and then I was ready to start. I’ve been doing large pieces to frame and hang on the wall and thought why not give furniture a try.
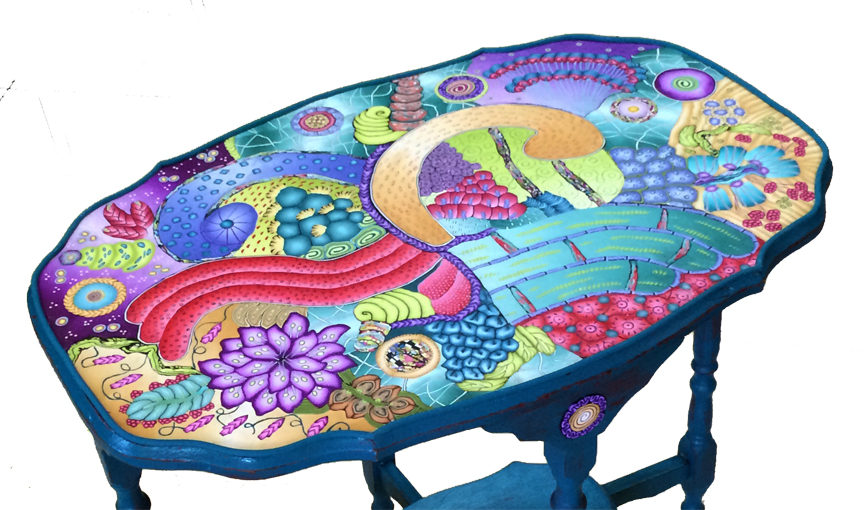
This is the same technique I use for my smaller pieces of wall art too, I call it cane mapping. Laying out a map and filling it with clay.
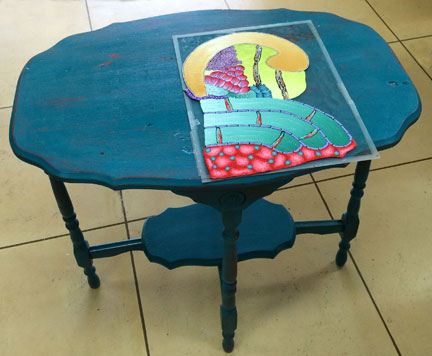
I started with a smaller table and it worked pretty well so I decided to give this larger one a go. It’s 28″ H 29″ L 18″W.
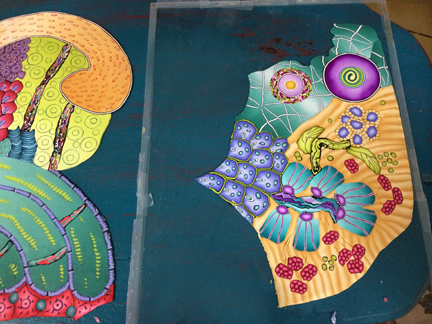
I start out by making a paper pattern of the top and draw my design on the paper. Then I place the pattern under a large piece of glass and just start laying clay.
 Once I have a good deal completed I bake it and then move on to the next part of the pattern. I end up with several large puzzle pieces that I then glue onto the table top. If I work on too large a piece I tend to rest my hand on on drop something on the part that was finished and have to redo parts of it, Baking in pieces helps to preserve the work I’ve already completed.
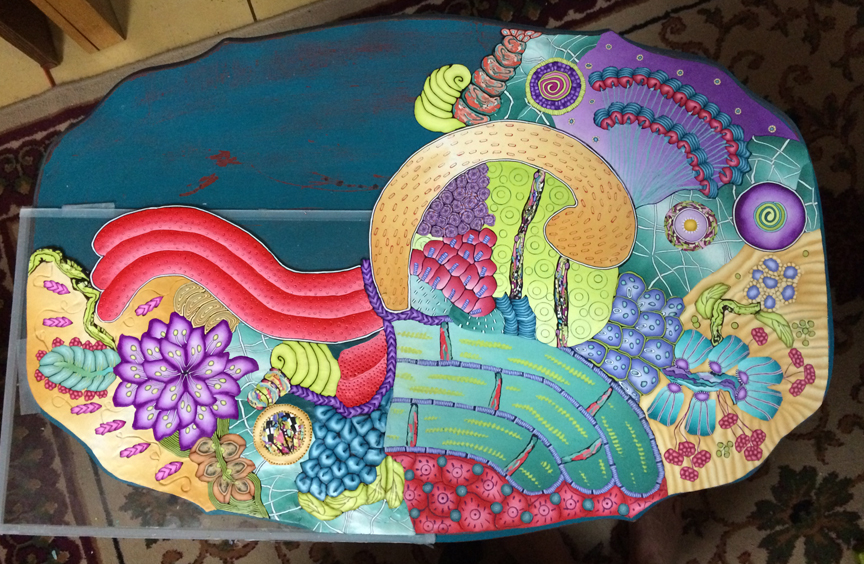
I use Liquid Fusion clear urethane adhesive. It dries fairly quickly, but takes 24 hours to completely dry. When I was finish with all the pieces for the top, I glued them together right on the wood.
Then I exuded a matching teal round snake from the edge. I baked it in four sections in roughly the same shape as the edge of the table. I use Premo because it’s flexible and it was easy to apply. However, to make sure it stayed in place, I taped it all around and left it until morning.
I don’t add a finish to the top, if I could stand to do it, I might sand and buff it. But until I get myself a do-boy…well…it will just get pretty with age and develop it’s own patina. I feel this way… it’s plastic…water won’t hurt it…you can wash it with a damp rag. The only thing I will do it make sure to use a coaster for hot beverages. I know the bracelets that I made years ago and wear often have this wonderful feel to them. So I say use it what’s the worse that can happen?
Thanks for all the wonderful words of encouragement, the likes, the shares, on Facebook and thank you in advance for any comments left here. On to the next project!!!
Follow me on Facebook if you want. https://www.facebook.com/alice.stroppel


Comments