Polymer Clay Canes for Beginners

27 videos, step by step, beginner cane workshop beginner Cane Tutorial What people are saying about this tutorial. jennifer rose Just finished this first workshop on how to make canes, and I must say I learned so much. This is exactly what I have been looking for, someone who could explain cane making in a step by step that process that I could replicate. I watched the videos, went into my studio and began to create all of the canes Alice showed. I finally have results I can be proud of, and I say thank you so much for doing this workshop. My only question now is when do we get more workshops. If you are only going to take one online class let it be this workshop. Thank you Alice for your hard work, and your dedication to helping others learn the joys of polymer clay.

Online Workshops with Alice Stroppel

Catagories

[caption id="attachment_102" align="aligncenter" width="100" caption="Member IPCA"]Member IPCA[/caption]

Fabulous Color Selector from Idée Labs

If you’re looking for my OWOH giveaway it’s here

____________________________________________________________________________

Patsy Monk shared this with the Florida Gulfcoast Polymer Clay Guild through their online group. I was blown away by it.

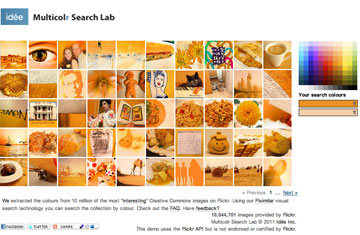
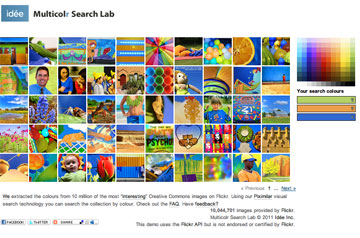
It’s called the Multicor Search Lab and it will display photos from flickr that match the colors you choose. what a wonderful way to create a color palette for your next project.

I thought with all the OWOH bloggers coming through, it would be a great thing to share will all the artists. But mainly  I was thinking about all of us working with clay and trying to figure out color combinations.

I for one don’t get many magazines these days and the ones I do get I don’t want to cut up, this is a great alternative.

The orange above was just two shades of orange. The one below is three colors, but you can add up to 10. Really a great find and a super tool. Thanks Patsy.

Here’s the Link Idée Multicolr Lab
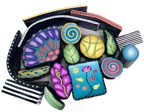
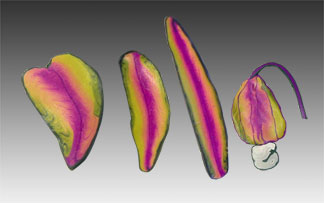
One Polymer Clay Cane = Three Leaves and One Pod Thingy

Leaf Cane- four ways - Alice Stroppel

Leaf Cane- four ways

Yesterday I worked on colors, today I blended and cut and shaped polymer clay into one main cane. I cut the large cane in half and then cut that half into three pieces.

The first piece I shaped it into the first leaf and you can see how I shaped the other two pieces. I now have three different leaf shapes to use and all from the same cane.

Then I cut another piece from the original cane and cut and formed the bud/pod thingy. Not happy with the white part, but I’ll fix it later.

I love the way the colors make me feel. As I blend, I can feel myself getting excited about the way things are beginning to look. That’s what keeps me coming back for more, the excitement of what’s just around the crank of the pasta machine.

Now on to making more leaves and things to go with these so I can get excited about putting them all together to create something else. Sweet!!

Magical Faces and Color Mixing Demos with Barbara McGuire at Fandango

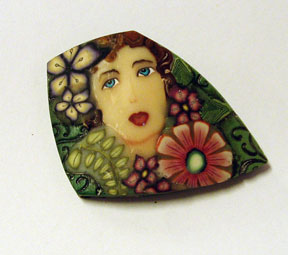
Face by Barbara McGuire

I’ve left Barbara McGuire for last because I had a chance to get to know her better than the other artists at Fandango. I’ve already posted about the incredible face class I had the opportunity to take with her and how much fun it was.

One of the demos Barbara McGuire gave was placing one of her faces on a base to make a large focal bead like the one in the photo above.  I purchased this one from Barbara that night. She used her new stamp on this one and demonstrated those as well.

But before that, I was truly excited to watch her demonstrate her color mixing techniques. This demo had Barbara with her pasta machine and an array of colored clay. After watching Sarah Shiver and Julie Picarello mix their colors using the skinner blend method, I was finally driven TO the edge by watching Barbara. It actually took attending that small face class to send me OVER the edge and soaring into a world that I have been just sticking one tiny finger in. I haven’t been this excited since I made my first face cane almost 10 years ago. The combination of all of the artist’s techniques came together for me and I was gobsmacked.

I loved learning how to make a face the way Barbara does, but I have my own voice that I am still training. I may never produce anything but jingles, but I will continue to strive for a symphony. Just this last few days I feel like I’ve been set free. Mixing colors will never be the same again.

It was such a pleasure to get to know Barbara and I appreciate all that she shares with us.

I feel that finding our own creative voice and a way to use it is what we are all striving for and I know Barbara has started a new publication to help us do just that. She was kind enough to share a bit about her Woman Creative postcards in the following video. Enjoy.

To find out more about Barbara, her products, where she’s teaching next visit her website.  Be sure to take a minute to check out Woman Creative.

Recreating a Favorite Cane in Polymer Clay

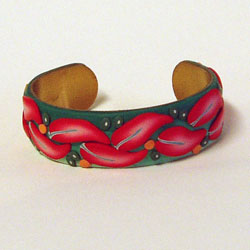
Coral Leaf Cane Bracelet

Coral Leaf Cane Bracelet

I had a favorite cane, like the coral leaf on the bracelet above. I made it a long time ago and have used it on many of my projects. It’s a simple cane using the Skinner Blend method for both the coral and the silver of turquoise in the middle.  I wasn’t sure if I would remember what colors I used, but it was simple. Cadmium Red and white and turquoise and white. They make quick and easy, beautiful, tropical blends.

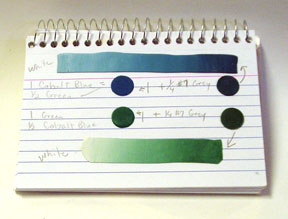
Color Chart

Color Chart

This time I’ll make a record of the color. For the last year or so, I’ve been making color records of my blends. I mix my color and then run a piece through the pasta machine at about #6 (very thin). I cut a small circle from that and heat set it with my heat gun, then glue it in my color book. Then I make Skinner  blends from it and do the same thing with bits of the blend. I like being able to write on the pages and make notes if I want to.

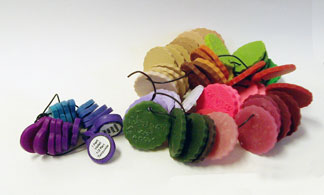
Color Rings

Color Rings

I’ve tried lots of other ways to record my color experiments like the color rings above. On the one on the right, I carved the recipe on the back. The one on the left, (I must have been out of my mind) I made these little circles with the recipe typed on the computer. I had to set them up on the computer, print them, cut them out and then glue them to the samples. After a couple of years, some of the recipes fell off!!!

Today, I like my book the best.

There’s lots of information out there about color charts, the most recent is by Maggie Maggio on her blog Smashing Color. The Article Documenting Your Color Mixes is very informative.

Oh, by the way, the bracelet is going to my Etsy shop.