


I’m pretty excited about offering this new cane mapping workshop for furniture at Studio 215 In downtown Sebring, FL .
I have a full size kitchen stove that is just waiting to be filled with student’s work.
Class size is limited to 6 students, I hope you can be one of them.
Cane Mapping Furniture
Cane Mapping Furniture
3 1/2 days
Thursday – Sunday
June 23 – 26, 2016
Limited to 6 students
$250.00
$100 deposit required”
Learn how to cane map on a large scale. We’ll be covering a small table (you provide) with colorful polymer canes.
Tables should not be larger than 20” in any direction. You should have your table completely ready to accept your artwork. Sanded, painted etc. If you are painting it yourself, don’t paint the surface where your artwork will be attached.
Bring your favorite canes and create your person piece of art-furniture.
Once you learn how to cane map for furniture, you’ll be able to apply that knowledge to large wall pieces and other items.
Day one – plan your design, make skinner blends and canes.
Day two – begin mapping your design.
Day three – Continue with your design and do final prep to your table.
Last day – Apply finished art to your table.
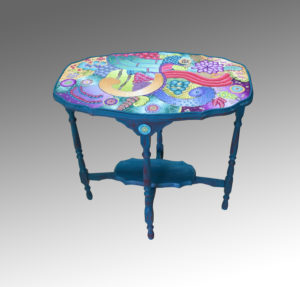
This is a little cart saved by my sister Sheryl. Her neighbor was throwing in out. A bit of paint and some polymer and it’s taken on a new life.

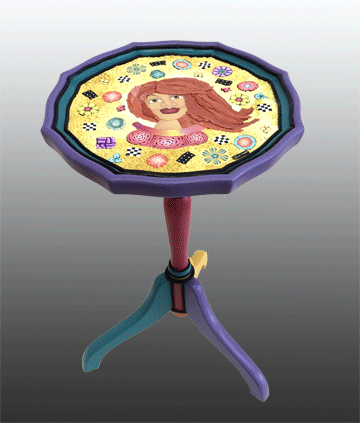
This table is special to me, it was our first telephone table in our first apartment. I won’t be teaching faces canes in this workshop, but you could bring your own.
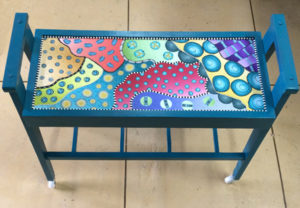
Here’s another thrift store find. But there is no reason why you can’t can’t bring a new table.


Comments