Polymer Clay Canes for Beginners

27 videos, step by step, beginner cane workshop beginner Cane Tutorial What people are saying about this tutorial. jennifer rose Just finished this first workshop on how to make canes, and I must say I learned so much. This is exactly what I have been looking for, someone who could explain cane making in a step by step that process that I could replicate. I watched the videos, went into my studio and began to create all of the canes Alice showed. I finally have results I can be proud of, and I say thank you so much for doing this workshop. My only question now is when do we get more workshops. If you are only going to take one online class let it be this workshop. Thank you Alice for your hard work, and your dedication to helping others learn the joys of polymer clay.

Online Workshops with Alice Stroppel

Catagories

[caption id="attachment_102" align="aligncenter" width="100" caption="Member IPCA"]Member IPCA[/caption]

Cane Mapping and Extrusion Online Workshops

cane mapped fish Alice Stroppels

I’m so happy to tell you that I have uploaded two new workshops to my online school. Scroll down to the bottom of the page and you’ll see Cane Mapping and Extrusions.

Cane mapped bird Alice Stroppel

The extrusion workshop consists of thirteen videos that equal over an hour of instruction.

This workshop will show you how to make small unique canes from extruded polymer clay. You can use these canes to make everything from buttons beads and pendants to cane mapped pieces.

It’s only about the techinque used in making the canes, not the finished pieces.

It’s all part of building your cane inventory so that when you are ready to begin a project you have many canes to choose from.

I use lots of extruded cane in my cane mapping pieces.

butterflies - Alice Stroppel - Cane mapped

The butterfly on the left is made with both extruded canes and traditional canes. The one on the right is all extrusions.

framed cane mapped Fish - Alice StroppelIf you love mosaics, color and polymer clay, if you love the look of complex canes but simply don’t want to create a giant complex cane, if you love one of a kind pieces, and if you have tons of left over canes, this is the can mapping workshop for you!

This is the workshop I teach at my Sebring Studio and around the country at polymer clay guilds and retreats. The difference is you can rewind and watch each step over and over if you want.

In almost 2 hours of videos you’ll learn the basics by cane mapping this fish portrait and the butterfly on the left above. I’ll show you a few unexpected canes and different slices that you can incorporate into your designs.

This is an intermediate class and having some Skinner blended canes in your stash will make your designs pop.

Thanks so much for taking a look .

More About Polymer Clay Fish Slides

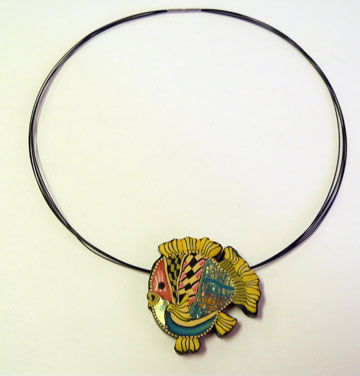
Fish slide polymer clay

Arlene Harrison from Harrison Hollow Designs left a comment asking what a slide was. Well my understanding was something that slides off and on a cord or wire. But later I began to think about the difference between a slide and a pendent with a bail. Or why isn’t the fish with the hole considered a bead? If I drilled the hole more in the center of the fish would it be a bead or does a bead have to have a design on all sides and be round?

What is the difference between my fish and the pendant I made for my class at Beads F.O.B. in Sarasota? I made the “bail” out of polymer clay for the class pendant and drilled a hole through the bail, with the fish I just drilled a hole straight through with no bail.
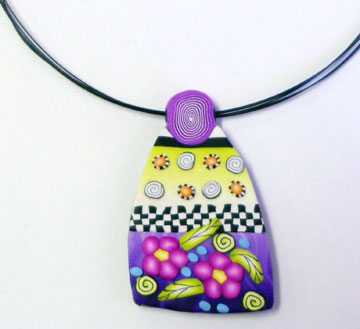
Class pendant - polymer clayBut  when I googled bail here’s what I found;

Bail A finding that connects a pendant to a necklace. They come in different forms: some clip onto the pendant, some have mounts to glue the pendant to, and some attach to a ring on the pendant. The purpose is to hold the pendant flat when worn.

So maybe the pendant above is really a slide just like the fish?  I don’t know …….I’ll just have to ask Marty and Karen at Beads F.O.B.. But the good news is I can tell you how to make whatever they’re called.
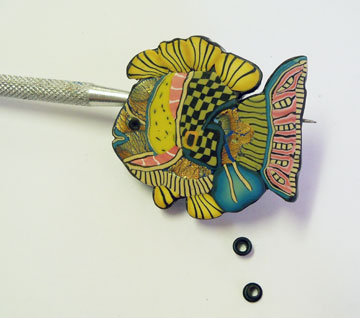
fish with needle toolOnce I’ve finished my mosaic fish I mount it on a piece of clay (double thickness of the widest pasta machine setting) and cut out with a exacto knife.

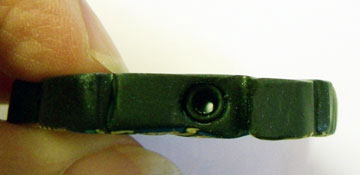
Then I poke a hole straight through the body of the piece and then insert small rivets that you can purchase in the scrapbook department.

I bake it and then remove the rivets and re-drill the hole with my Dremel tool then replace the rivets with a tiny bit of super glue. Make sure you don’t fill the hole with super glue. The rivets just finish the hole and neaten everything up.

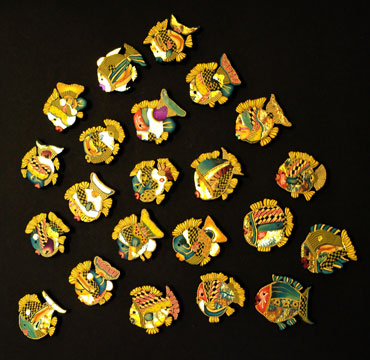
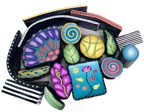
Here are all my almost finished fishies, some are going to my Etsy shop. But I have to finish them by signing the back with my name and the date, so it will be later today.
Fish Slides - polymer clay

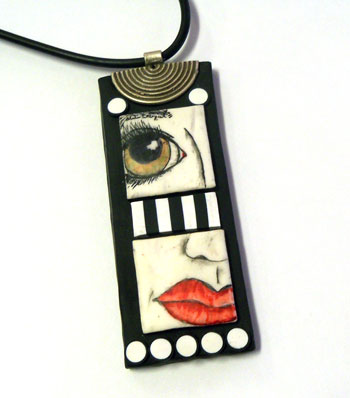
An “Eye” Catching Polymer Clay Pendant

Polymer Clay with Face in Pen and InkThis pendant was made by combining a black polymer clay base and black and white canes together, then drawing the split face onto white polymer clay squares.

The combo has proven to be well received and I’ll be teaching the pen and ink technique along with cane mapping mosaic class at Barbara McGuire and Ellen Prophater’s Woman Creative Art and Jewelry Center in Buford, GA.

For more information and to sign up visit BarbaraMcguire.com . If you aren’t able to attend one of my classes, you might be interested in the other classes offered by some very exciting instructors.