27 videos, step by step, beginner cane workshop
What people are saying about this tutorial.
jennifer rose
Just finished this first workshop on how to make canes, and I must say I learned so much. This is exactly what I have been looking for, someone who could explain cane making in a step by step that process that I could replicate. I watched the videos, went into my studio and began to create all of the canes Alice showed. I finally have results I can be proud of, and I say thank you so much for doing this workshop. My only question now is when do we get more workshops. If you are only going to take one online class let it be this workshop. Thank you Alice for your hard work, and your dedication to helping others learn the joys of polymer clay.
I’ve had a very exciting week. I took a class with Kate Church and created a very funny and cool doll. I received two trades in the mail from two extremely accomplished artists and I finished 20 something charms for an exchange. Whew.
I’ll tell you all about each of them in separate posts, the first one being this over the top cool mosaic magic carpet I received from Sherry Moon.
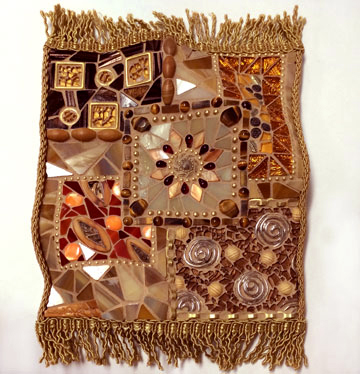
When I first saw her large carpet I just fell in love, here’s a picture, tell me you don’t feel the same.
Sherry Moon
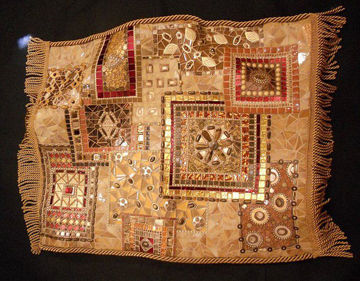
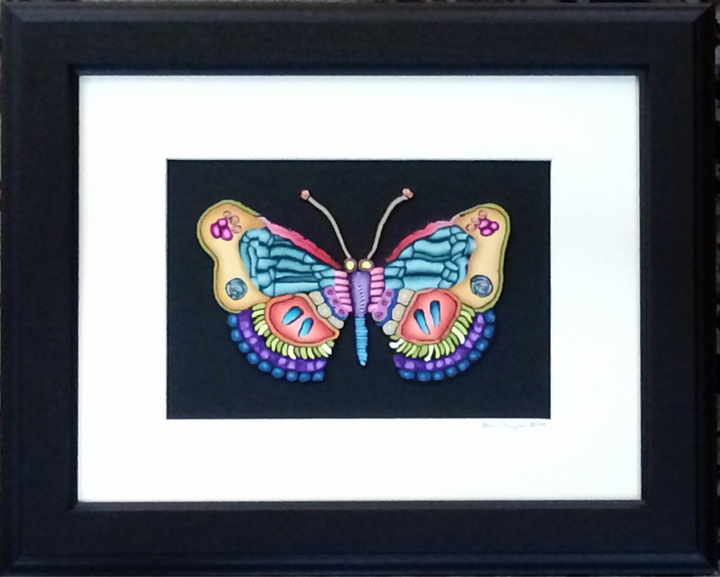
It’s just so luscious and looks so much like a real carpet. I was thrilled when Sherry said she wanted to trade for one of my cane mapped butterflies and she agreed to do a mini version of her carpet. Here’s the butterfly that now lives with Sherry. Thank you so much Sherry, your work is sterling and I’m honored to own this bit of magic.
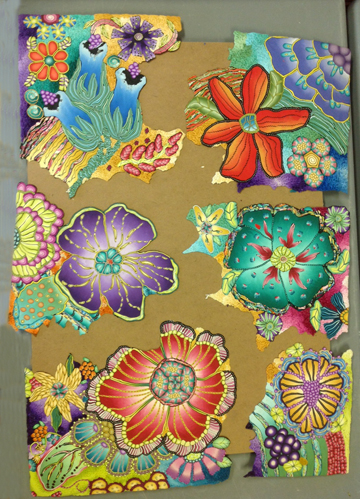
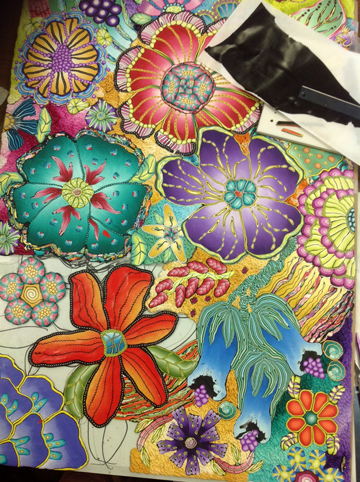
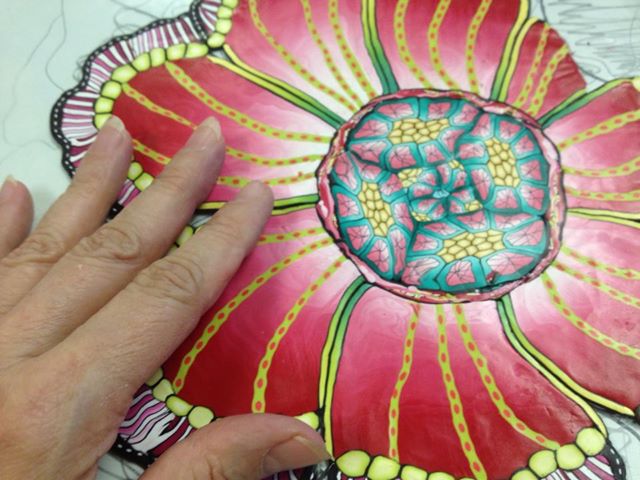
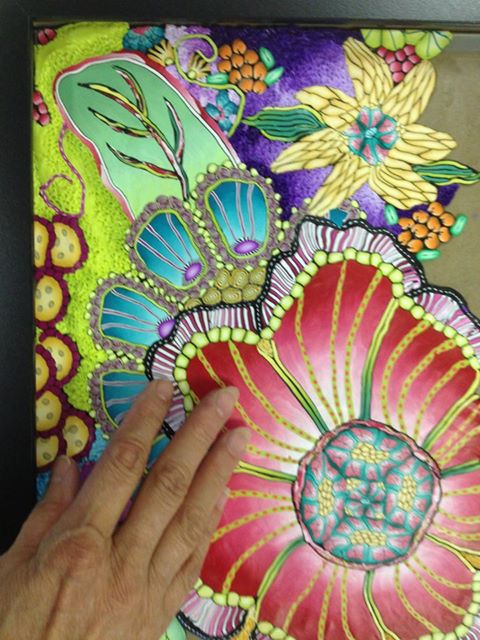
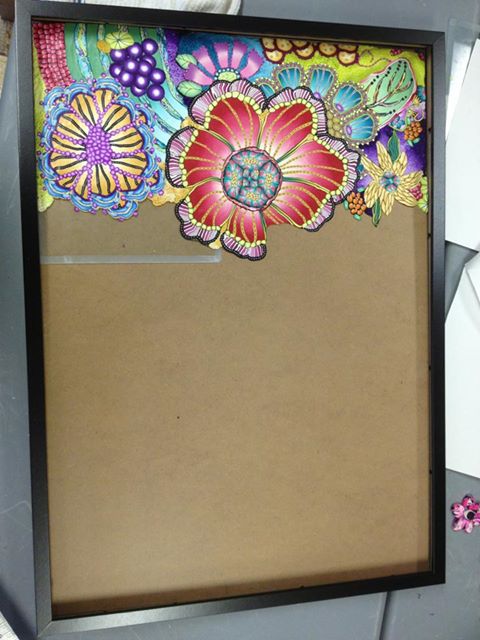
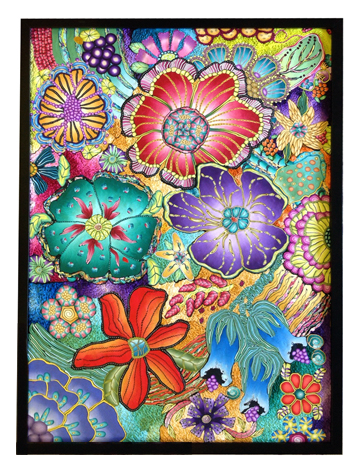
This is my newest adventure, I pushed myself to create something large and more complicated than in the past. I used my Cane Mapping technique with an added twist.
It’s a large piece, 19″ x 27″, framed it’s 20 1/2″ x 28 1/2″. I bake my polymer clay in a regular kitchen oven, but even so I had to construct it in pieces like a giant jigsaw puzzle.
After baking a pieces, I constructed the next piece on a piece of glass and by fitting it to the last piece. I placed a roughly drawn pattern behind the glass, but as you can see by this picture, I didn’t follow it exactly.
I continued this way until all were pieces were baked and then glued them to a back board. Actually this board came with a frame I bought. Here’s a look at each step as it was completed.
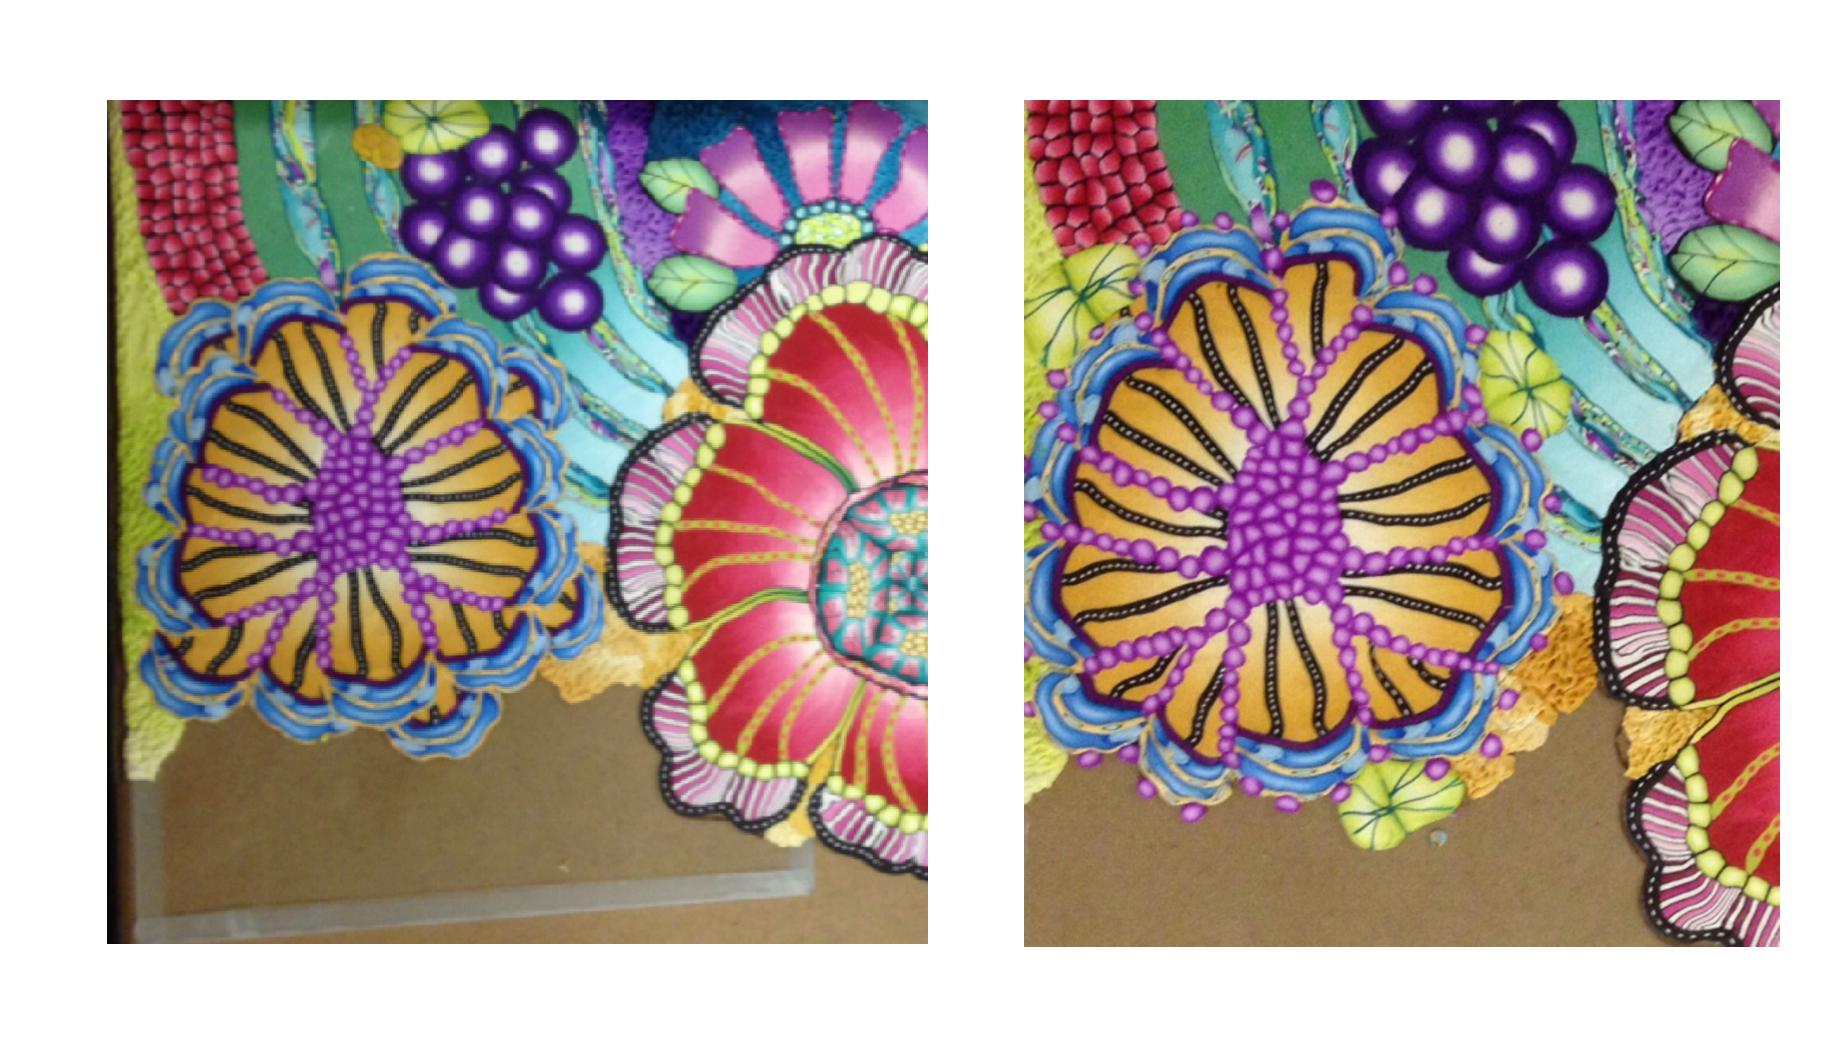
After completing and taking a picture of this step, I realized how disjointed some of the yellow flower petals looked. So before I baked it, I made some corrections.
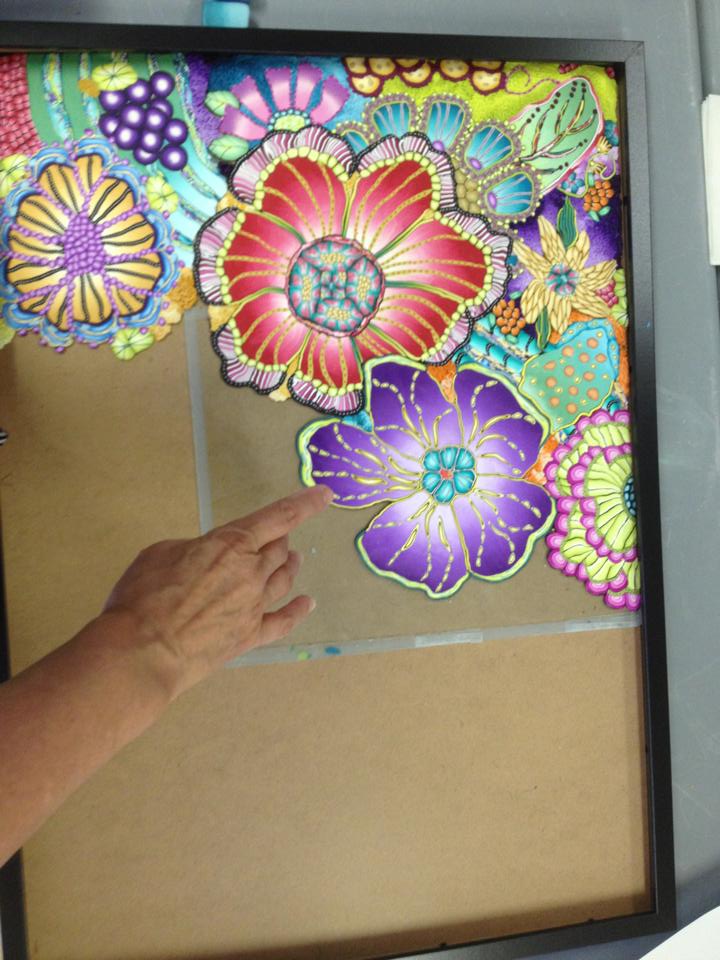
Not completely satisfied, but knowing this was as good as it was going to get, I baked it and moved to the next section. Once again I used my and for size reference.
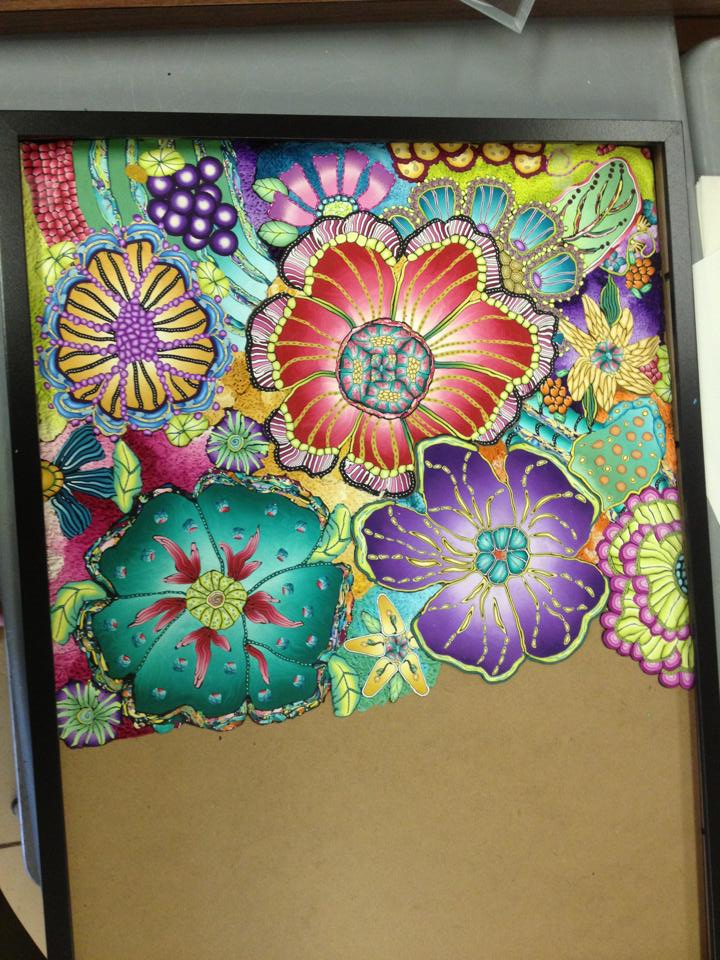
And once again the finished piece. I certainly learned a lot and look forward to making many more.
I had these wonderful people in my studio for two day last weekend. We had the best time, but we always do when this group comes to play. Thanks you guys for everything.
We took both days to experiment and give permission to ourselves to explore canes and designs in different ways. To let go of preconceived notions of how thing are SUPPOSE to look and let imaginations run wild.
On day two I we explored my Cane Mapping technique and how to cover something, make giant hollow beads or make a beautiful piece to frame. Everyone created very individual pieces. How fun are these?
Each person had their own colors and style making the day and the finished pieces so interesting.
Some of these were clip art and some were drawn by Tyra, who is very talented, and some were done without a drawing. And if you look close, I’m sure you’ll see a Stroppel Cane or two. *g*
This is kind of my finished fish piece. Kind of…..I’m still playing with it and not sure I like everything about it and might do something different with the flower stems. The metal leaf was left over from the fish and I thought I try it as stems. It wasn’t what I had in mind and I’m not sure I won’t try my original idea after all.
I haven’t glued the pieces down yet, I had a black background in mind, but now I’m not so sure. I don’t want to try to do the background in polymer, so if I want a different background I have to think of something else. I’m not much of a painter, but I’m thinking of painting a lighter background on board. Plus I’m still arranging and rearranging each piece and wondering if I need more fish.
I might have to let this percolate for awhile, but hopefully not too long. I like to finish projects and get them either out the door on the way to a new home, or among my many polymer clay keepers.
Anyway, it was fun and if nothing else I’ve added metal foils to my cane mapping techniques and I’m ready to see what else I can do with it besides fish………love fish but……. well you understand I’m sure.
I’ve been working on more fish and some other fantasy flowers for my WIP but it’s not finished yet, so I thought I’d share these fish today.
I find that I am using more and more of those little canes I made from scraps of other canes like the ones I show you in my video Don’t Waste That Little Bit of Skinner Blend. In fact while I’m doing these fish, I am making more little canes to use. It’s just plain fun because nothing has to be perfect and you kind of create as you go.
I usually create that way, just begin and see what come from it. Some days I like to just mix colors and have them ready for making a series of canes that coordinate. Other days I like to make skinner blends for the same reason. It makes creating a project so much easier, working flows easily when you have canes made up but also when you have bits of left over colors from your canes so you can make quick little matching canes to accent a piece.
I’ll try to post a picture of the flowers tomorrow. Hopefully I can finish the whole picture by then, maybe!
These fish with their own bling are a part of a WIP, but I wanted to share them with you today because I am excited about how they look.
It’s one of those slap myself on the forehead moments…ever since I attended a class with Kathleen Dustin, I’ve had every color of Gilding Material, gold leaf, variegated blue leaf, red variegated and silver too. This class was years ago maybe 2005, can’t remember. Anyway I made a few thing using the techniques I learned in her class and then move to other things.
This metal leaf has just been patiently waiting for me to remember it. Today, 6? years later I incorporated it in these cane mapped mosaic fish. You can learn the basic mosaic technique by signing up for my newsletter in the upper right hand side of this page.
I’ve been framing some of the other fish that I’ve done for my classes and I wanted to create a large piece that contains several fish and other subjects. So I’m not finished yet, this has exploded me into a whole different group of ideas. Like I need anymore to add to the ones I haven’t gotten to yet. But maybe I’ll add some of these to the front of the list.
It’s so great to be able to share what I’m doing each day. I know there is someone out there checking in once in awhile, thanks……….
This pendant was made by combining a black polymer clay base and black and white canes together, then drawing the split face onto white polymer clay squares.
The combo has proven to be well received and I’ll be teaching the pen and ink technique along with cane mapping mosaic class at Barbara McGuire and Ellen Prophater’s Woman Creative Art and Jewelry Center in Buford, GA.
For more information and to sign up visit BarbaraMcguire.com . If you aren’t able to attend one of my classes, you might be interested in the other classes offered by some very exciting instructors.
I was checking my clipart disks for butterflies to do using my mosaic technique and ran into the moth section and I realized that moths are pretty spectacular. The guy above is a moth, fantasy colors of course. I still have a butterfly on my table and there are some fabulous butterflies as well. I’m going to make a necklace out of this one.
You can learn this technique by signing up for my newsletter (in the upper right hand side of this page) and watching the free 20 minute video tutorial.
Stay tuned, because I’m going to be teaching a full day of this technique very soon. It’s lots of fun and the applications are limitless.
I ‘ve been doing lots of new pieces involving the mosaic technique that I share with you when you sign up for my newsletter. I’ve made this fish and placed it on the underside of a 6×6 plate. It will make a perfect desert plate or a catch all for a dresser.
I have other things I’m working on that I want to share with you soon. Just wanted you to know I’m busy working at my clay table.
I’m doing two trades with two incredible mosaic artists, Laura Pattison and Doreen Bell. It all started when I saw the rainbow mosaic above that Laura made for a trade with Doreen. Polymer Clay canes are similar and have long been compared to glass millefiori canes so it’s no wonder that I was drawn to their work. Laura is living in Spain and Doreen is here in the U.S..
I loved the rainbow, it was so colorful and fun, I asked Laura if we could trade too or if I could buy one. Happily she agreed to a trade, she wanted my funny girl business card holder below. I’ll post a picture of my rainbow when it gets here.
Laura does some really wonderful work, you should see the cat she’s making for her parents, plus check out all the other cool things on her flickr pages.
Funny Girl
Then Doreen emailed me about buying some of my girls for a project she has in mind. I had already seen her work and loved all her crazy women and off the wall pieces, so I was delighted when she said she’d trade.
I sent her the 7 girls below to use in her work and I am so excited to see how she’ll do that. How interesting to be combining the two mediums. It certainly has my head spinning with possibilities.
I’ve seen a few pictures of my prize from Doreen, but will wait until it’s completely finished before I post her here. You can check out Doreen’s so cool work on her flickr site
Thank you Laura and Doreen for making these trades a highlight for me. You are making me laugh and giggle and that’s the most favorite thing I do. But most of all I’ll own some wonderful pieces of artwork from two incredible artist and make some terrific new friends. What a great experience.


Comments