Polymer Clay Canes for Beginners

27 videos, step by step, beginner cane workshop beginner Cane Tutorial What people are saying about this tutorial. jennifer rose Just finished this first workshop on how to make canes, and I must say I learned so much. This is exactly what I have been looking for, someone who could explain cane making in a step by step that process that I could replicate. I watched the videos, went into my studio and began to create all of the canes Alice showed. I finally have results I can be proud of, and I say thank you so much for doing this workshop. My only question now is when do we get more workshops. If you are only going to take one online class let it be this workshop. Thank you Alice for your hard work, and your dedication to helping others learn the joys of polymer clay.

Online Workshops with Alice Stroppel

Catagories

[caption id="attachment_102" align="aligncenter" width="100" caption="Member IPCA"]Member IPCA[/caption]

Other World – Polymer Clay Wall Art

Other World
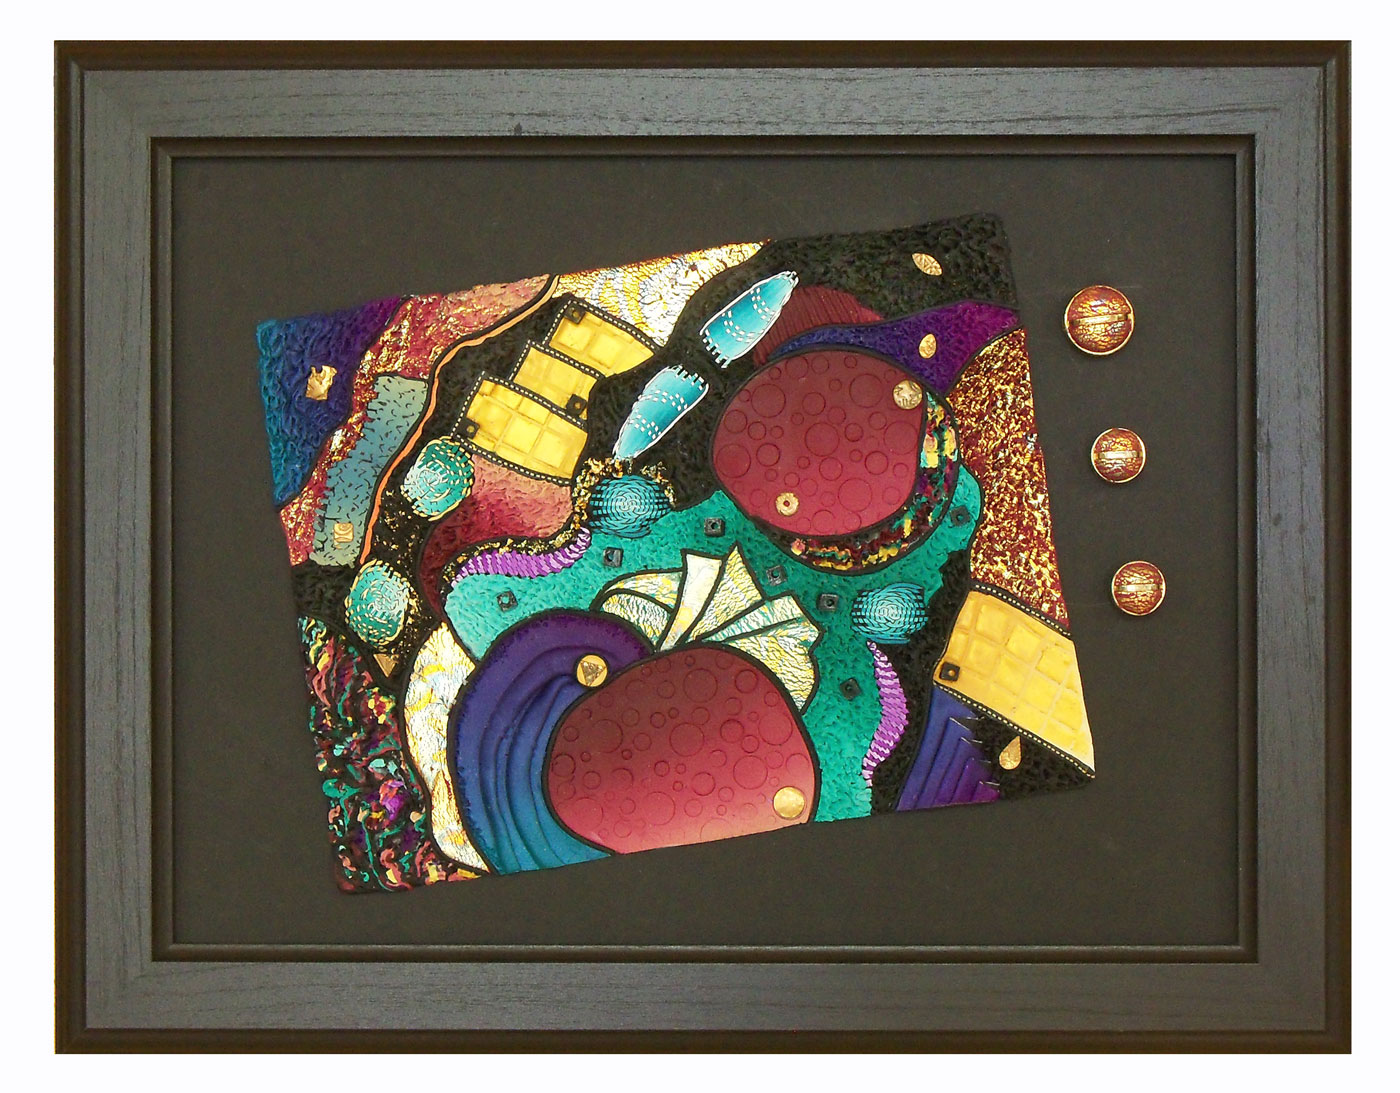
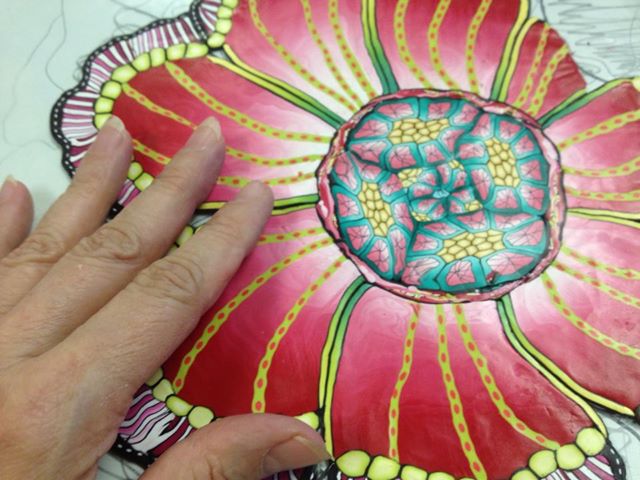
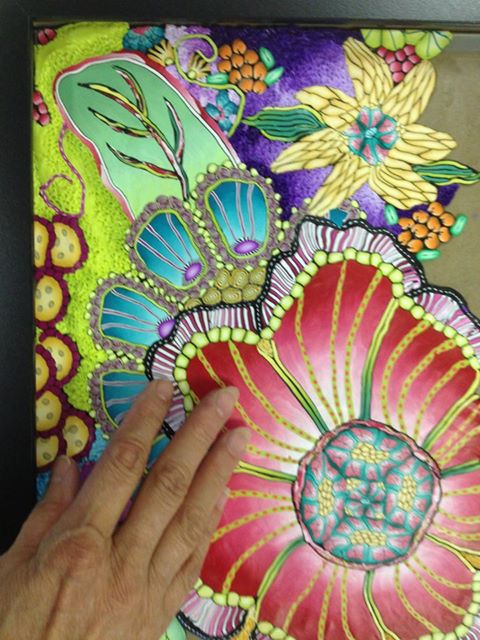
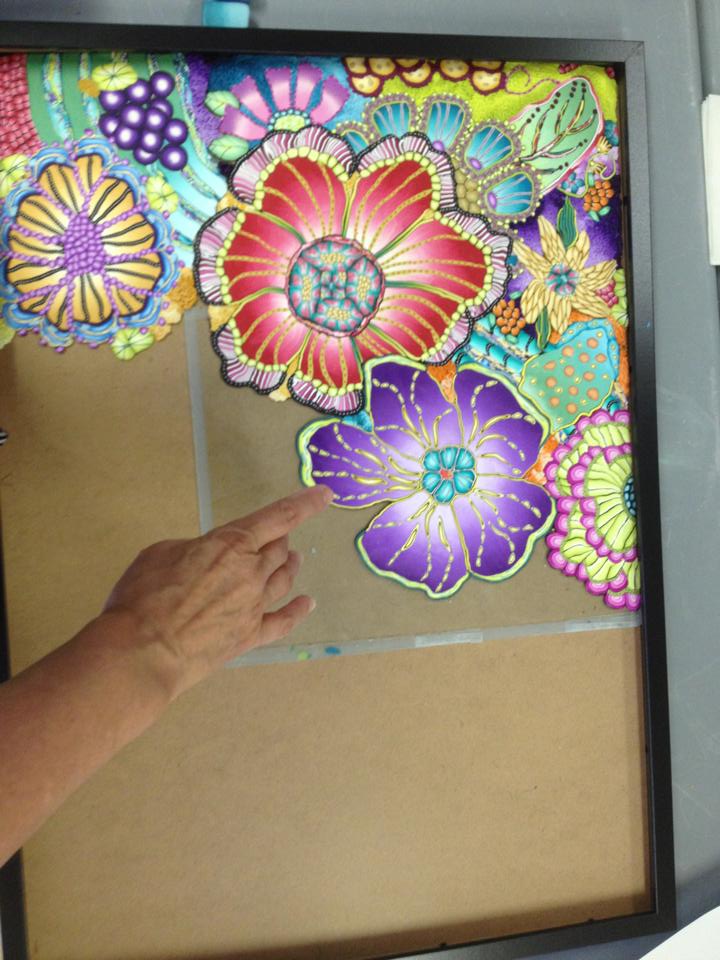
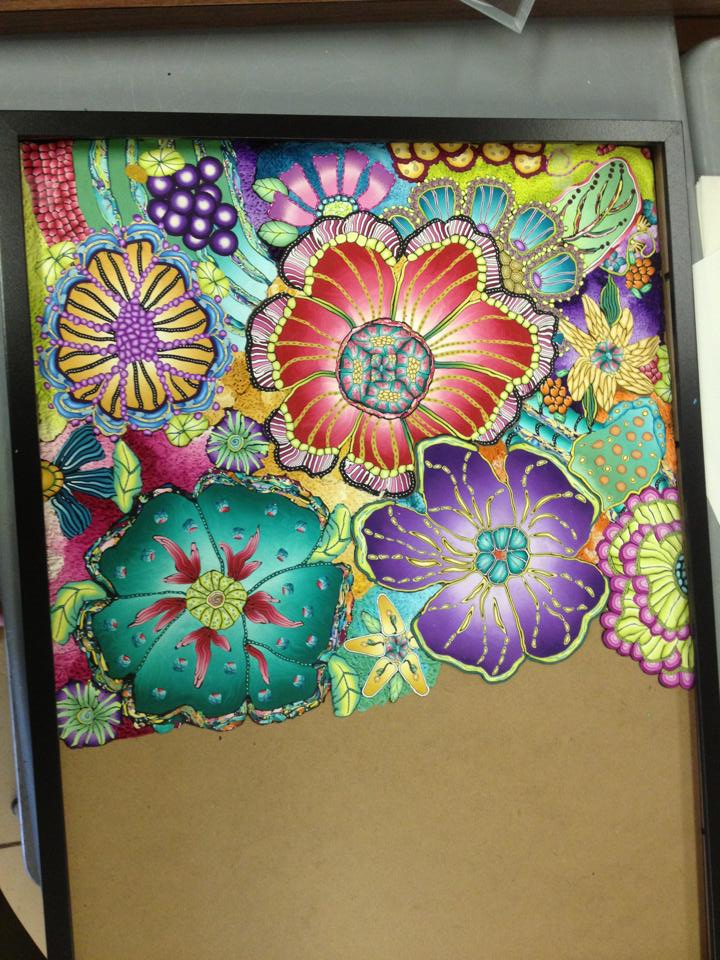
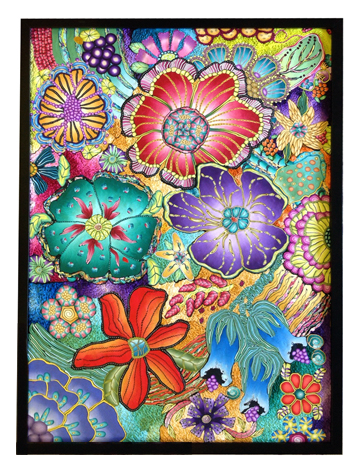
I created this new piece while I was in the Rocky Mountains on retreat. At least the main rectangle was created there. Today I framed it and added some polymer clay covered buttons.

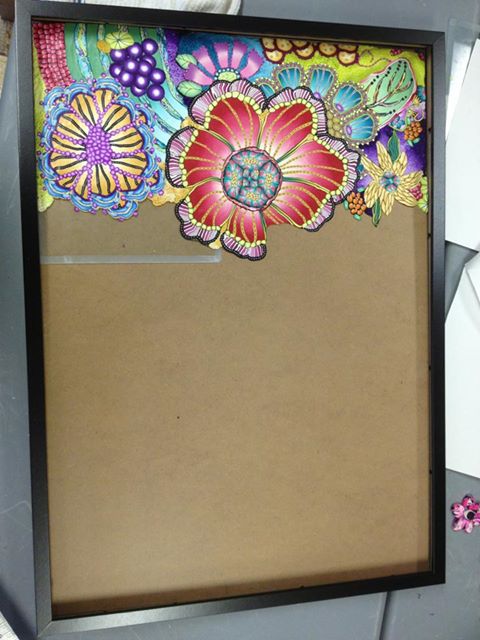
I’m happy with this unconventional framing even though it would not have been my first choice. When I started looking for a frame for it, I didn’t have one that would fit. I had just spent a small fortune on frames and didn’t want to run out to buy another one.

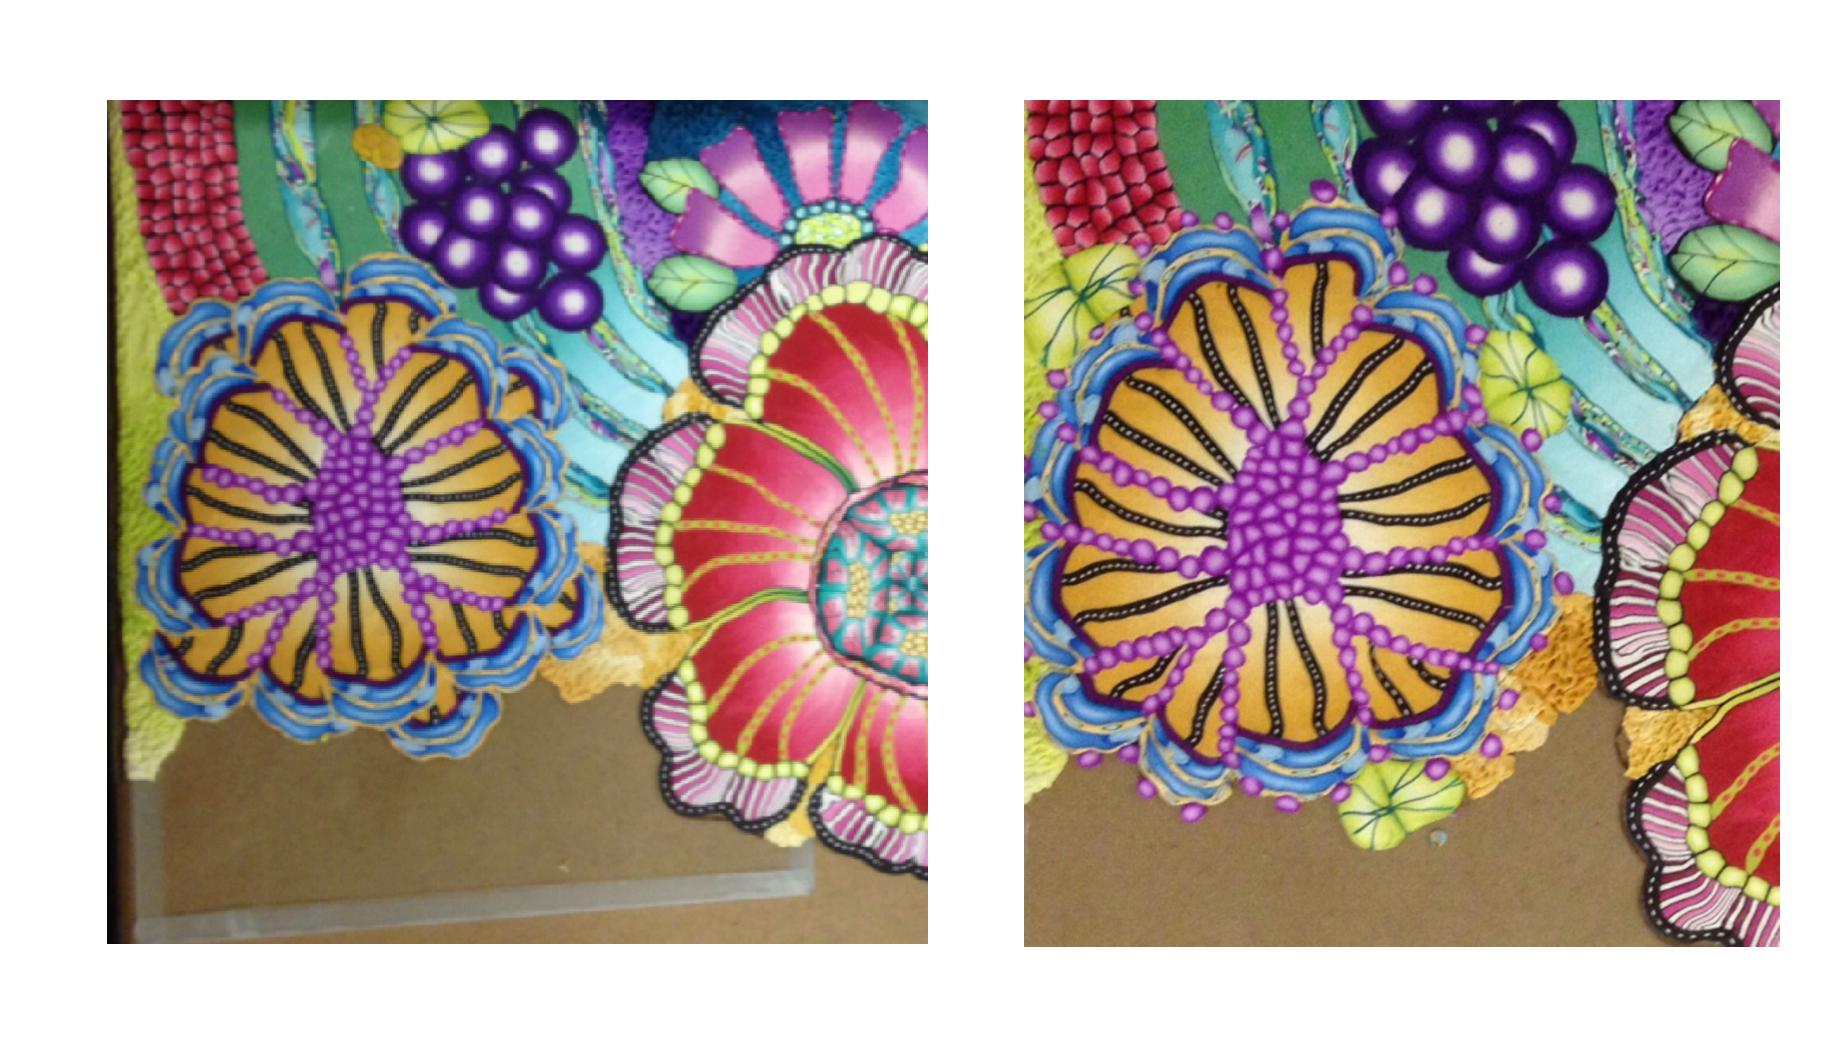
I started to center it on the mat but then I began to play around with it and decided to put it at an angle. It needed something else, having the raw edges showing and because they were so straight I covered some buttons with clay and added them.

If you double click on the picture you’ll be able to see it closer.

I was influenced by my fellow retreater in many ways. I hope to explore and expand my wall pieces and continue to add texture and interest.

Polymer Clay Wall Art – Flowers

Polymer Clay Wall Art -Alice Stroppel

This is my newest adventure, I pushed myself to create something large and more complicated than in the past. I used my Cane Mapping technique with an added twist.

It’s a large piece, 19″ x 27″, framed it’s 20 1/2″ x 28 1/2″. I bake my polymer clay in a regular kitchen oven, but even so I had to construct it in pieces like a giant jigsaw puzzle.

Polymer Clay Wall Art -Alice Stroppel

After baking a pieces, I constructed the next piece on a piece of glass and by fitting it to the last piece. I placed a roughly drawn pattern behind the glass, but as you can see by this picture, I didn’t follow it exactly.


Polymer Clay Wall Art -Alice Stroppel


I continued this way until all were pieces were baked and then glued them to a back board. Actually this board came with a frame I bought. Here’s a look at each step as it was completed.

Polymer Clay Wall Art -Alice Stroppel

Alice stroppel wall art WIP 2


flower 4

After completing and taking a picture of this step, I realized how disjointed some of the yellow flower petals looked. So before I baked it, I made some corrections.

Polymer Clay Wall Art -Alice Stroppel

Not completely satisfied, but knowing this was as good as it was going to get, I baked it and moved to the next section.  Once again I used my and for size reference.


Polymer Clay Wall Art -Alice Stroppel

Polymer Clay Wall Art -Alice Stroppel

And once again the finished piece. I certainly learned a lot and look forward to making many more.

Polymer Clay Wall Art

On Going Polymer Clay Cane Mapping Experiment

Single fish - polymer clay cane mapping

I’m trying other ways to display the fish that I shared with you the other day. I still like the black background so I decided to see how a lone fish would look in a square frame. I can see a group of these on the wall. I like this as well as the larger grouping.

Still, nothing is permanent yet, plus I used very small glue dots to hold the pieces in place. They are used in scrapbooking and it only takes one or two to hold each item and I can easily remove the polymer piece if I want to. They will mess up your background though so keep that in mind.

This is a 9″ x 9″ frame and the fish is only about  3  1/2″ from lips to tail, so you could use several in a grouping.

For a Friend – A Butterfly

Butterfly PinThis butterfly is for a friend, in appreciation. I started by  making just the character in the middle and then decided to try some wing stamps by Barbara McGuire that I brought home from my visit to Woman Creative in GA. Well once I added the wings she got quite large.

I decided to place it in a frame so that she can hang it on the wall or wear it if she’s brave enough. (It’s big, really!) I hope she likes it.

Another “Old Polymer Clay Cane Save”

Here’s another cane I made last year sometime and couldn’t ever figure out exactly how to finish it.  I did know however, that I wanted to make something for the wall and I had already sliced and baked the whole cane, so like the canes from yesterdays post, I’ve moved them out of the shoe box and onto my wall.

Again this is just for me, so I give myself permission to do whatever I want. :) And I’m having fun just playing around with foam core and cheap frames. Who knows all this playing around could just lead to something exceptional……or not….but the key word here is FUN! Go have some today.

Oh and I am still working on the idea I told you about yesterday. It’s a way to use the mosaic that you made from my free video you watched when you signed up for my newsletter. You did make something didn’t you? *g*