
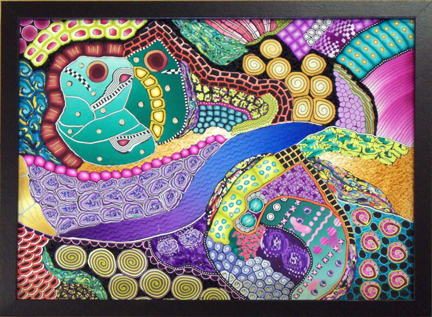
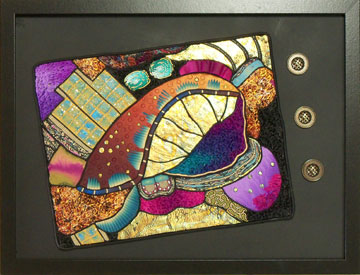
Frame 20″ x 20″, design mounted on white mat board. It’s an interesting piece in that the metal leaf makes it pop and shine differently from every angle.
Still having fun just doing.
|
27 videos, step by step, beginner cane workshop
 What people are saying about this tutorial.
jennifer rose
Just finished this first workshop on how to make canes, and I must say I learned so much. This is exactly what I have been looking for, someone who could explain cane making in a step by step that process that I could replicate. I watched the videos, went into my studio and began to create all of the canes Alice showed. I finally have results I can be proud of, and I say thank you so much for doing this workshop. My only question now is when do we get more workshops. If you are only going to take one online class let it be this workshop. Thank you Alice for your hard work, and your dedication to helping others learn the joys of polymer clay.
What people are saying about this tutorial.
jennifer rose
Just finished this first workshop on how to make canes, and I must say I learned so much. This is exactly what I have been looking for, someone who could explain cane making in a step by step that process that I could replicate. I watched the videos, went into my studio and began to create all of the canes Alice showed. I finally have results I can be proud of, and I say thank you so much for doing this workshop. My only question now is when do we get more workshops. If you are only going to take one online class let it be this workshop. Thank you Alice for your hard work, and your dedication to helping others learn the joys of polymer clay.  Member IPCA |
Frame 20″ x 20″, design mounted on white mat board. It’s an interesting piece in that the metal leaf makes it pop and shine differently from every angle. Still having fun just doing.
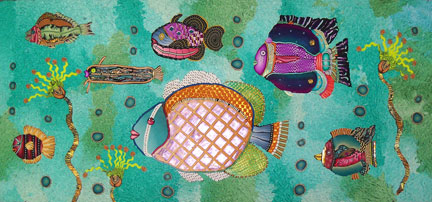
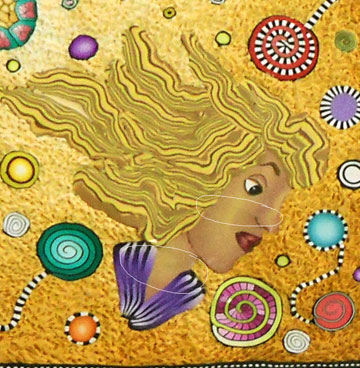
I’ve finished another polymer clay cane mapped painting. Now that’s a mouth full… I usually spend a bit of time looking at the painting before I bake it. wondering if I should make any adjustments. But when things really pop out is when I photograph the finished piece and look at it on my computer screen. Do you see the fish? Seems like I can’t get away from the fantasy fish even when they aren’t in the plan. Pretty funny if you as me, wonder what a psychoanalyst would have to say. I think I need to take a photo before baking from now on. On the other hand, it’s certainly interesting to just let things happen.
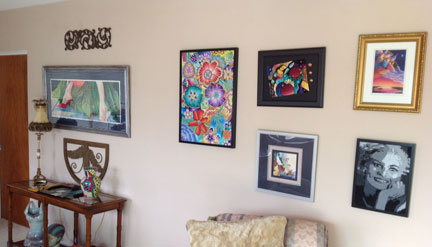
Happy New Year Everyone! I can’t wait to get this new year started, I truly finished with 2013 and I’m looking forward to an inspiring 2014. I finished this fantasy fish painting a couple of weeks ago but couldn’t post it because if was a gift for my oldest son Brad. Brad is a master diver and often spends time in an underwater world. It’s safe to show it now, he has it and hopefully it’s up on a wall somewhere. This painting is 9″ x 20″. I’m working on two more large polymer clay paintings now. One is huge, 28″ x 40″ …I know, I’m a little bit crazy, but hey, what’s the worse that can happen? That’s one of the things I love about polymer clay, if you don’t like what you’ve done, just start over. The clay can be recycled and isn’t lost. Someone asked me to show a photo of the work hanging on the wall. Here’s a shot of some of the painting hung. It’s a new wall, that is, we rearranged furniture and there I was with the beautiful long wall to decorate, so it’s still a “work in progress” but I’m enjoying having some of my polymer painting in my house and not just in the studio.
Have a great year! Oh and by the way, I’m adding the fish picture again because Facebook only gives me the last photo as the image to post to my page. Use to be you had a choice…geezzzz.
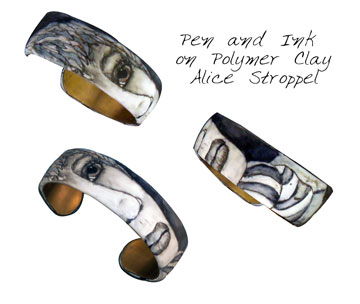
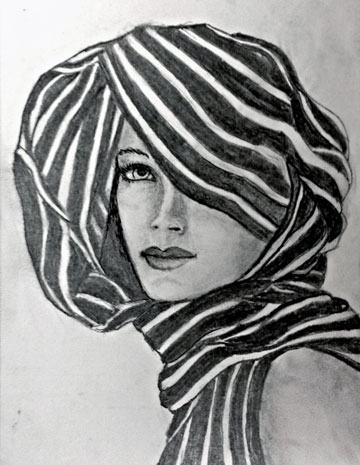
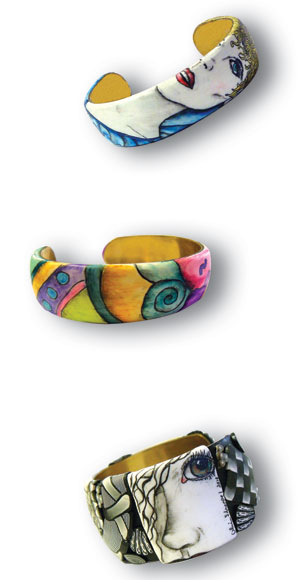
I really enjoy creating pen and ink faces on white polymer clay covered bracelets. I’ve drawn many and continue to strive to improve. This is different views of the same bracelet. I’m teaching Pen and Ink on Polymer Clay on Jan. 10th at McKilliams Promotions in Oddessa, FL. That’s just north of Tampa. For more information visit McKilliams Promotions, Inc. Hope to see you there. While I was away from my studio for a few months, I practiced drawing faces using pen and ink. Here’s one I did using a Vogue cover from the 50’s. I’ve always loved this picture and it was a perfect one for me to try and recreate. I’m happy with it except the face doesn’t look like the model at all. I don’t think I’ll ever be able to do a likeness, but that’s okay I’m happy just drawing imaginary faces. Practice, practice, practice…..it’a all fun!
I’m the opening act for the ever delightful and funny Julie Eakes and her workshop , “I’ve Been Framed”. She’ll be showing you how to make micro canes and use them to make frames. For more information visit McKilliams Promotions, Inc. Hope to see you there. Next I’ll be at the Florida Gulf Coast Polymer Clay Guild on Feb. 1st with my canes. For more information visit their Yahoo group.
I went to my annual Christmas party with my best FF’s last night. Each year we have a good gift/bad gift exchange, you know the deal when you all draw a number and the first person opens the first gift and then the next person can steal it or open a new one? Well we do that for both good gifts and bad. Coming up with a bad gift is easy, sometimes it’s something just too silly or funny or a regift from past bad gifts. We’ve been doing this for over 15 years, so there is plenty of old bad gifts and trust me they do show up again. Good gifts are well…good and sometimes a lot of stealing goes on. This is my contribution this year. I enjoyed making it very much because it was going to end up in the home of one of my friends and because it got me back in the studio. I’m looking forward to really rocking the clay after the 1st of the year. Merry Christmas and Happy Holidays to all my friends both here in the States and all over the world. And a Happy New Year!
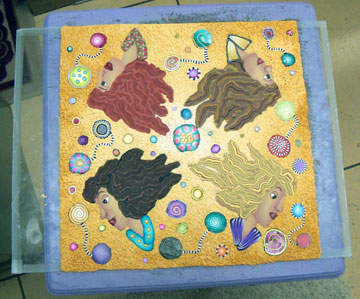
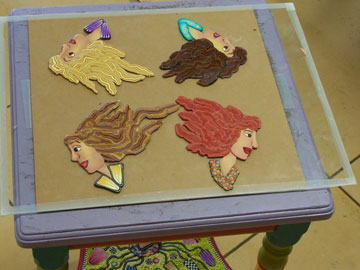
I’ve been working on the polymer clay cane mapped top of my little table off and on for days. Right now I’m not able to work days in a row, but can only get to my studio 3 or 4 days a week. So getting this piece finish it taking awhile. I thought I might not share with you what happened, you know, admitting to a huge mistake and all, but then I decided that you might benefit from my lesson learned. Besides, (laughing) I was able to save it so I don’t look to stupid. I’d already baked the top once with only the girls on the glass. See last post. I finished the background and cane slices and places it on the table top to see how it looked. I added some more cane circles and then baked it again.
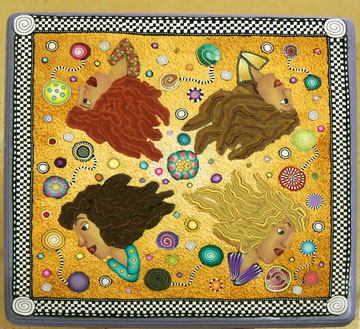
I added my dot, dot, dot cane around two edges of the baked piece and then a row of black and white check. The reason I only did two ends was because my glass wasn’t big enough to do the other two sides. I baked it again and I was very happy with the way it was coming along. Then…..DISASTER….I can’t show you pictures, because I had to work quickly to try and save the piece and all my work. Here’s what happened. I removed the baked top from the glass and put it on a large ceramic tile that I work on. I thought, great, this is just the right size to finish the edges. I added more dot, dot, dot cane and checkered canes to the remaining two edges. I finished off with a larger dot, dot, dot cane. Fabulous, now to bake it and see how it fits the top. I had planned to figure out the very edges once I could really see how much room I had left. I considered using an extruded piece that I could bake and then glue in place. I received a new CZeXtruder from Kimberly Idalski and want to try it out on the edge. I’ll be posting more about using the new extruder in another post. Well………..I put it in the oven, baked it the normal time, the buzzer went off, I opened the oven and the piece was a total mess! YIKES! Buckling in the center and a couple of other places and so drastically the blonde girl had cracked right in two across the middle of her face and neck. Circled in white in the picture below, this is after the fix and I’m still amazed a how well it turned out.
I won’t repeat what I thought and said in the minutes that followed……. but I was able to save the entire piece and honestly I still can’t believe it. I wish I had pictures of the before. Here’s what I did to save the piece. At first I just used a towel to press the bulging clay gently back down. It seemed to help but it wasn’t enough and the pressure wasn’t even. The tile was still extremely hot. I used another tile the same size to place on top of the piece to apply even pressure. I first placed a piece of paper on top of the design, I didn’t want the second tile to create a shine. I remove the tiles from the oven tray and onto a cooler surface, not a cold one, just cooler. When I had completely cooled I removed the top tile and paper and it had pretty much gone back into the original shape. You can imagine how relieved I was. I’ve ruined many things in my day, but this was the biggest, most time invested piece that I “almost” lost. I glued it down quickly to my table top. The blonde girl was actually in three pieces, but I put her back together like a puzzle and glued all the pieces in place. You can barely see hair line cracks and that my friends is the ONLY way you can tell the was a near disaster. Now, there are two things that may have cause the buckling. At first I thought it might have been because I moved the rack up one level, I wanted to bake another piece at the same time and that put the whole thing closer to the top of the oven, you know, heat rises. And that may well have contributed, but this morning I really think the main problem is that it was on the large tile. I actually had the tile at an angle in a broiler pan and air could get underneath it. But the tile was very hot and I think the glass must not get as hot or maybe not hold the heat as well.
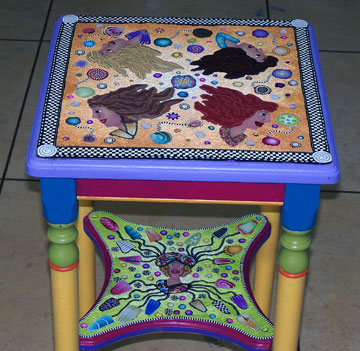
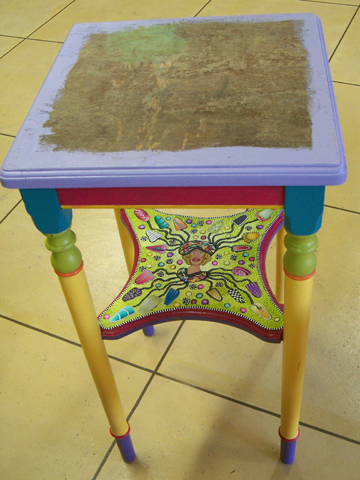
I bake in a regular home oven, by the way. Whatever the reason, I will stick to baking my cane mapped pieces on glass and I won’t move away from the center of my oven. Here’s the finished top, whew is all I can say. I’m still not sure about the very edges and I want to add more slices to the leg etc. More when I can….
Step one on the table top is finished. I’m going to love having this table around with samples of my faces. Lots of fun here, great therapy for sure. I’m constructing and baking everything right on the glass. When it’s cool I’ll pop it off and glue it to the table top. I think I might have a piece of glass cut to fit to protect it. See ya’ back here soon.
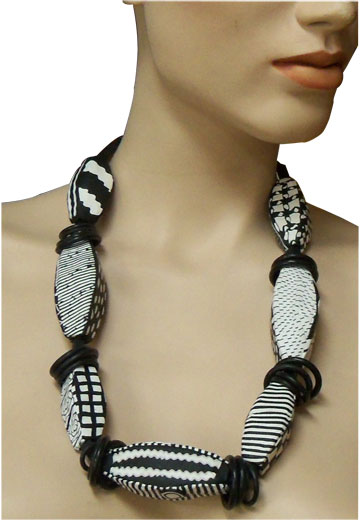
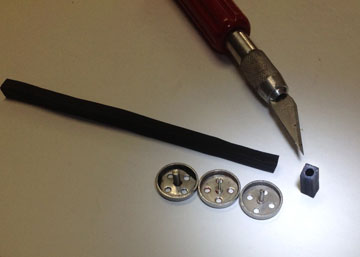
Here’s a necklace I made right after seeing Arty Becca’s (Rebecca Watkins) hollow forms. I needed to make one more of the smaller beads to finish it off and I finally did that last night. I use black rubber O rings in between the beads and extruded black clay bits as spacers. Extruded black clay bits you ask? I use an adapter made by Makins for their extruder. They come in all different sizes and you can use several different dies with them. I used a square die to make a long piece, bake it and then slice off what I need. Cool.
We had a cord that could reach all the way into the living room. That was the only way you could talk for more than 5 minutes, I could cook, fold clothes, and watch the kids playing. When we moved to our new house we didn’t need the table anymore. My Mother, Father, sister and brother-in-law bought a three story victorian house together and they had tons of room. The table went to stay with them and now it’s come back to live with me. I’ve painted it lots of fun colors and have covered the bottom shelf in polymer clay with one of my faces and some of my colorful canes. I’m starting to work on the top when I have time and I’ll also be adding bits of PC on the legs.
It’s a piece that has been touched by every member of my family at one time or the other. No hurry on this piece it’s just something that will capture a lovely memory in time and link it to the present.
|
      |

Comments