Just finished this first workshop on how to make canes, and I must say I learned so much. This is exactly what I have been looking for, someone who could explain cane making in a step by step that process that I could replicate. I watched the videos, went into my studio and began to create all of the canes Alice showed. I finally have results I can be proud of, and I say thank you so much for doing this workshop. My only question now is when do we get more workshops. If you are only going to take one online class let it be this workshop. Thank you Alice for your hard work, and your dedication to helping others learn the joys of polymer clay. Jennifer Rose
Yesterday a friend of mine who is fish crazy, in a good way, asked me a couple of questions about my fish and if I had any for sale. Not for her, but for something else. The truth is I really don’t. the ones I have I use as demos in my cane mapping class, I have hanging on my walls or have given away.
I started this fish with just part of the tail when my friend Chrissie Baker was here in my studio. I wanted to show her how I did my big wall pieces.
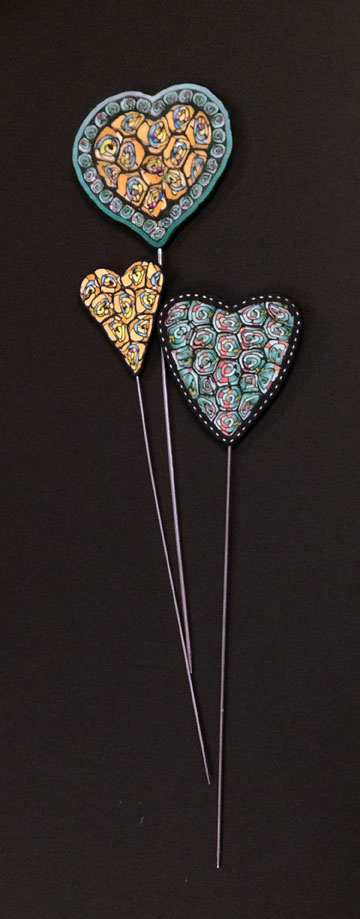
So when I came to the studio this morning and was beginning to clean up my work table after my Stroppel Cane #2 video. I actually started cleaning the day before but got side tracked making hearts plant stakes out of the Stroppel #2’s that may for the film. Can’t throw them away of course…see.
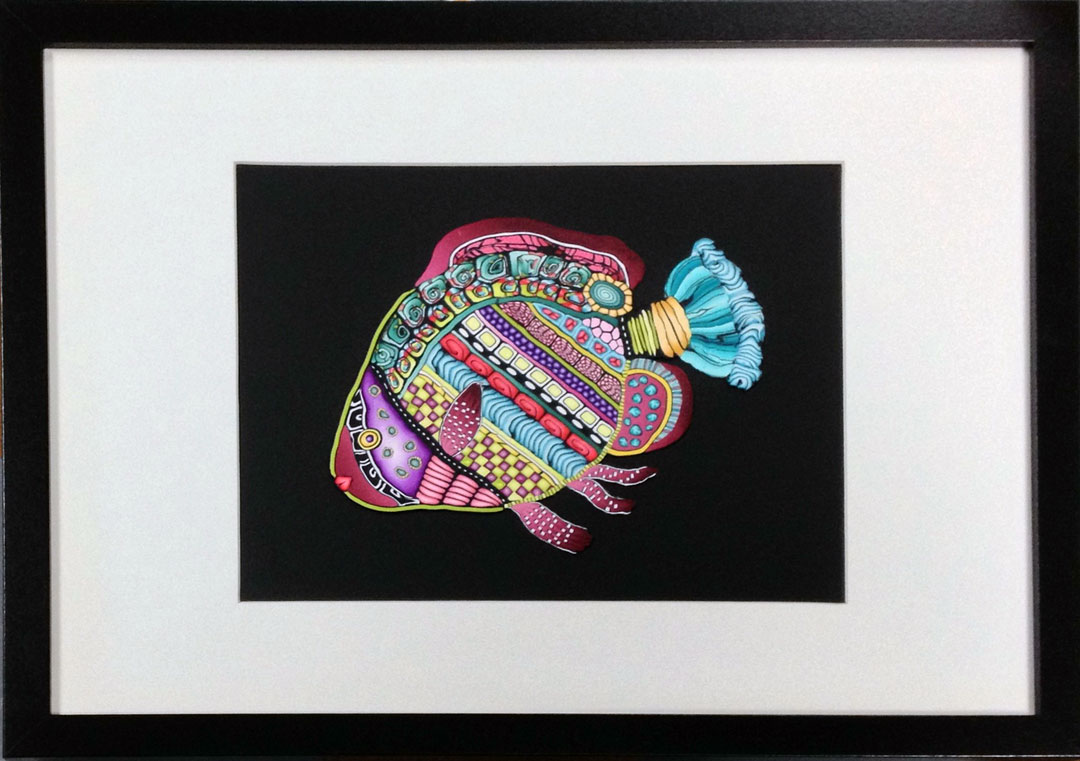
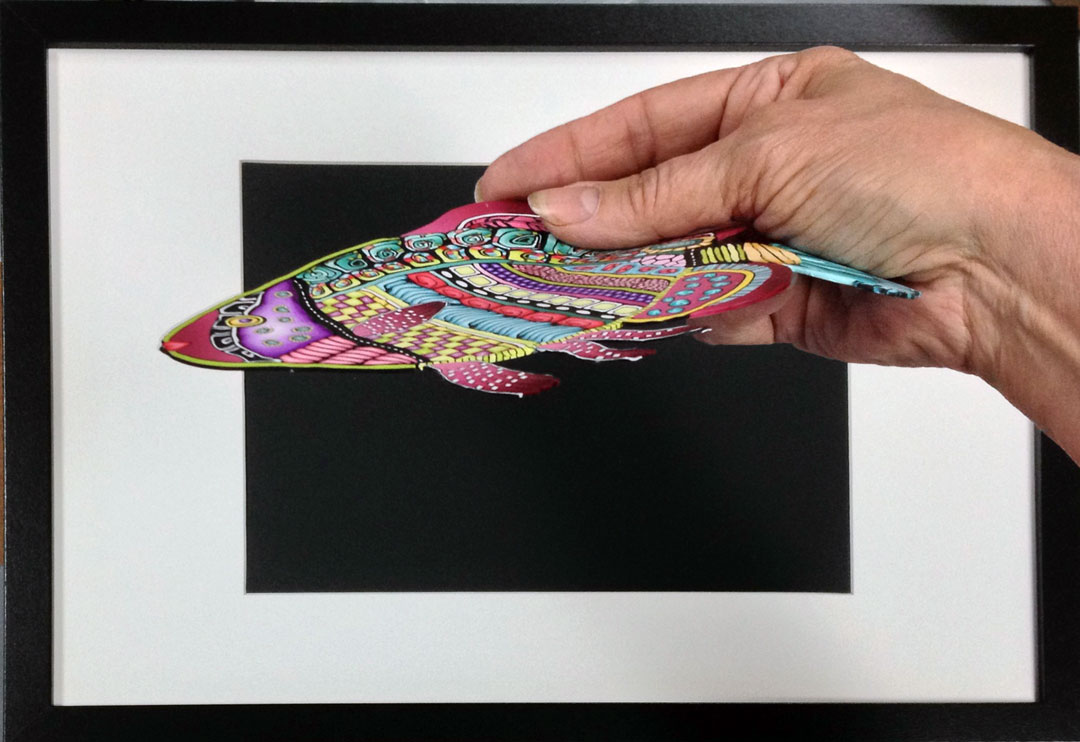
Sorry, back to the fish. before I put all my canes away, I decided to use some of them to finish the fish. What fun it was, really lost myself in it. But what I wanted to show you was how thin these designs are and how easy they are to frame. So now I can say I have one for sale at least.
Oh and you can see how I used some more of my Stroppel cane #2 across the back of the fish. (first photo)
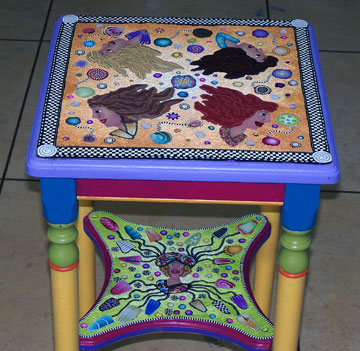
I call this technique cane mapping and it’s how I’ve done my large wall piece and this table.
If you are near Palmetto, I’m teaching a one day cane mapping workshop on June 7th. You must have lots of pre-made canes to bring with you. We won’t have time in class to make many if any. Skinner blends work best for me. Message me on Facebook, or leave a comment here.
The next class in my studio will this month, July 30, 2011. We’ll be using up your old canes and creating some very cool fish.
I’m using fish as the subject, but you could cane map almost anything. I’ll be showing you a couple of other cane mapped items in the next few days. The photo above shows one crazy fantasy fish that I applied to this cute little tea pot. Fun! Here’s a close up. It’s only about 3″ square.
The Class is $55.00 and that will include lunch and Foam core for mounting your finished fish and cording or pin back to finish your small fish. Plus…I’ll add a bit of metal foil to add the pop need to create a fantasy fish.
I used the same canes to create this bracelet that I used on my mermaid in the last post. And again, I layered the cane slices instead of butting them side by side as in the video. However, I did draw a pattern and built the fish first before putting it on the bracelet.
Laying Out The Design
You can just see the pattern between the two fish. I’m fitting the fish on a piece of glass. To see my video that explains how to use a pattern and a piece of glass, just sign up for my newsletter. It’s free.
Bracelet Covered With Black Polymer Clay
I covered a bracelet with black clay, then laid my fish on top. I made sure everything was securely down and baked it.
Side View of Fish Bracelet
Notice the tail on this fish, there is another slice of this cane on the other side. In fact, these are the last two slices of the cane. In the last post I told you that this cane was made from left overs and I was only able to get 6 slices out of it. Four I used for my mermaid’s hat and these two for fish tails. I didn’t waste that little bit of Skinner Blend.
See what happens when I start thinking about merchandise for galleries on the beach. I was mixing colors and making canes for leaves and plants for my flamingos and started thinking about my fish mosaic.
I ended up with a mermaid……………..
When I mix my colors, I try to mix them with the same amount of grey to get my base color and then add white and skinner blends. I am looking at the book Color Inspirations and am interested in play with the “mud” idea too. But for now I’m mixing grays with my color blends to get a muted result.
Then I make different canes using the mixes and Skinner blends. When I’m ready to work on a project, I have canes that blend and go together nicely.
Polymer Clay Mermaid Close Up
I used the coral Skinner blend in each of the canes. Sometimes as the main body of the cane and sometimes as accents. Her hat was leftover bits of mixed color and Skinner blend. It didn’t make a very big cane and I only got six slices off of it, but I only needed four to make her a smashing hat. I used the other two slices on a fish bracelet I’ll show you in the next post.
I used the same method to build this mermaid as I do for my fish mosaic except I’m layering the canes instead of butting them up next to each other. It’s less labor intensive, but doesn’t create the same level of sophistication as the mosaic work. It just depends on what effect you are trying to achieve and how much time you want to spend.
To see how I do my mosaics, just sign up for my newsletter and watch a video for free.
I love these blue bottles and I’m quickly running out of them. Here’s one I did for a fund raiser at Highlands Art League. It made $135 for the league. I was delighted as there was some incredible art work auctioned off that evening from some very talented artists.
Here’s how this started! I was going to shoot a video to share about all the items I found while cleaning that I can use with my clay work.
But as always, I had to clean up my clay space before I could begin. There sat slices of canes that I used in my (not finished yet) Polymer Clay Collage Project…. you’ll see a line of red squares across the bottom. Some were slices that I messed up and then there was this small little piece of cane left.
If you have been following this blog at all, you know me well enough to know that I do not like to make scrap clay. So, I layered the messed up slices with a layer of black #7 on the pasta machine. Then I sliced the remaining cane and added those slices with the black layers in between. Ending up with a new cane.
Why I didn’t start filming this for you, I don’t know, except that I didn’t know that it was going to come out this cool.
I sliced this cane into thin slices and added them to a sheet of black. Then placed the whole thing on my bracelet. It looks pretty good, I liked it anyway.
Then I had just a couple of slices left of this scrap cane (and I’m laughing here)! I didn’t want to scrap the rest of the cane I didn’t use because I liked it.
So I decide to play with what I had left. this next bracelet was the result and I like it way better than the first one.
Ancient Mystery II
I laid the left over slices out on a skinny strip of black and ran it through the pasta machine. It was ragged along the edges and I kind of liked that, so I put it on a layer of ecru clay and covered the bracelet form, added dots and there it was.
It was interesting and fun to experiment and the best part is I made something out of clay that was going to become a gray blob.
But..I still haven’t made the video with the found objects to use with clay. It will have to wait now, I have a special request for more girl bracelets in my Etsy shop, so I better get moving.
I’ve listed the other two bracelets there, so cross your fingers that summer sales will happen.
As winner of the Fish Mosaic Contest, Adrienne Lindsey will be receiving the perfume pen with one of my girls on it and as a bonus, (she doesn’t know this yet) I’ve sent her a note card with her fish on the front. I’m sending her a pdf by email with a layout for two note cards that she will be able to print over and over again. She can sell them, give away sets to friends or just use them herself for thank you notes etc. All she has to add is the envelopes.
(I also did a pdf for Laura Lang’s fish too.)
I’ve added this service to my Etsy shop, for those who don’t have the software to do it themselves. If you do have the software, you should consider using your artwork in this way. It really makes sense, you can sell the original and still continue to make money from the item. That’s what other artists do with prints of their originals. Why not Polymer Clayers? Gotta think outside the box.
I just looked at Naama Zamir’s two fish that she made after viewing the video. They are so cute, they would make darling cards or prints for that matter.
I love this fish, the colors are so vibrant and full of contrast. Our judge, watercolor artist Janet King, said that it was hard to choose a winner, but she really like the red color choice in Adrienne’s fish. I want to thank my friend Janet for taking the time to be our judge. Janet is a fabulous watercolor artist and instructor. Please take the time to visit her site and spend some time with her paintings. This bird painting is one of my favorites of Janet’s and represents her humor. See why I asked her to be our judge and why she is my friend?
Adrienne will be receiving the perfume pen in the mail very soon. Thank you Adrienne for the time you spent with your fish. Adrienne was the first to enter a fish and she enjoyed it so much she made another and entered it too. As you can see it paid off, she won!! We do improve with age. (At least with polymer clay)
Thank you to the rest of you who entered this summer contest. I wish I could post all your photos. It was such fun to receive the fish photos in my in-box. But I think what I enjoyed most was talking with so many wonderful people out there that share this crazy passion for polymer clay. Or maybe it’s just the shared love of making things with our hands. The creative process is such a healing, exciting, self affirming activity that it is a necessity for our very being.
Several people told me that this project has rekindled the creativity spark in them. What a compliment for me and an affirmation for just starting something creative. Thanks again.
I did want to show another fish that came very close to winning that I felt I needed to share it. Laura Lang’s fish is beautifully done and I enjoy her color choices. Thanks, Laura for entering.
Laura Lang's Entry
If you want join in the on going adventure, simply sign up for my newsletter at the top right hand side of this page and watch the video.
Adrienne’s fish is the first entry and it is always so much fun when the first one arrives. Aren’t her colors rich? I love this fish!!! Thank you Adrienne for being the first. I can’t wait for the rest of the entries to start flowing in.
If you want to enter and win the perfume pen shown in the column on the right hand side of this page, simply join my newsletter list and watch the 20 minute video showing you how to create your own mosaic fish. Then look for the July Newsletter in you email box and follow the link to find out more.
Someone asked me the other day how I came up with the fish mosaic technique. I thought about the progression that led me to create that first fish.
The Color Vase in this post was covered with polymer clay canes by me in 2001 and even listed on Glass Attic. It was my first polymer clay work to be shown on the internet and let me tell you, I was thrilled.
It was when I still had my old business website, Talented Friends. The link is no longer active to say the least, but the listing is still there on Glass Attic under covering glass.
Color Vase 3
From this vase, I covered many other things and experimented with all sorts of techniques that I saw online or in books or classes.
Several years ago, while I was director of Highlands Art League, we were having a members exhibit and I wanted to do something in PC. I decided I didn’t want to cover an entire vase, I just didn’t have the time. Plus I thought there had to be an easier way to create the designs with clay than trying to do it on the actual vase.
I wanted the design to be recognizable, and something that would lend itself to cane work. I drew out a fish shape on paper and taped it under a flat piece of glass. From there I created the fish vase below and displayed it in our members show along with the Color Vase and two other vases I had done over the years.
Fish Vase Art League
I stepped away from the art league late last year because of my husband’s health. I was home now and had time to actually grow my clay work and expand my horizons. I opened an Etsy shop and decided to try and make small things that I could sell in my Etsy shop and went to clip art for my general pattern for the fish and even a crab. One thing always leads to another as you can see by the cuff bracelet I did this week with the same technique.
This fish led me to share this technique with you. By signing up for my newsletter on the right hand side of the page, you can view the 20 minute film showing the technique I used to achieved this design. I hope you decide to enter my contest too.
What I have discovered is that nothing replaces just getting your hands in the clay and letting the work evolve. One idea will lead to another. Be bold, experiment, enjoy the process. I know I do.
It’s hot, it’s summer, and since I’ve had such positive feed back from my new Fish Mosaic video, I decided that maybe we should have some summer fun.
I’m challenging my newsletter members to create a fish mosaic of their own. I’m giving away the following perfume pen to the winner of the contest. To use the pen, you simply hold the wick in your favorite perfume for about a minute. Screw on the top and it’s ready to go with you anywhere, tucked into your purse. I love mine, it’s even small enough to stick in your pocket.
The winner’s fish will be posted here in August with a link to their blog, website, Etsy store, and/or flicker account.
If you are already a member of my newsletter list, your should have already received instructions for entering the contest in the July issue.
If you aren’t a member yet and want to join in the fun, simply sign up for my free newsletter on the upper right hand side of this page, view the video and follow the instructions that will be sent to you in the July newsletter. It’s free, and it’s easy.


Comments