Polymer Clay Canes for Beginners

27 videos, step by step, beginner cane workshop beginner Cane Tutorial What people are saying about this tutorial. jennifer rose Just finished this first workshop on how to make canes, and I must say I learned so much. This is exactly what I have been looking for, someone who could explain cane making in a step by step that process that I could replicate. I watched the videos, went into my studio and began to create all of the canes Alice showed. I finally have results I can be proud of, and I say thank you so much for doing this workshop. My only question now is when do we get more workshops. If you are only going to take one online class let it be this workshop. Thank you Alice for your hard work, and your dedication to helping others learn the joys of polymer clay.

Online Workshops with Alice Stroppel

Catagories

[caption id="attachment_102" align="aligncenter" width="100" caption="Member IPCA"]Member IPCA[/caption]

Fun Swaps at Fandango Polymer Clay Retreat!

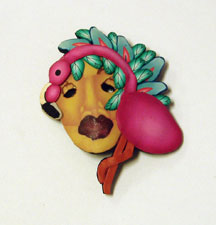
Flamingo Mask - Alice Stroppel

This is one of the masks that I made for the mini mask pin swap at this year’s Orlando Clay Fandango in Florida. The Orlando Area Polymer Clay Guild had lots of fun things planned for us to share with each other plus several competitions. I ran out of time and only participated in the mini mask swap and the brown bag swap.

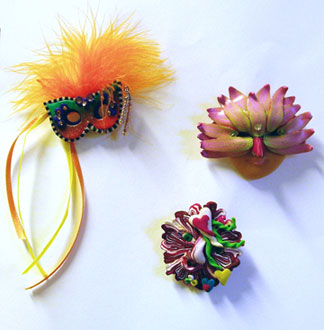
Mini masks

Mini Masks by Karen Hampton, Pat Ghadbane, Kathryn Peters

I received these three fabulous mini mask in exchange for three of mine. I saved all the names, but somehow lost the name of the woman who made the mask on the bottom. If anyone from Fandango know who made this mask, I’d love to list her name, so let me know.

Update…. Mystery solved, Katy commented on this post to let me know it was her mask. Whew, I’m glad that’s taken care of. I didn’t like losing her name. Thanks Katy.

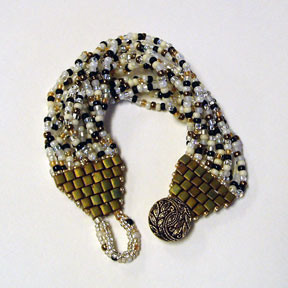
Brown Bag Swap - Bracelet by Pat Ghadbane

Brown Bag Swap - Bracelet by Pat Ghadbane

I was lucky to win two beautiful items from Pat Ghadbane. Isn’t this bracelet lovely? I love the beads on the end and the button closure. I’d say I was lucky all the way around and came home with some fabulous artwork from some talented women.

Two more reason to attend next years Orlando Clay Fandango! So start saving kids.

Bottle Stoppers, Business Card Cases, Perfume Pens, Christmas is Coming

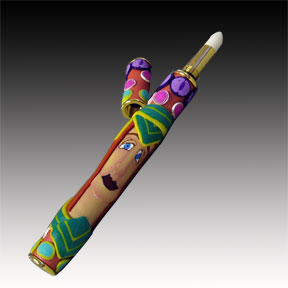
Perfume Pen

Perfume Pen

Three more items going to AliceStroppel.Etsy.com. Perfume pen, bottle stopper and card case. All great gifts for the holidays.

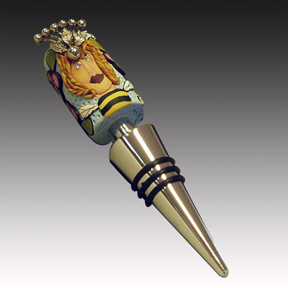
Queen Bee

Queen Bee

I had a special request for a wine stopper for a friends mother. She was “The Queen Bee” to her family and loved a good glass of wine. Perfect! I made two so she could have her choice. This is the second one. I wanted you to see the piece of costume jewelry that I used for her crown. Another way to use found objects to make your pieces unique. There are little bees flying around and flowers on the back of this fun and crazy piece.

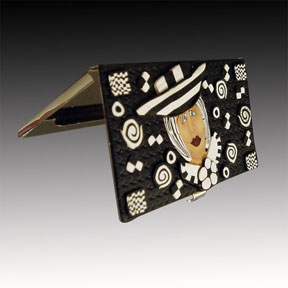
Business Card Case

Business Card Case

I’ve sold quite a few business card holder and continue to hear from my customers that they gets tons of compliments on their unusual case. I buy my blanks for all these great things at Boston Craft Works.

Free Photo Background for Your Polymer Clay

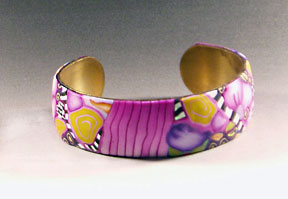
Bracelet on Graduated Background

Bracelet on Graduated Background

There are many ways to take pictures of your Polymer Clay artwork and I’m sure you have figured out how to get the best picture. Staging is popular now, making the item shine in an environment. I’m all for it and think it really show items to the best advantage.

But for an easy professional looking photo, here’s a quick way to get started. I’m giving you are free pdf of a graduated background. The background goes from white at the bottom to black at the top. It doesn’t use that much ink, and can be well worth the cost of printing it.  It is only 8 1/2″ x 11″ and will only work for small items.

I printed mine on card stock and have used it over and over again. Sometimes I use Photoshop to create a background like this after I have cut the item out. But sometimes, to save time, I use my gradient sheet.

If your printer won’t print on card stock, then print it on regular paper. Tape another sheet behind it when you are taking pictures to prevent the light shining though.

Down load the pdf gradient background now. Save a copy to your computer or print right away. Before you print, make sure the heads on your printer are clean, you have enough ink, and you might want to choose black ink in your printer settings.

I take my pictures on my porch in the brightest part of the day. You could set a small table outside in the shadow of your house. The key is for it to be a bright sunny day, but your item is in the shade so that there are not shadows yet plenty of light.

Tape the top (black part) of the background to the wall of your house or a box and the other end to the table. It just needs a slope so that the background goes up behind the item.

Place you item on the background, turn off you flash and take your picture. If you have a photo editing program of any kind on your computer, download your photo into it, make any adjustments and crop it.

Hope it helps those of you who have been wondering how to get started. You can always do something different as you become more experienced.

Selling Your Polymer Clay Artwork

The Tourist

The Tourist

Creating with polymer clay is fun, addictive and costly if everything you make stays at home with you. Don’t get me wrong, that can be a good thing if you can wear a different necklace, earrings, and bracelet set every day. Have polymer clay art in every room of your house! Light switch covers in the dining room, cover vases and sculpture the livingroom, covered knobs on the bedroom furniture and mosaic tile mirrors in the bathroom. (Did you know you could replace all the buttons on your kids clothes with polymer clay……..oh never mind…sorry)

Then you start giving your masterpieces to your friends and relatives. And they love them, the first 3 or 4 that is. After all how many nercklaces, earrings, bracelets, light switch covers, vases, sculptures, covered knobs and mosaic mirrors can they use?

The time comes when you just have to find a place to showcase your work or just give it up all together. You know we don’t want to quit, some of us just can’t. So what’s to be done?

If you are reading this online, then you have the skills to find the right outlet for your work right at your finger tips. I’m not going to talk about Etsy, or ArtFire, or any of the other online places to sell. You probably already have a shop set up on one of these sites. If you are successful and are selling your art faster than you can produce it, then you can skip the rest of this post.

But if you are a bit frustrated with your online shop sales, then you aren’t alone. It’s hard to be the artists, the marketer, the agent, the packer, and shipper, etc. All you want to really do is make your art…..well sorry.. that will probably never happen for most of us! We will all have to do some things to promote ourselves. But maybe you are living close to a solution to your problem. Or at the very least another outlet for sales.

There are thousands of art/craft galleries around the country and almost every town, no matter what size, has at least one. Maybe you have contacted you local shop with no luck. Well how about shops or galleries within a hundred miles of your house? Tourist spots are fabulous outlets, or just busy cities with a reputation for “artsy” shops.

I randomly picked Jackson, Mississippi to see what I could find. I did a google search for “arts and craft galleries jackson, mississippi”. About halfway down the second page there was a link to the Jackson Free Press that said…………..
Culture The Fall Arts …The Jackson area certainly has numerous venues for arts of all kinds, from museums …. Chimneyville Crafts Gallery Works by 400 members of the Mississippi

That looked interesting so I click on the link and bingo! There was an article about the Arts in Jackson and the names of 44 arts and or craft galleries around the city.

The next step was to check over the list and see what sounded like a good possibility. I found several, the first was Chimmeyville Crafts Gallery. I did a google search and couldn’t find a website for Chimmeyville Crafts Gallery, but found out that it was operated by the Craftsmen’s Guild of Mississippi, Inc.

I did another google search for the Craftsmen’s Guild and found their membership page

These were the membership benefits for $75.00 per year.

Benefits of membership include:

-Invitations to show and sell work at all sanctioned Guild events such as the December Chimneyville Crafts Festival
-Referrals to other national and international festival organizers
-Direct referrals to collectors, buyers, designers and wholesalers
-The privilege to sell and demonstrate work at Guild retail galleries and exhibits
-Direct referrals to feature writers, authors and producers
-A quarterly newsletter with articles designed especially for the professional artisan
-Invitations to special members’ meetings, workshops and social events

Notice that you can sell and demonstrate your work at Guild Galleries, I think they have two.
Also there is a referral service to collectors, buyers, designers and wholesalers. If I lived within 100 mile of Jackson, I would be a member of the Guild. If for nothing else but the referrals. ( I didn’t check any further to see if you have to be present to sell you work. Some places require that you volunteer a certain amount of hours a month.) But I would still join for the referrals.

I didn’t look any further, but there were several galleries that looked promising. I would see if they have a website, find their email address and mail them an introductory email and two or three (low resolution) photos of my work, asking if they might be interested in featuring them in their gallery. If you receive a positive reply, then an appointment can be arranged and a road trip planned. Find a friend to go with you and make a day of it.

Next post I’ll talk about the importance of pricing your work to sell on your own website shop with enough room to then be able to sell to the shop owner at wholesale. You shouldn’t undersell the retailer that is carrying you work.

You can do this kind of search for any city you live in or near. We have a great advantage outside of the internet. Not many people have seen the fabulous artwork that we are making with polymer clay. We have the opportunity to be the first in a gallery, shop or guild to offer polymer clay art for sale. You don’t have to do craft fairs or festivals, (even though they can be another great way to sell your work).   It may just be a matter of finding a couple of just right galleries close by.

Good Luck, let me know how it goes.
Part 2 Pricing Polymer Clay Artwork to Sell Wholesale
Part 3 Mermaid Bracelet Listed on Etsy
Part 4 Inventory Lists for Your Polymer Clay
Part 5 Display Cards for Polymer Clay Pins and Necklaces
Part 6 Creating Tags for Your Polymer Clay Creations
Road Trip

My friend Alice Hansen and I took a road trip down to Matlacha, FL and Pine Island to Julia’s Arts Gallery.

Julia's Arts

Julia's Arts

Julia’s Arts is featuring some of my polymer clay work, bracelets, bottle stoppers, perfume pens, and my fish mosaics. The Mermaid on the blue bottle and the new fish bracelet are living there now too.

Julia's Arts - Gallery

Julia's Arts - Gallery

It’s a delightful gallery with some really wonderful art by some very talented artists. I’m thrilled to be included.

I love little Florida coastal towns, the “artsy” buildings are so colorful. They grab your attention and make you feel happy, lift your mood if you’re feeling glum. Get you ready to kick back, grab that drink with the umbrella and relax. You’ll find some of the most unusual art work in these cool, colorful galleries.

Alice and I had a great time, we stopped in Punta Gorda to have lunch on the way home and visit some galleries there. Charming little town and they have made a great effort to come back for the devastation from hurricane Charlie several years ago.

Alice has had her painting and prints at Julia’s for several years now. Alice’s work is amazing! She is famous for her marine life watercolors. Manatee and fish of all kinds fall under Alice’s spell and no color escapes her brush. She sells her original artwork as well as prints and note cards of most of her paintings. You can contact Alice through her gallery page at Highlands Art League. Or see more of her work on Julia’s Arts website.

Now all I have to do is figure out how to create these wonderful gentle manatees in polymer clay. Don’t you just love the colors Alice uses?

Manatee Family - Alice Hansen

Manatee Family - Alice Hansen

Polymer Clay Fish Bracelet

Polymer Clay Fish Bracelet

Polymer Clay Fish Bracelet

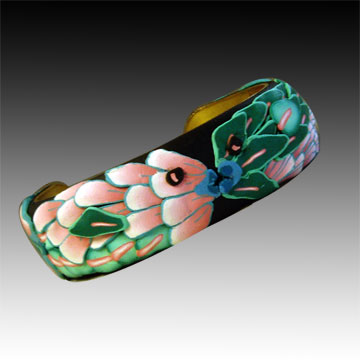
I used the same canes to create this bracelet that I used on my mermaid in the last post. And again, I layered the cane slices instead of butting them side by side as in the video. However, I did draw a pattern and built the fish first before putting it on the bracelet.

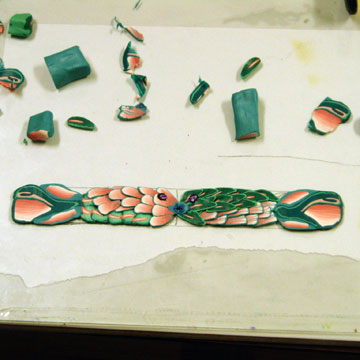
Laying Out The Design

Laying Out The Design

You can just see the pattern between the two fish. I’m fitting the fish on a piece of glass. To see my video that explains how to use a pattern and a piece of glass, just sign up for my newsletter. It’s free.

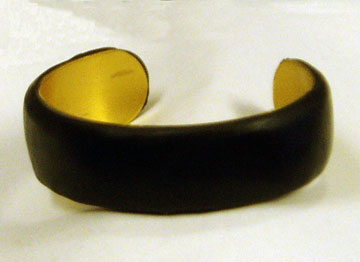
Bracelet Covered With Black Polymer Clay

Bracelet Covered With Black Polymer Clay

I covered a bracelet with black clay, then laid my fish on top. I made sure everything was securely down and baked it.

Side View of Fish Bracelet

Side View of Fish Bracelet

Notice the tail on this fish, there is another slice of this cane on the other side. In fact, these are the last two slices of  the cane.  In the last post I told you that this cane was made from left overs and I was only able to get 6 slices out of it. Four I used for my mermaid’s hat and these two for fish tails.  I didn’t waste that little bit of Skinner Blend.

Dora’s Explorations in Polymer Clay Puts a Hex on Us!

Dora's Joy of Hex Cane

Dora's Joy of Hex Cane

Lately, I’ve been following Dora’s Explorations Blog and her polymer clay cane experiments. She seems to enjoy the complicated canes and I understand the challenge.

Her plaid canes are fabulous and there are many more just waiting for you give them a try. She is generous to share these tutorials on her website.

If you want to challenge yourself, take a look at her newest cane tutorial, “Joy of Hex“. It free and the pattern possibilities are endless. Thanks Dora for sharing your talent with us.

Found Objects and Polymer Clay – Video

Bakers Man

Baker Man

Boy have I had fun the last few days. Filming the video on found objects and polymer clay really got me excited about all the projects that I have promised myself I was going to do when I wasn’t working anymore. So watch out..I might be on a roll. I say might because I always have great intentions.

I could have made this video an hour longer, I had that many found objects that I could have shared with you, but I figured you would thank me if I kept it at 15 minutes.

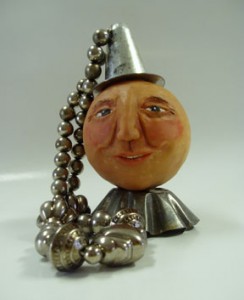
The photo above is just one of the projects that I used some of my found objects on. Kitchen items from my husband’s grandmother and a necklace from a garage sale. I love using items that have meaning to members of my family. He is going to hang on the Christmas tree and once a year we will be reminded of grandma and the fabulous things she use to make for the holidays. Easter pie was a favorite, even for Christmas.

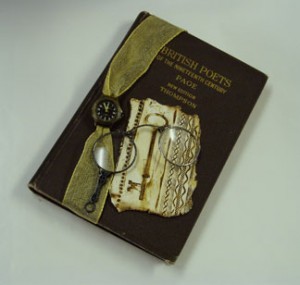
Embellished Book

Embellished Book

This photo is of an old flea market book and one of the pieces I made in this video. Old watch part from my dad, who is no longer with us, fabulous magnifying spectacles that belong to a long ago relative.  A great coffee table book.  Enjoy the video!

Found Objects to Use With Polymer Clay

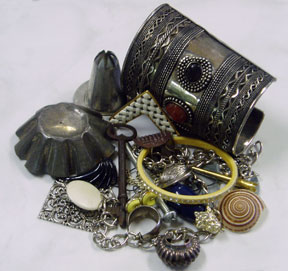
Found Objects

Several days ago, I promised you a video showing how to use objects you might have around the house to imprint polymer clay projects. Or you may want to use that interesting found object to embellish one of your creations.

I “found” all of these items while I was clean out and cleaning up. You might say I “re-found” them. Most are things I have collected over the years because they were interesting and I just knew one day I’d “make something from them”. ( I think there is a name for this illness……..most of you have it too I think!)  Some are just everyday items.

Even my husbands work space didn’t escape the scavenger hunt……don’t tell him though, he gets scared when I venture into his garage with that look on my face.

Today, I’m working on samples and tomorrow or the next day I’ll post the video. Start looking around you, I know you’ll find lots of things to play with. Roll out some fresh clay and experiment. Or be ready with your treasures for when you watch my new video and we can experiment together.

Just remember, if you use something from your kitchen for clay, you won’t want to use it again for food.

Using Old Polymer Clay Canes

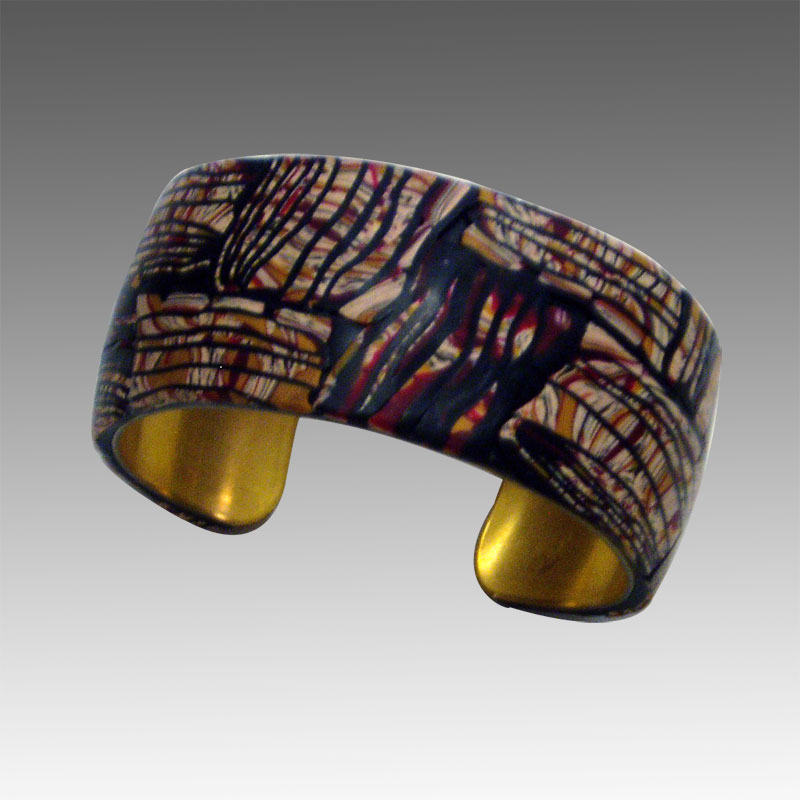
Ancient Mystery I

Ancient Mystery I

Here’s how this started! I was going to shoot a video to share about all the items I found while cleaning that I can use with my clay work.

But as always, I had to clean up my clay space before I could begin. There sat slices of canes that I used in my (not finished yet)  Polymer Clay Collage Project…. you’ll see a line of red squares across the bottom. Some were slices that I messed up and then there was this small little piece of cane left.

If you have been following this blog at all, you know me well enough to know that I do not like to make scrap clay. So, I layered the messed up slices with a layer of black #7 on the pasta machine. Then I sliced the remaining cane and added those slices with the  black layers in  between. Ending up with a new cane.

Why I didn’t start filming this for you, I don’t know, except that I didn’t know that it was going to come out this cool.

I sliced this cane into thin slices and added them to a sheet of black. Then placed the whole thing on my bracelet. It looks pretty good, I liked it anyway.

Then I had just a couple of slices left of this scrap cane (and I’m laughing here)! I didn’t want to scrap the rest of the cane I didn’t use because I liked it.

So I decide to play with what I had left. this next bracelet was the result and I like it way better than the first one.

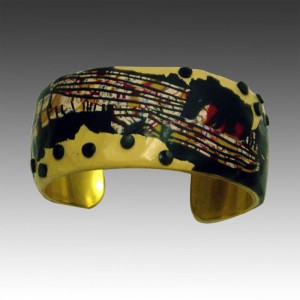
Ancient Mystery II

Ancient Mystery II

I laid the left over slices out on a skinny strip of black and ran it through the pasta machine. It was ragged along the edges and I kind of liked that, so I put it on a layer of ecru clay and covered the bracelet form, added dots and there it was.

It was interesting and fun to experiment and the best part is I made something out of clay that was going to become a gray blob.

But..I still haven’t made the video with the found objects to use with clay. It will  have to wait now, I have a special request for more girl bracelets in my Etsy shop, so I better get moving.

I’ve listed the other two bracelets there, so cross your fingers that summer sales will happen.