Polymer Clay Canes for Beginners

27 videos, step by step, beginner cane workshop beginner Cane Tutorial What people are saying about this tutorial. jennifer rose Just finished this first workshop on how to make canes, and I must say I learned so much. This is exactly what I have been looking for, someone who could explain cane making in a step by step that process that I could replicate. I watched the videos, went into my studio and began to create all of the canes Alice showed. I finally have results I can be proud of, and I say thank you so much for doing this workshop. My only question now is when do we get more workshops. If you are only going to take one online class let it be this workshop. Thank you Alice for your hard work, and your dedication to helping others learn the joys of polymer clay.

Online Workshops with Alice Stroppel

Catagories

[caption id="attachment_102" align="aligncenter" width="100" caption="Member IPCA"]Member IPCA[/caption]

A Polymer Clay Figure Inspired by Kathleen Dustin’s Class

Flying Mermaid

Flying Mermaid

I have been working all week on my tutorial for the profile face cane, but haven’t finished the editing of the video yet. But the filming and the pdf are finished.

I have been having blogging withdrawals, I haven’t made anything new to post because of the tutorial.

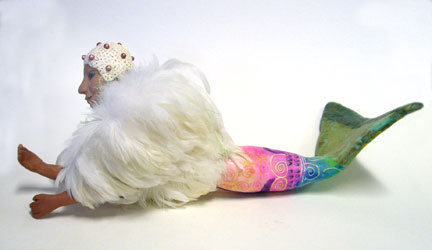
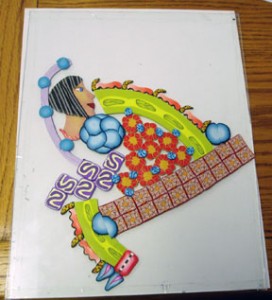
While on breaks,  I have been talking with some people on Facebook about the class we took with Kathleen Dustin. I thought I’d post this flying mermaid that I made after her class. I really enjoyed the techniques she taught us and I would like to try again. I know, just another thing to put on my Wanna Do list.

This mermaid flies above my head when I am working on my computer. Unlike her human friends, she wears her bathing cap when she is flying….it keeps her hair from frizzing in the air.

Flying Mermaid Tail

Flying Mermaid Tail

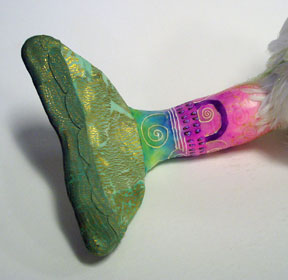
I had a thing for mermaids back then, and I guess I still do kind of. But back to work on the face cane tutorial.

Found Objects to Use With Polymer Clay

Found Objects

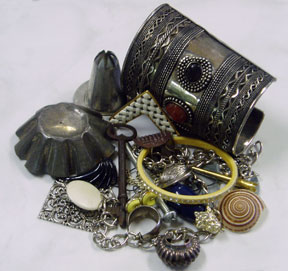
Several days ago, I promised you a video showing how to use objects you might have around the house to imprint polymer clay projects. Or you may want to use that interesting found object to embellish one of your creations.

I “found” all of these items while I was clean out and cleaning up. You might say I “re-found” them. Most are things I have collected over the years because they were interesting and I just knew one day I’d “make something from them”. ( I think there is a name for this illness……..most of you have it too I think!)  Some are just everyday items.

Even my husbands work space didn’t escape the scavenger hunt……don’t tell him though, he gets scared when I venture into his garage with that look on my face.

Today, I’m working on samples and tomorrow or the next day I’ll post the video. Start looking around you, I know you’ll find lots of things to play with. Roll out some fresh clay and experiment. Or be ready with your treasures for when you watch my new video and we can experiment together.

Just remember, if you use something from your kitchen for clay, you won’t want to use it again for food.

Using Old Polymer Clay Canes

Ancient Mystery I

Ancient Mystery I

Here’s how this started! I was going to shoot a video to share about all the items I found while cleaning that I can use with my clay work.

But as always, I had to clean up my clay space before I could begin. There sat slices of canes that I used in my (not finished yet)  Polymer Clay Collage Project…. you’ll see a line of red squares across the bottom. Some were slices that I messed up and then there was this small little piece of cane left.

If you have been following this blog at all, you know me well enough to know that I do not like to make scrap clay. So, I layered the messed up slices with a layer of black #7 on the pasta machine. Then I sliced the remaining cane and added those slices with the  black layers in  between. Ending up with a new cane.

Why I didn’t start filming this for you, I don’t know, except that I didn’t know that it was going to come out this cool.

I sliced this cane into thin slices and added them to a sheet of black. Then placed the whole thing on my bracelet. It looks pretty good, I liked it anyway.

Then I had just a couple of slices left of this scrap cane (and I’m laughing here)! I didn’t want to scrap the rest of the cane I didn’t use because I liked it.

So I decide to play with what I had left. this next bracelet was the result and I like it way better than the first one.
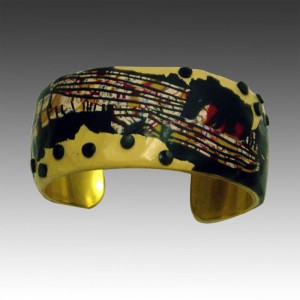
Ancient Mystery II

Ancient Mystery II

I laid the left over slices out on a skinny strip of black and ran it through the pasta machine. It was ragged along the edges and I kind of liked that, so I put it on a layer of ecru clay and covered the bracelet form, added dots and there it was.

It was interesting and fun to experiment and the best part is I made something out of clay that was going to become a gray blob.

But..I still haven’t made the video with the found objects to use with clay. It will  have to wait now, I have a special request for more girl bracelets in my Etsy shop, so I better get moving.

I’ve listed the other two bracelets there, so cross your fingers that summer sales will happen.
New Polymer Clay Collage Project – Part Two

Project Idea

Project Idea

How funny is this? I haven’t had much time to work on this new project. The Fish Mosaic Contest entries were coming in and I was having fun and other life stuff got in the way.

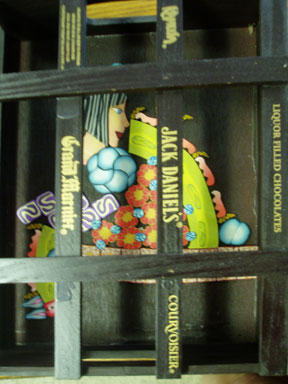
But part of “in the way” was having to clean off some shelves in my studio. I save everything, much to my husband’s dismay. The box in the picture is “the box” that I think everyone that shops at Sam’s club here in the states bought as a Christmas gift “for that person that you have no idea what to buy” It’s a funny gift full of little candies that look like little bottles of liquor.

When I saw the box, I was going to throw it away, but I thought maybe it might make an interesting addition to my “project”. I need to cover up the liquor logos, add some back ground or something else to the clay. But maybe this could turn into something fun! OR maybe not. (This may just turn into one of those projects that goes on for years.)

Tell me what you think. Should I continue, or forget about it?

Fish Mosaic Contest Winner to be announced on Friday. You’re gonna love it.

If you are new here, don’t forget to look at my videos. Just click on the link on the left hand side of the page or at the top. Or for the Fish Mosaic tutorial, just join my email list at the top right hand side of the page.

New Polymer Clay Collage Project

Profile Face Cane Experiement

Profile Face Cane Experiement

I wanted to do something with my profile face canes and really wanted to do something different. I used the piece of glass from my mosaic work and lots of canes both old and new and have begun a picture. I’ve placed a piece of white paper behind the glass so that the work would show up better. So right now there is no background.

This is stage one. I’m going to bake it now and add more to it later. I think, after it comes out of the oven, I’ll add a skinner blend background and see where that takes me.  Stay tuned.

Covering Glass With Polymer Clay

My First Covered Vase 2001

My First Covered Vase 2001


Color Vase 2

Color Vase 2

Someone asked me the other day how I came up with the fish mosaic technique. I thought about the progression that led me to create that first fish.

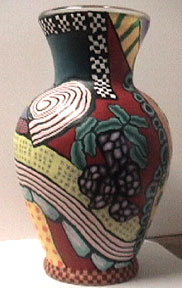
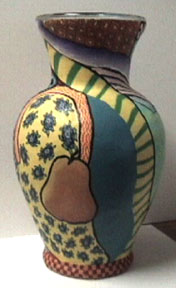
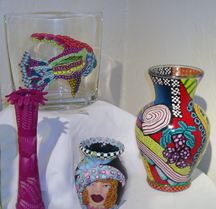
The Color Vase in this post was covered with polymer clay canes by me in 2001 and even listed on Glass Attic. It was my first polymer clay work to be shown on the internet and let me tell you,  I was thrilled.

It was when I still had my old business website, Talented Friends. The link is no longer active to say the least, but the listing is still there on Glass Attic under covering glass.

Color Vase 3

Color Vase 3

From this vase, I covered many other things and experimented with all sorts of techniques that I saw online or in books or classes.

Several years ago, while I was director of Highlands Art League, we were having  a members exhibit and I wanted to do something in PC. I decided I didn’t want to cover an entire vase, I just didn’t have the time. Plus I thought there had to be an easier way to create the designs with clay than trying to do it on the actual vase.

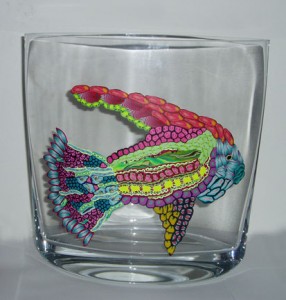
I wanted the design to be recognizable, and something that would lend itself to cane work. I drew out a fish shape on paper and taped it under a flat piece of glass. From there I created the fish vase below and displayed it in our members show along with the Color Vase and two other vases I had done over the years.

Fish Vase Art League

Fish Vase Art League

I stepped away from the art league late last year because of my husband’s health. I was home now and had time to actually grow my clay work and expand my horizons. I opened an Etsy shop and decided to try and make small things that I could sell in my Etsy shop and went to clip art for my general pattern for the fish and even a crab. One thing always leads to another as you can see by the cuff bracelet I did this week with the same technique.

This fish led me to share this technique with you. By signing up for my newsletter on the right hand side of the page,  you can view the 20 minute film showing the technique I used to achieved this design. I hope you decide to enter my contest too.

What I have discovered is that nothing replaces just getting your hands in the clay and letting the work evolve. One idea will lead to another. Be bold, experiment, enjoy the process. I know I do.

Group of Vase shown at Highlands Art League 2007

Group of Vases shown at Highlands Art League 2007