Just finished this first workshop on how to make canes, and I must say I learned so much. This is exactly what I have been looking for, someone who could explain cane making in a step by step that process that I could replicate. I watched the videos, went into my studio and began to create all of the canes Alice showed. I finally have results I can be proud of, and I say thank you so much for doing this workshop. My only question now is when do we get more workshops. If you are only going to take one online class let it be this workshop. Thank you Alice for your hard work, and your dedication to helping others learn the joys of polymer clay. Jennifer Rose
Happy New Year Everyone! I can’t wait to get this new year started, I truly finished with 2013 and I’m looking forward to an inspiring 2014.
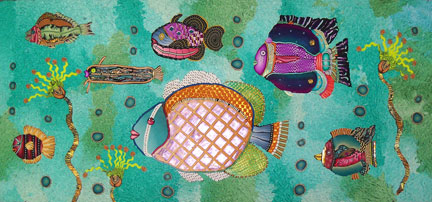
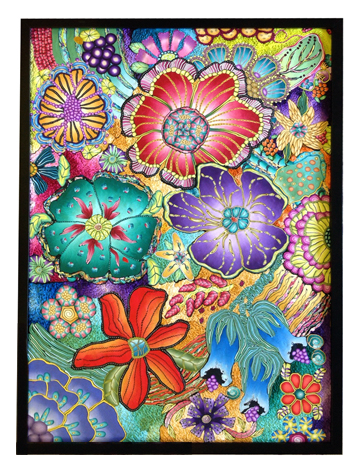
I finished this fantasy fish painting a couple of weeks ago but couldn’t post it because if was a gift for my oldest son Brad. Brad is a master diver and often spends time in an underwater world. It’s safe to show it now, he has it and hopefully it’s up on a wall somewhere.
This painting is 9″ x 20″. I’m working on two more large polymer clay paintings now. One is huge, 28″ x 40″ …I know, I’m a little bit crazy, but hey, what’s the worse that can happen? That’s one of the things I love about polymer clay, if you don’t like what you’ve done, just start over. The clay can be recycled and isn’t lost.
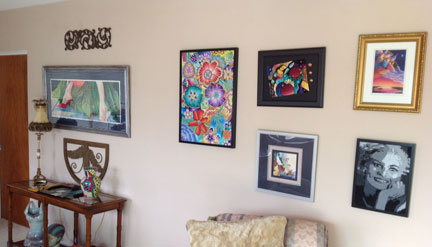
Someone asked me to show a photo of the work hanging on the wall. Here’s a shot of some of the painting hung. It’s a new wall, that is, we rearranged furniture and there I was with the beautiful long wall to decorate, so it’s still a “work in progress” but I’m enjoying having some of my polymer painting in my house and not just in the studio.
Have a great year!
Oh and by the way, I’m adding the fish picture again because Facebook only gives me the last photo as the image to post to my page. Use to be you had a choice…geezzzz.
I went to my annual Christmas party with my best FF’s last night. Each year we have a good gift/bad gift exchange, you know the deal when you all draw a number and the first person opens the first gift and then the next person can steal it or open a new one? Well we do that for both good gifts and bad.
Coming up with a bad gift is easy, sometimes it’s something just too silly or funny or a regift from past bad gifts. We’ve been doing this for over 15 years, so there is plenty of old bad gifts and trust me they do show up again.
Good gifts are well…good and sometimes a lot of stealing goes on.
This is my contribution this year. I enjoyed making it very much because it was going to end up in the home of one of my friends and because it got me back in the studio.
I’m looking forward to really rocking the clay after the 1st of the year.
Merry Christmas and Happy Holidays to all my friends both here in the States and all over the world. And a Happy New Year!
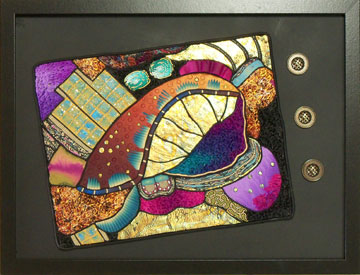
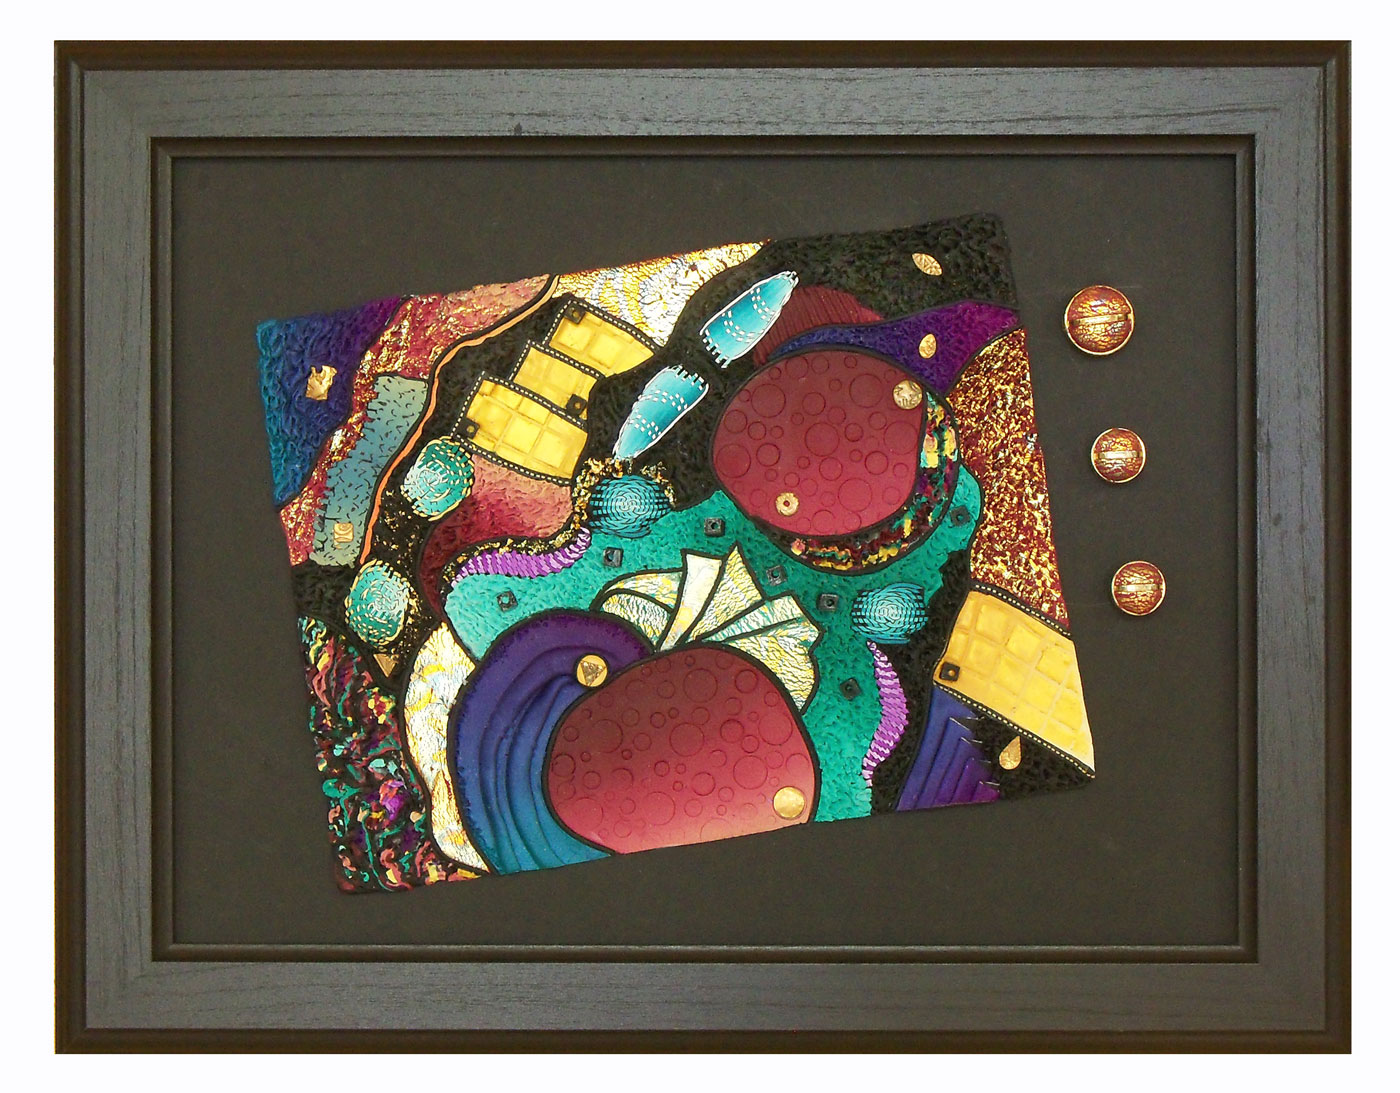
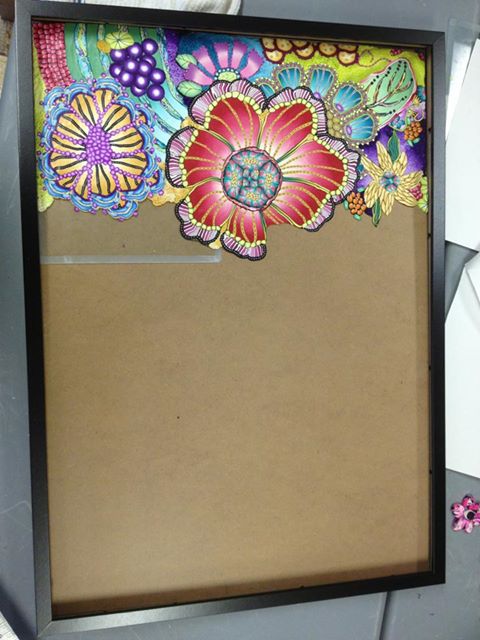
I created this new piece while I was in the Rocky Mountains on retreat. At least the main rectangle was created there. Today I framed it and added some polymer clay covered buttons.
I’m happy with this unconventional framing even though it would not have been my first choice. When I started looking for a frame for it, I didn’t have one that would fit. I had just spent a small fortune on frames and didn’t want to run out to buy another one.
I started to center it on the mat but then I began to play around with it and decided to put it at an angle. It needed something else, having the raw edges showing and because they were so straight I covered some buttons with clay and added them.
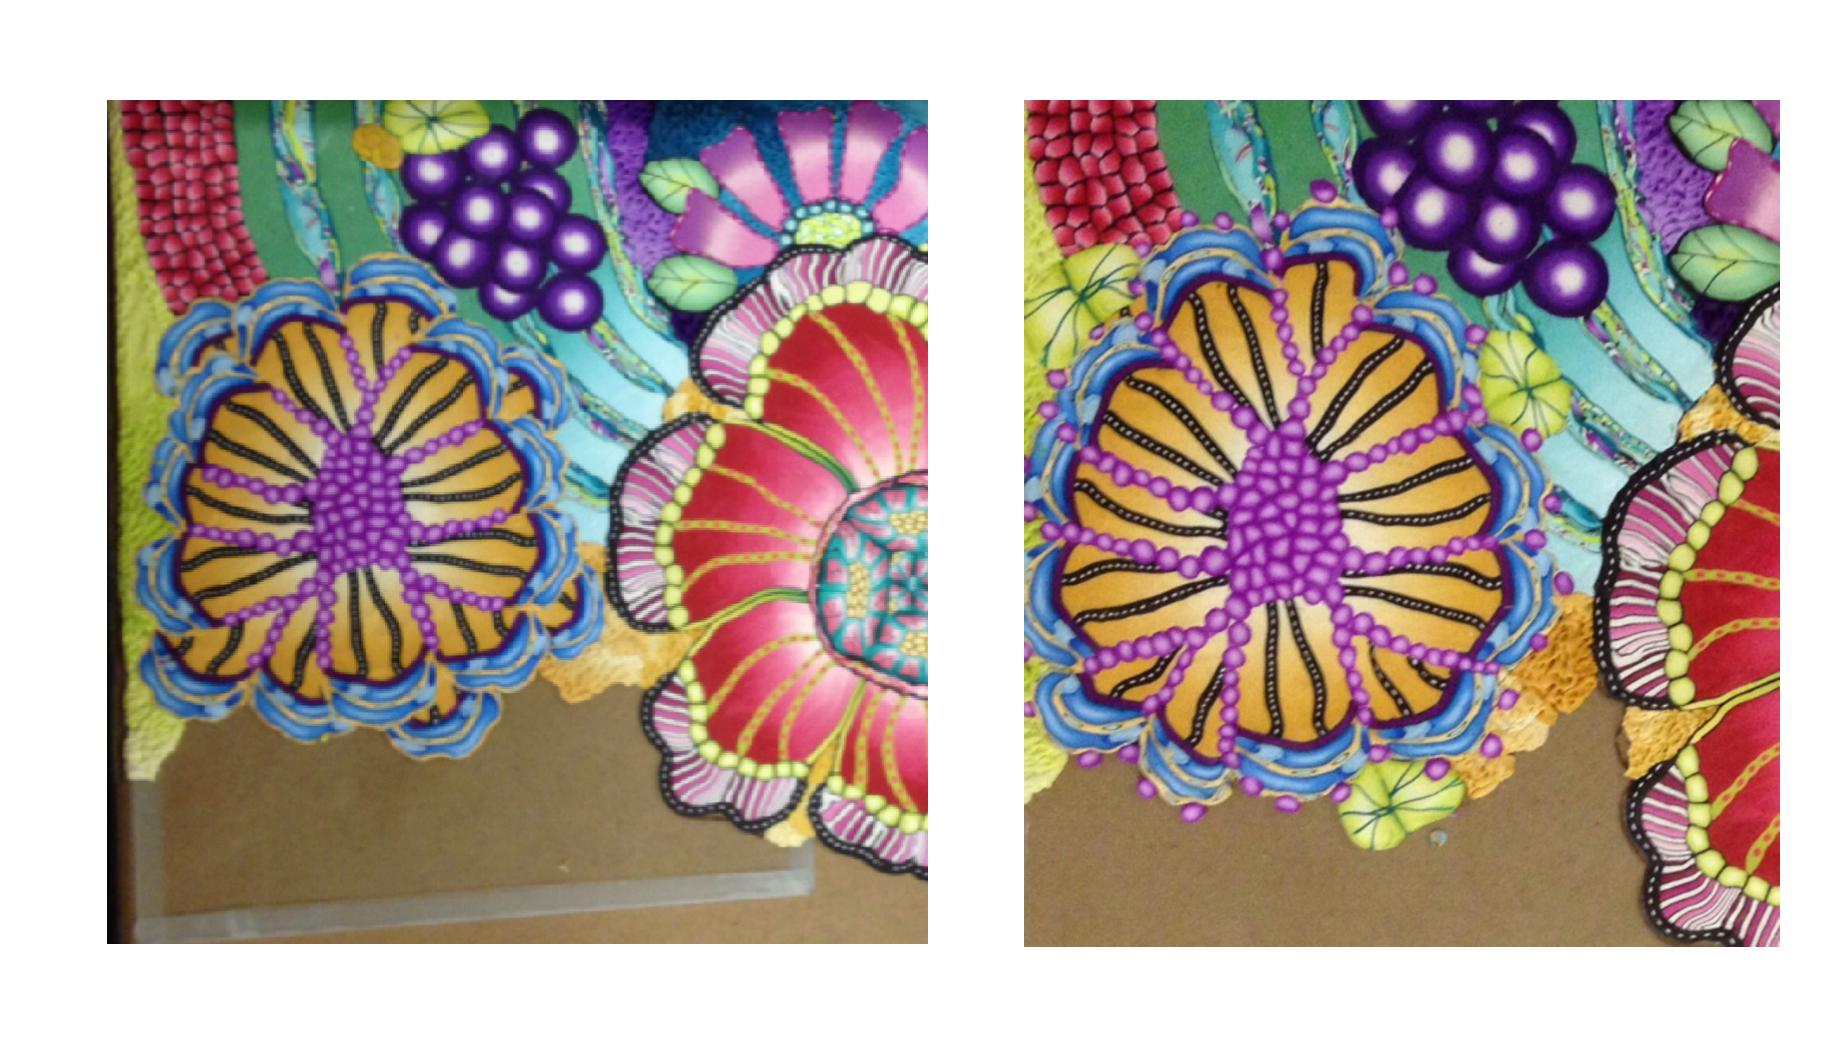
If you double click on the picture you’ll be able to see it closer.
I was influenced by my fellow retreater in many ways. I hope to explore and expand my wall pieces and continue to add texture and interest.
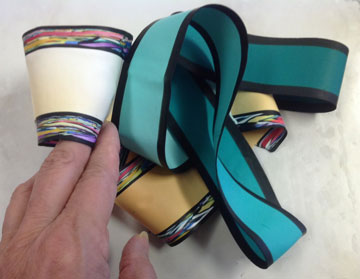
Well this was productive. I have two tall cylindrical glass vases that I wrapped the thin strips of polymer clay around and around. I layered paper between each revolution.
These strips are 29″ long, that’s as long as I could make the strips because I was using sheets of Skinner blends. I’m going to see if I can make even longer ones with solid colors.
Of course I had to add some Stroppel Cane to one of the strips. hehehe
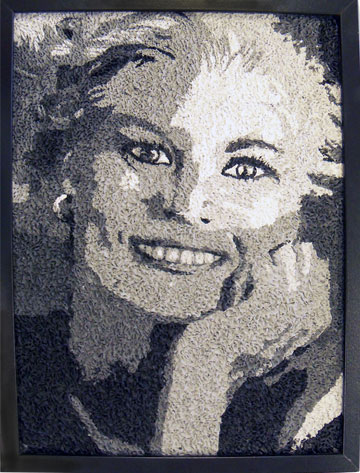
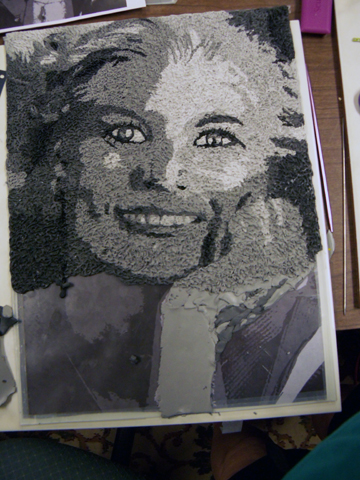
So here I am with the finished portrait. I’ve learned a couple of important thing about this process and I’ll share them with you. I had a great time doing this and I’ve managed to make an anniversary present for my husband. He actually liked it very much, reminds him of all the years we’ve been together, 44 years is a bunch.
I somehow lost track of my shades of gray and didn’t follow through with the right shade on the top right. By the time I got to the bottom and the arm I realized my mistake and didn’t have enough of the lighter shade mixed so… I just continued with the darker shade. It’s okay, I’m still happy with the over all outcome but lesson #1…mix enough clay. It was just hard for me because I had trouble mixing that much gray from perfectly good black and white new clay. I actually have enough scrap gray thank you very much! If it would have been any color, I could always used the left overs for something else.
I believe I might do it again just to see how different it will look if I actually follow the picture. Whaaat? follow the pattern, pheeew.. but this time it’s going to be a color.
Part of Lesson #2 I already knew, there will be places that you have to fill in. The lesson came in when I realized I was in a big hurry to finish it last night and didn’t take enough time to cover well at all. I had to spend that time this morning filling in anyway. So Lesson #2 is take your time. HA!
Part of the problem was it was hard to see, the paper picture on the back of the glass didn’t let light through and it was night time. ( cant’ think of any more excuses for this one)
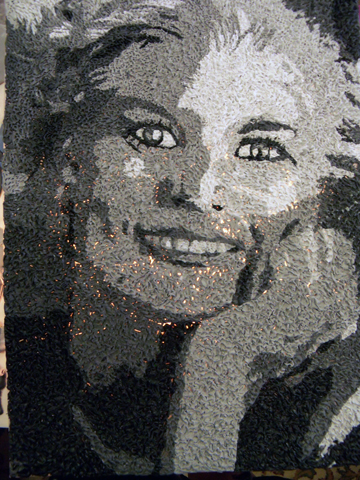
I have this little light box that came in handy for finding the holes to fill in. I just placed the piece on top and filled away.
Here it is a little more than half way finished. First I lay out my clay following the picture and then stipple it with a knitting needle, my fingers are not very happy with me.
I think you might really enjoy giving this a try. It was pretty easy to do and not as time consuming as other techniques. You could do it with a drawing as well, or a photo of a landscape, it doesn’t have to be a portrait. And it doesn’t have to be a large wall piece.
I have way too many ideas, i just can’t get to them all fast enough. I laid out a wall piece for my older son Brad who is a Master Scuba instructor. It’s lots of my funky fish and I can’t wait to get started on it.
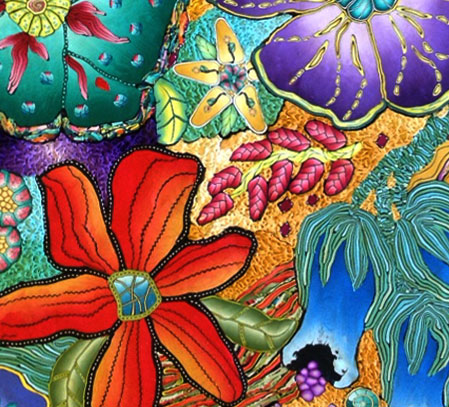
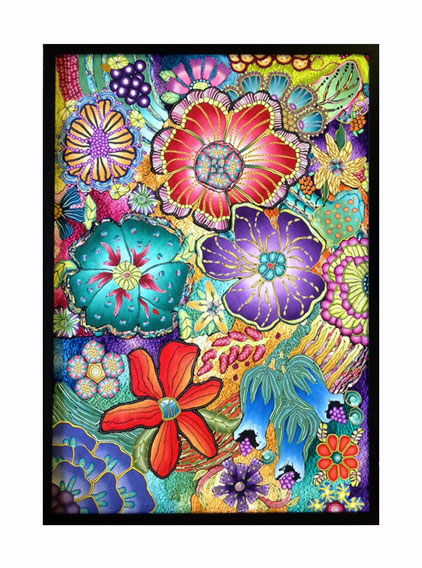
But before that I really wanted to try something new. After I posted my first large wall piece, Wall Flowers, almost everyone that saw it in person commented on the texture in-between the flowers. When more than one person mentions something, I usually pay attention. I called it stippling for lack of a better word and stipple actually describes pretty well.
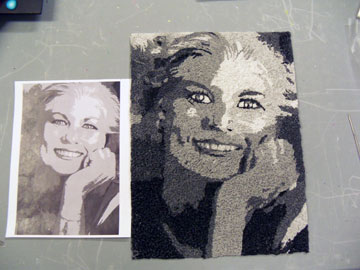
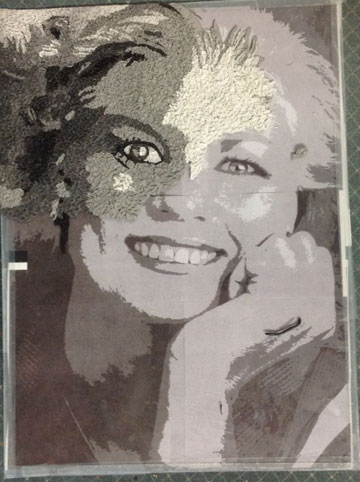
I wanted to use the artistic cutout filter in Photoshop to change a photo to a graphic picture so I could stipple it in either shades of gray or monochromatic. I decided on shades of gray. So here’s the beginning and I thought I’d share it with you.
This one isn’t as large as the first one, I need to get to Tampa to buy new frames, it’s only 12″ x 16″. But this will work out just fine in case it isn’t a keeper.
To get the photo large enough, I imported into Illustrator, enlarged it and then tiled it to print. I taped it together and then taped it to the back of the glass from the frame I’m going to use.
I’m hoping that when the picture gets completely covered that it will looks like a person….check back, I’ll post more as I get it finished. I promise…even if it isn’t what I expect. Trust me, I’m having way too much fun to care and besides, polymer clay is not precious, there’s more where this came from.
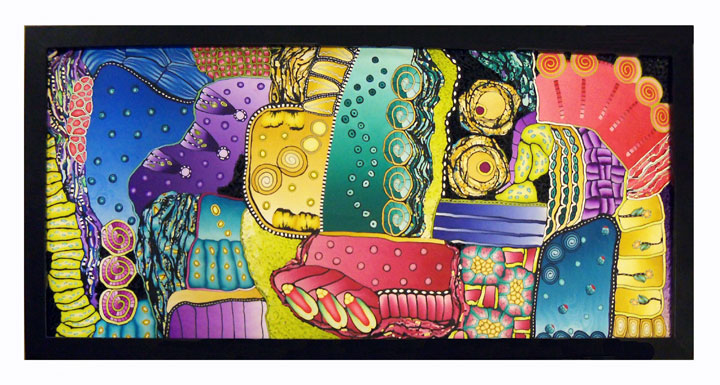
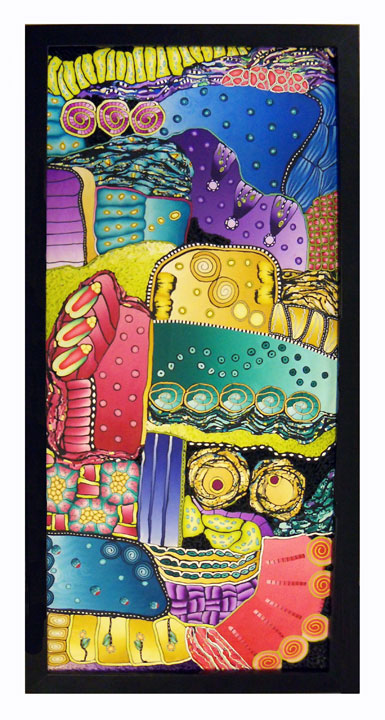
This is the second large wall art piece made of polymer clay. It’s 9″ x 20″. About half the size of the first picture, Wall Flowers. It’s totally random pops of color that has already been speaking differently to each person. I began working on it with this view as the way it should be hung.
Explorations – Alice Stroppel
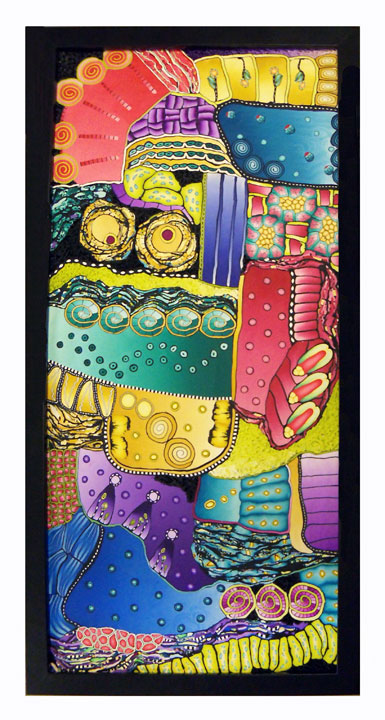
But when I posted it on Facebook yesterday, people started telling me they thought it should be hung a different way.
Explorations – Alice Stroppel
Nikolina Otrzan , Orson’s World, said she saw it hanging like below, and I quote, “because those “eyes” look to me like Pink panther in distress. Nik, you’re so funny.
Yvette Macy wants to sing, “We all live in a yellow submarine.”
Explorations – Alice Stroppel
Maybe I should take a vote. voice your opinion, leave a comment. I think it will be interesting to see what ya’ll think and what you see. I’ll tell you what I think in a couple of days.
In the end, my son Jason will decide because this one is going to him.
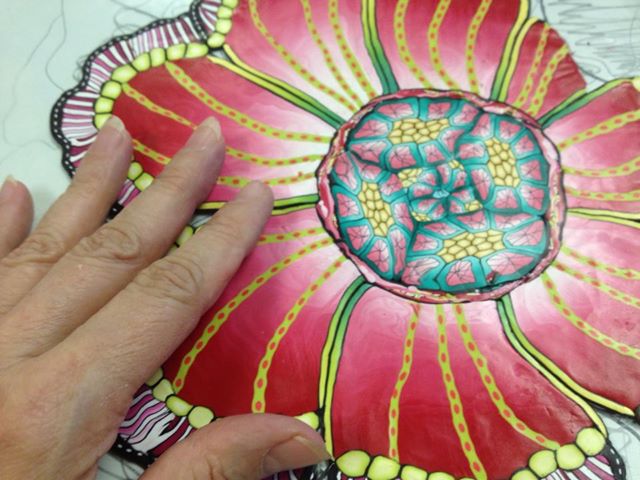
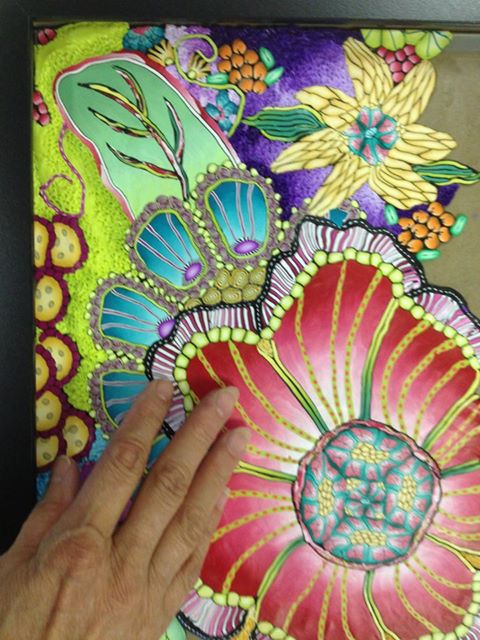
This is my newest adventure, I pushed myself to create something large and more complicated than in the past. I used my Cane Mapping technique with an added twist.
It’s a large piece, 19″ x 27″, framed it’s 20 1/2″ x 28 1/2″. I bake my polymer clay in a regular kitchen oven, but even so I had to construct it in pieces like a giant jigsaw puzzle.
After baking a pieces, I constructed the next piece on a piece of glass and by fitting it to the last piece. I placed a roughly drawn pattern behind the glass, but as you can see by this picture, I didn’t follow it exactly.
I continued this way until all were pieces were baked and then glued them to a back board. Actually this board came with a frame I bought. Here’s a look at each step as it was completed.
After completing and taking a picture of this step, I realized how disjointed some of the yellow flower petals looked. So before I baked it, I made some corrections.
Not completely satisfied, but knowing this was as good as it was going to get, I baked it and moved to the next section. Once again I used my and for size reference.
And once again the finished piece. I certainly learned a lot and look forward to making many more.
Way over a year ago, Suzanne Ivester and I met for the first time at Fandango, the Orlando Area Polymer Clay Guild’s yearly retreat. I had an idea for an online polymer clay magazine and Suzanne has excellent writing and editing skills. A plan was created and we began gathering artists for our first issue titled Polymer Portfolio – Wall Art.
We received such a fabulous response from a large group of wonderfully talented artist, sharing photos and informative answers to our questionnaire. It was a great deal of fun and we were looking forward to a series of themed additions of Polymer Portfolio. We saw it as an informative reference publication rather than a project oriented magazine.
After a year and a half , much thought and a lot of soul searching, Suzanne and I decided that the time and commitment involved were more than either of us wanted to continue to contribute. But most of all, I decided that the technology was moving way too fast for me and that the material that we’ve gathered would be better off in the hands of a specialist.
So we asked The Polymer Arts Publishing Director and Editor-in-Chief Sage Bray if she would be interested in publishing the material that we’ve gathered. I mean come on…look at what she’s accomplished with her dream magazine. Both Suzanne and I were determined to share the wealth of information and highlight the artists that shared it with us and are so pleased that Sage agreed and we can rest easy that everything is in good hands.
We begin with the first article Stories in Wall Art. Each of artists that Suzanne and I chose have stories to share with their polymer clay wall art and are a perfect fit for this themed issue of TPA, Stories & Symbolism. I can’t wait for you to see the lovely art and the wonderful article that Suzanne penned.
Thank you Sage, and thank you to the artists featured in this issue, Maureen Carlson, Gera Scott Chandler, Edgar Hernandez, Layl McDill, (cover art) and Marisol Ross for their time and for sharing their talent with us. By the way, I’m thrilled that Layl’s fabulous “Think How Books are Like Birdhouses” made the cover.
A special thank you to my partner in this adventure, Suzanne Ivester.
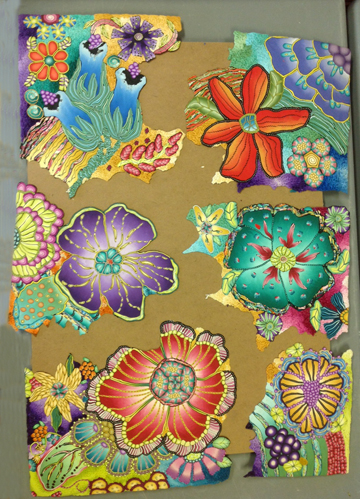
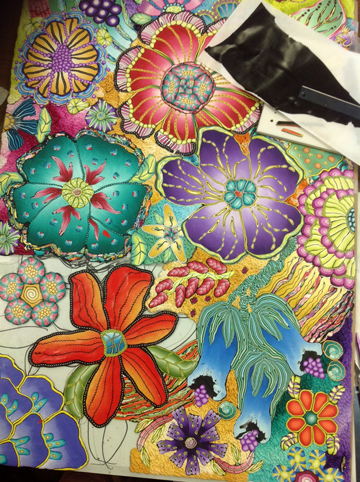
After reading what everyone else was doing with the Stroppel cane, using up old canes and not just scraps on their work tables, I decided that I needed to dig around in my really old canes and see what I had. Tons! I have Tons of old canes, most of them made from Sculpey III that I won’t ever use for anything else and some of them really pretty bad. So experimenting was it.
I also have a desire to do wall art with polymer clay, I made this cane that has layers as wide as 1/4″ to 1/2″. I sliced it and added what I call my dot, dot, dot cane and am now ready to attach them to the canvas shown below. I just can’t decide what to do with the background, the canvas or which way to place the pieces. I’ve already baked them.
I like the contrast of the black against the white so I might just paint the canvas white. I think I have to look at it for awhile. Maybe they would look better like this……
Just me having fun again. Thank to all of you for your ideas for the Stroppel Cane.


Comments