Polymer Clay Canes for Beginners 27 videos, step by step, beginner cane workshop

What people are saying about this tutorial.
jennifer rose
Just finished this first workshop on how to make canes, and I must say I learned so much. This is exactly what I have been looking for, someone who could explain cane making in a step by step that process that I could replicate. I watched the videos, went into my studio and began to create all of the canes Alice showed. I finally have results I can be proud of, and I say thank you so much for doing this workshop. My only question now is when do we get more workshops. If you are only going to take one online class let it be this workshop. Thank you Alice for your hard work, and your dedication to helping others learn the joys of polymer clay.
Online Workshops with Alice Stroppel
[caption id="attachment_102" align="aligncenter" width="100" caption="Member IPCA"]  [/caption]
|
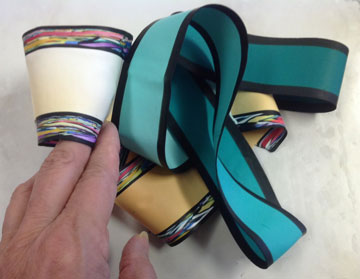
Well this was productive. I have two tall cylindrical glass vases that I wrapped the thin strips of polymer clay around and around. I layered paper between each revolution.
These strips are 29″ long, that’s as long as I could make the strips because I was using sheets of Skinner blends. I’m going to see if I can make even longer ones with solid colors.
Of course I had to add some Stroppel Cane to one of the strips. hehehe
More to come…..

Here’s another idea I’ve had in the back of my mind. I just ordered the new Lark 500 Paper Objects and was inspired by Lydia Hirte‘s incredible work. She creates some fabulous Jewelry sculptures with paper.
I wanted see if I could do something similar in polymer clay. I really want to do a large scale piece for the wall using these thin pieces, but first I was experimenting to see how thin I could get the clay and what I could make it do. I used Premo and it really is amazing to work with. It bends and doesn’t crack at all.
This piece is incredibly light and it’s been so much fun to play with. It’s very bright I know and I’m not really a pink girl, but this certainly says, “Here I Am!” It would stand out on black for sure.
I’ve just spent a ton of money on quite a few frames and have way too many ideas. I’m already working on a giant 27 x 39 piece that I’m very excited about and will tell you more later. Let’s see which project wins out.
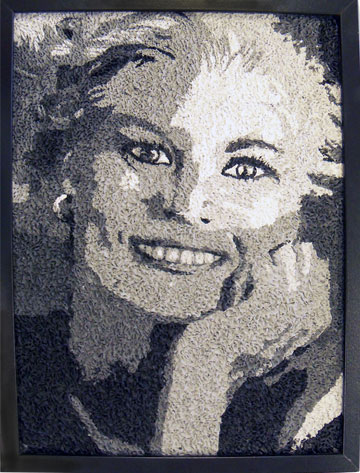
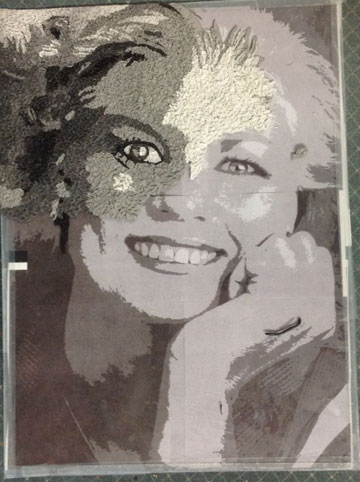
So here I am with the finished portrait. I’ve learned a couple of important thing about this process and I’ll share them with you. I had a great time doing this and I’ve managed to make an anniversary present for my husband. He actually liked it very much, reminds him of all the years we’ve been together, 44 years is a bunch.
I somehow lost track of my shades of gray and didn’t follow through with the right shade on the top right. By the time I got to the bottom and the arm I realized my mistake and didn’t have enough of the lighter shade mixed so… I just continued with the darker shade. It’s okay, I’m still happy with the over all outcome but lesson #1…mix enough clay. It was just hard for me because I had trouble mixing that much gray from perfectly good black and white new clay. I actually have enough scrap gray thank you very much! If it would have been any color, I could always used the left overs for something else.
I believe I might do it again just to see how different it will look if I actually follow the picture. Whaaat? follow the pattern, pheeew.. but this time it’s going to be a color.
Part of Lesson #2 I already knew, there will be places that you have to fill in. The lesson came in when I realized I was in a big hurry to finish it last night and didn’t take enough time to cover well at all. I had to spend that time this morning filling in anyway. So Lesson #2 is take your time. HA!
Part of the problem was it was hard to see, the paper picture on the back of the glass didn’t let light through and it was night time. ( cant’ think of any more excuses for this one)
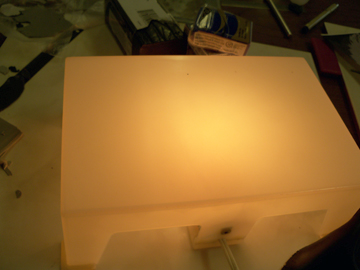
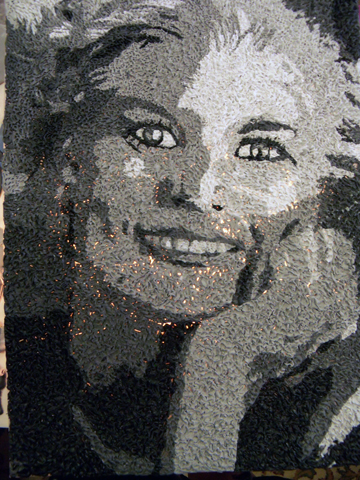
I have this little light box that came in handy for finding the holes to fill in. I just placed the piece on top and filled away.
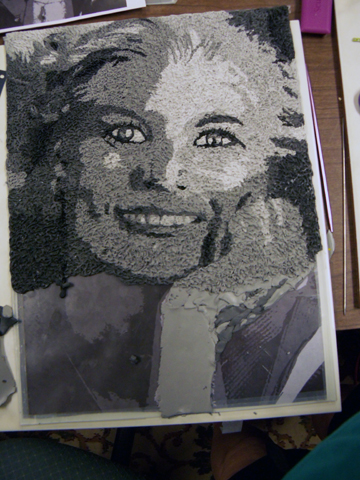
Here it is a little more than half way finished. First I lay out my clay following the picture and then stipple it with a knitting needle, my fingers are not very happy with me.
I think you might really enjoy giving this a try. It was pretty easy to do and not as time consuming as other techniques. You could do it with a drawing as well, or a photo of a landscape, it doesn’t have to be a portrait. And it doesn’t have to be a large wall piece.
I have way too many ideas, i just can’t get to them all fast enough. I laid out a wall piece for my older son Brad who is a Master Scuba instructor. It’s lots of my funky fish and I can’t wait to get started on it.
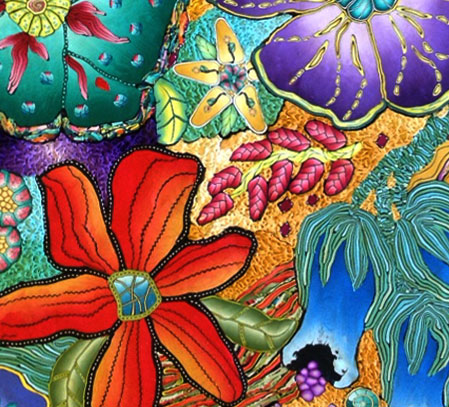
But before that I really wanted to try something new. After I posted my first large wall piece, Wall Flowers, almost everyone that saw it in person commented on the texture in-between the flowers. When more than one person mentions something, I usually pay attention. I called it stippling for lack of a better word and stipple actually describes pretty well.
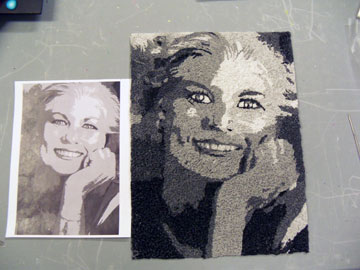
I wanted to use the artistic cutout filter in Photoshop to change a photo to a graphic picture so I could stipple it in either shades of gray or monochromatic. I decided on shades of gray. So here’s the beginning and I thought I’d share it with you.
This one isn’t as large as the first one, I need to get to Tampa to buy new frames, it’s only 12″ x 16″. But this will work out just fine in case it isn’t a keeper.
To get the photo large enough, I imported into Illustrator, enlarged it and then tiled it to print. I taped it together and then taped it to the back of the glass from the frame I’m going to use.
I’m hoping that when the picture gets completely covered that it will looks like a person….check back, I’ll post more as I get it finished. I promise…even if it isn’t what I expect. Trust me, I’m having way too much fun to care and besides, polymer clay is not precious, there’s more where this came from.
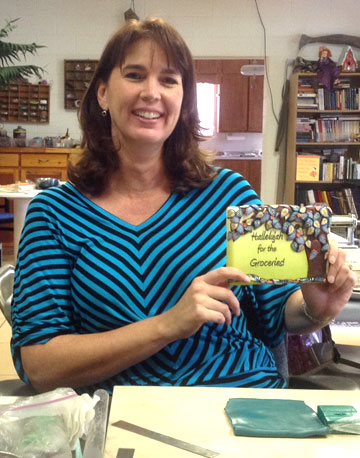
My friend Christine Kaczmarek spent a couple of days in my studio playing with clay. She brought along a project she was working on for her father with a favorite family saying and a pretty fabulous tree. There even is a bit of a Stroppel Cane across the bottom…go figure.
She also tried out the recipe for Premo Sea Green and we both think it’s pretty close. It’s one of the discontinued colors that I really miss. I have two block of it left, so I hope the recipe will work.
Christine has been experimenting with stamps and oil paints with some pretty cool results. I love this one and the saying just makes me laugh. She a true dog and cat lover and sell great doggie and kitty pendants in her Etsy shop.
We had a great time clayin’ and laughing. Thanks for coming to see me Christine, see you again soon.
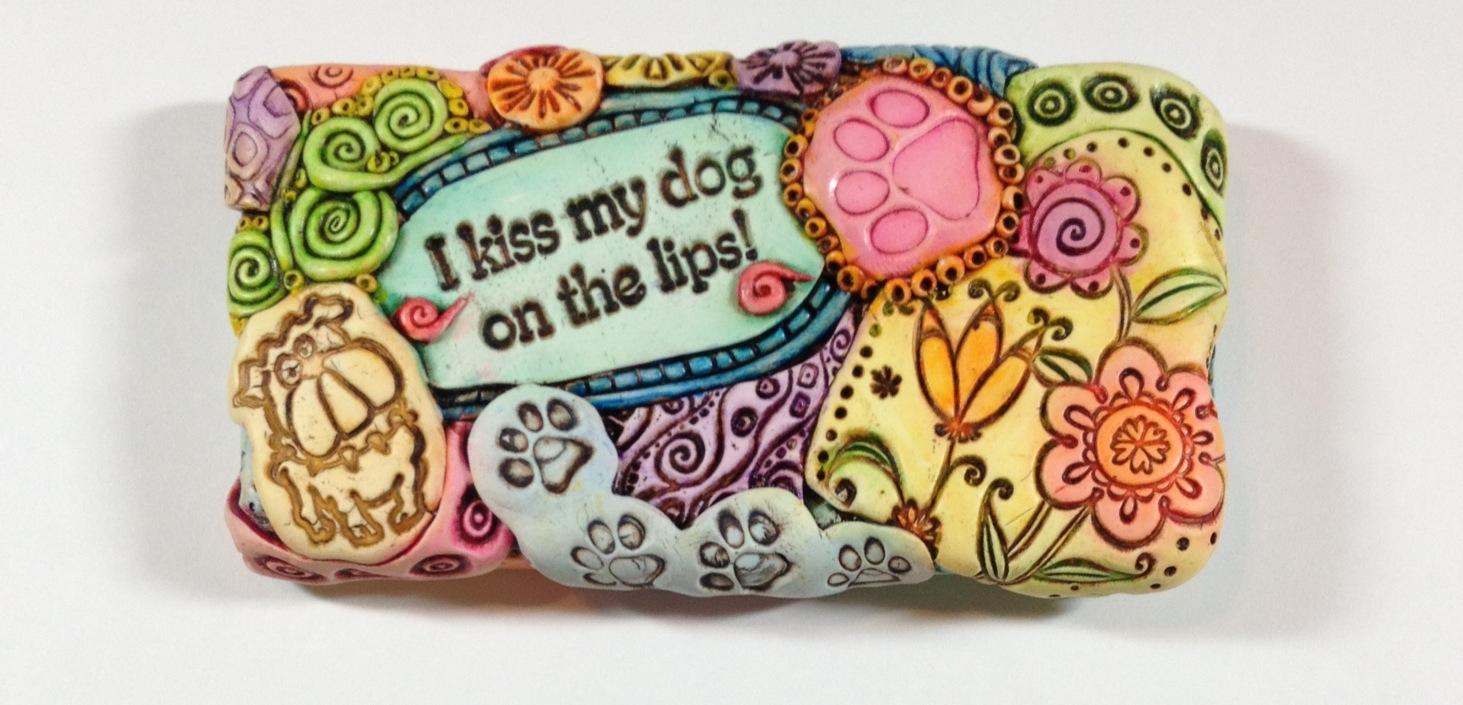
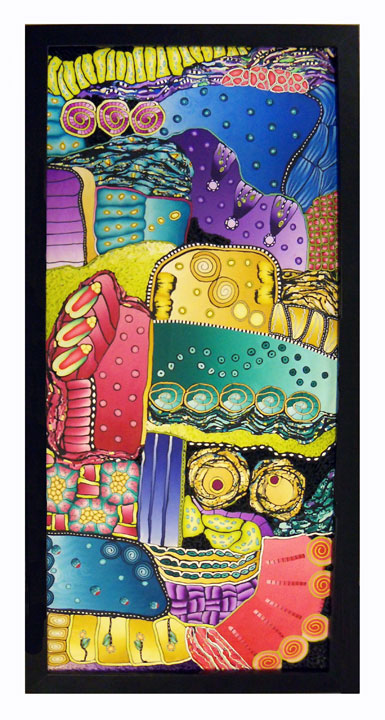
 Explorations – Alice Stroppel This is the second large wall art piece made of polymer clay. It’s 9″ x 20″. About half the size of the first picture, Wall Flowers. It’s totally random pops of color that has already been speaking differently to each person. I began working on it with this view as the way it should be hung.
 Explorations – Alice Stroppel But when I posted it on Facebook yesterday, people started telling me they thought it should be hung a different way.
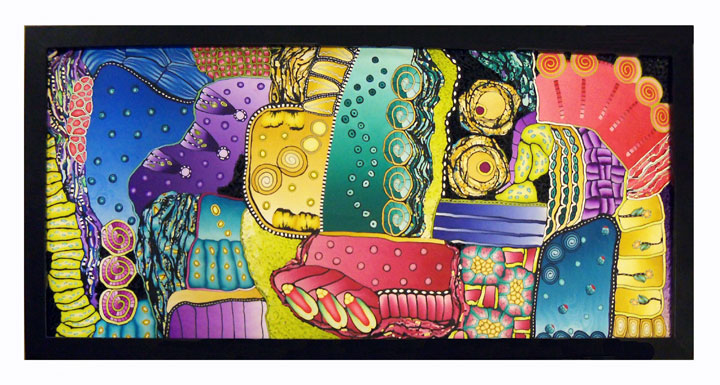
 Explorations – Alice Stroppel Nikolina Otrzan , Orson’s World, said she saw it hanging like below, and I quote, “because those “eyes” look to me like Pink panther in distress. Nik, you’re so funny.
Yvette Macy wants to sing, “We all live in a yellow submarine.”
 Explorations – Alice Stroppel Maybe I should take a vote. voice your opinion, leave a comment. I think it will be interesting to see what ya’ll think and what you see. I’ll tell you what I think in a couple of days.
In the end, my son Jason will decide because this one is going to him.
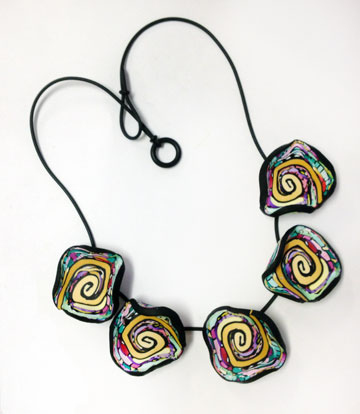
I was cleaning up my work space after covering the hand in the last post and made this Stroppel Cane Jelly roll Cane.
From my pattern business years ago I still have hundreds of brass button covers that for some reason I still have. Okay I admit, it’s because I’m a keeper of “things I might be able to use in my art projects” kind of person. I also have lots of rubber cording. I decide to combine the two making these “beads” removable and interchangeable.
Of course your cording has to be thin enough and flexible enough for the clasp to close.
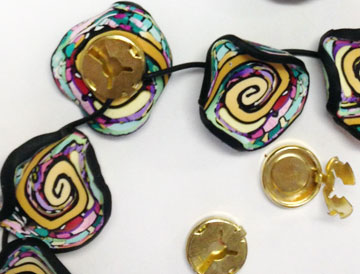
The second thing I have a few of are brass button on a shank. I pushed one through each slice of my cane and baked them
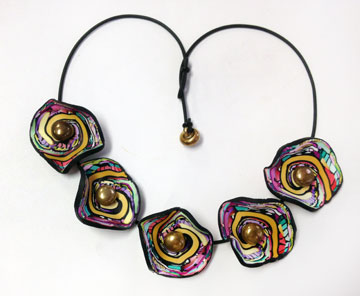
All I had to do is run the cord through the button shank and tada. The cord was just tight enough to keep everything in place and keep them from sliding. Both of these necklaces lay well and look very interesting.

There’s a discussion on FaceBook about Buna Cord or Rubber cording. Several people say that years later the cord gets brittle and falls apart. I’ve heard this before, but I haven’t had it happen to me.
You might want to consider a different cording material if you are going to make anything like this and offer it for sale. These are just for me.
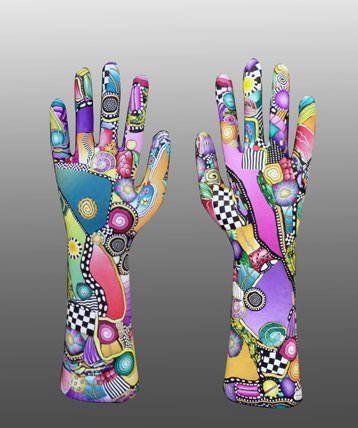
I bought two hand molds at a flea market several months ago with the intention of coming right home and covering them with clay. It certainly wasn’t right away but believe it or not, I’m proud I actually got one of them covered before the year was out. Usually projects like this sit around staring at me forever.
This is one hand, I’m just showing you both sides at the same time. I still have some work to do on it before I begin on the second one. I have a bit of ……*choke, cough, choke* ………sanding to do and buffing it up. You see how much I wanted these, I do not like to sand or buff. but it will be worth it.
These are colorful, funky and a perfect sampler of many of my canes. I’ll be happy to have it to remind me of them all.
These hand are molds for rubber gloves. The flea market vendor had about 20 of them and I wanted to buy them all. I know, I know, I’m having trouble finishing two so what would I do with 20? Anyway, I’m glad I bought the two. You can find plenty of these glove molds online should you be so inclined to cover one.
Even if you didn’t cover them, they would make great display pieces just like they are. Hang your necklaces or bracelets from the fingers.
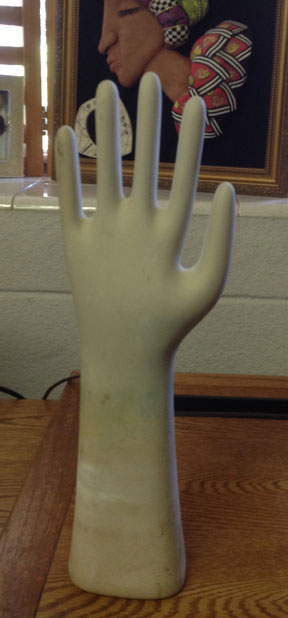
now…..what should I do with the second one. Black and white? more color? hmmmmmm.
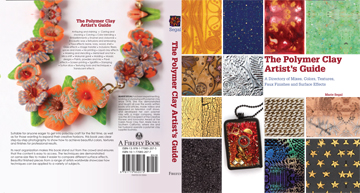
Isn’t this beautiful cover? Marie Segal’s new book the Polymer Clay Artist’s Guide will be released in August You can preorder it from Amazon today.
I’m delighted to say that one of my pen and ink pieces is included, thank you Marie. I can’t wait to see what yummy techniques you’re going to share with us.
Just so you know what to look for if you aren’t on the side of the world, this book is also being release in the UK at the same time and this is the cover for that printing.
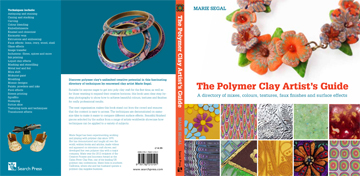
You can follow Marie’s adventures on her blog, Art from my Heart. Or you can be friends with her on Facebook.
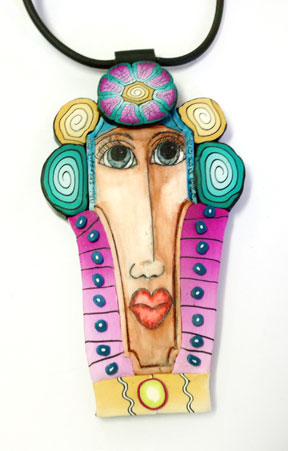
Just a quick picture of a new pen and ink pendant. I’m getting ready to go spend some time with the Orlando Area Polymer Clay Guild. A little bit of ink and a little bit of clay……The main shape is a stamp by Barbara McGuire
These are talented people and I look forward to sharing some of their work next week. Have a get weekend and a fun 4th of July.
|
|


Comments